Showing posts with label Tea Time Doily. Show all posts

Friday, February 10, 2023

Thank You Flowers

 Hello Friends

IT'S NEW RELEASE TIME!  The collection is called Flowers and More.   The unique thing about this release is that there are fewer pieces in each of the dies.  So they go together really quickly and easily! 

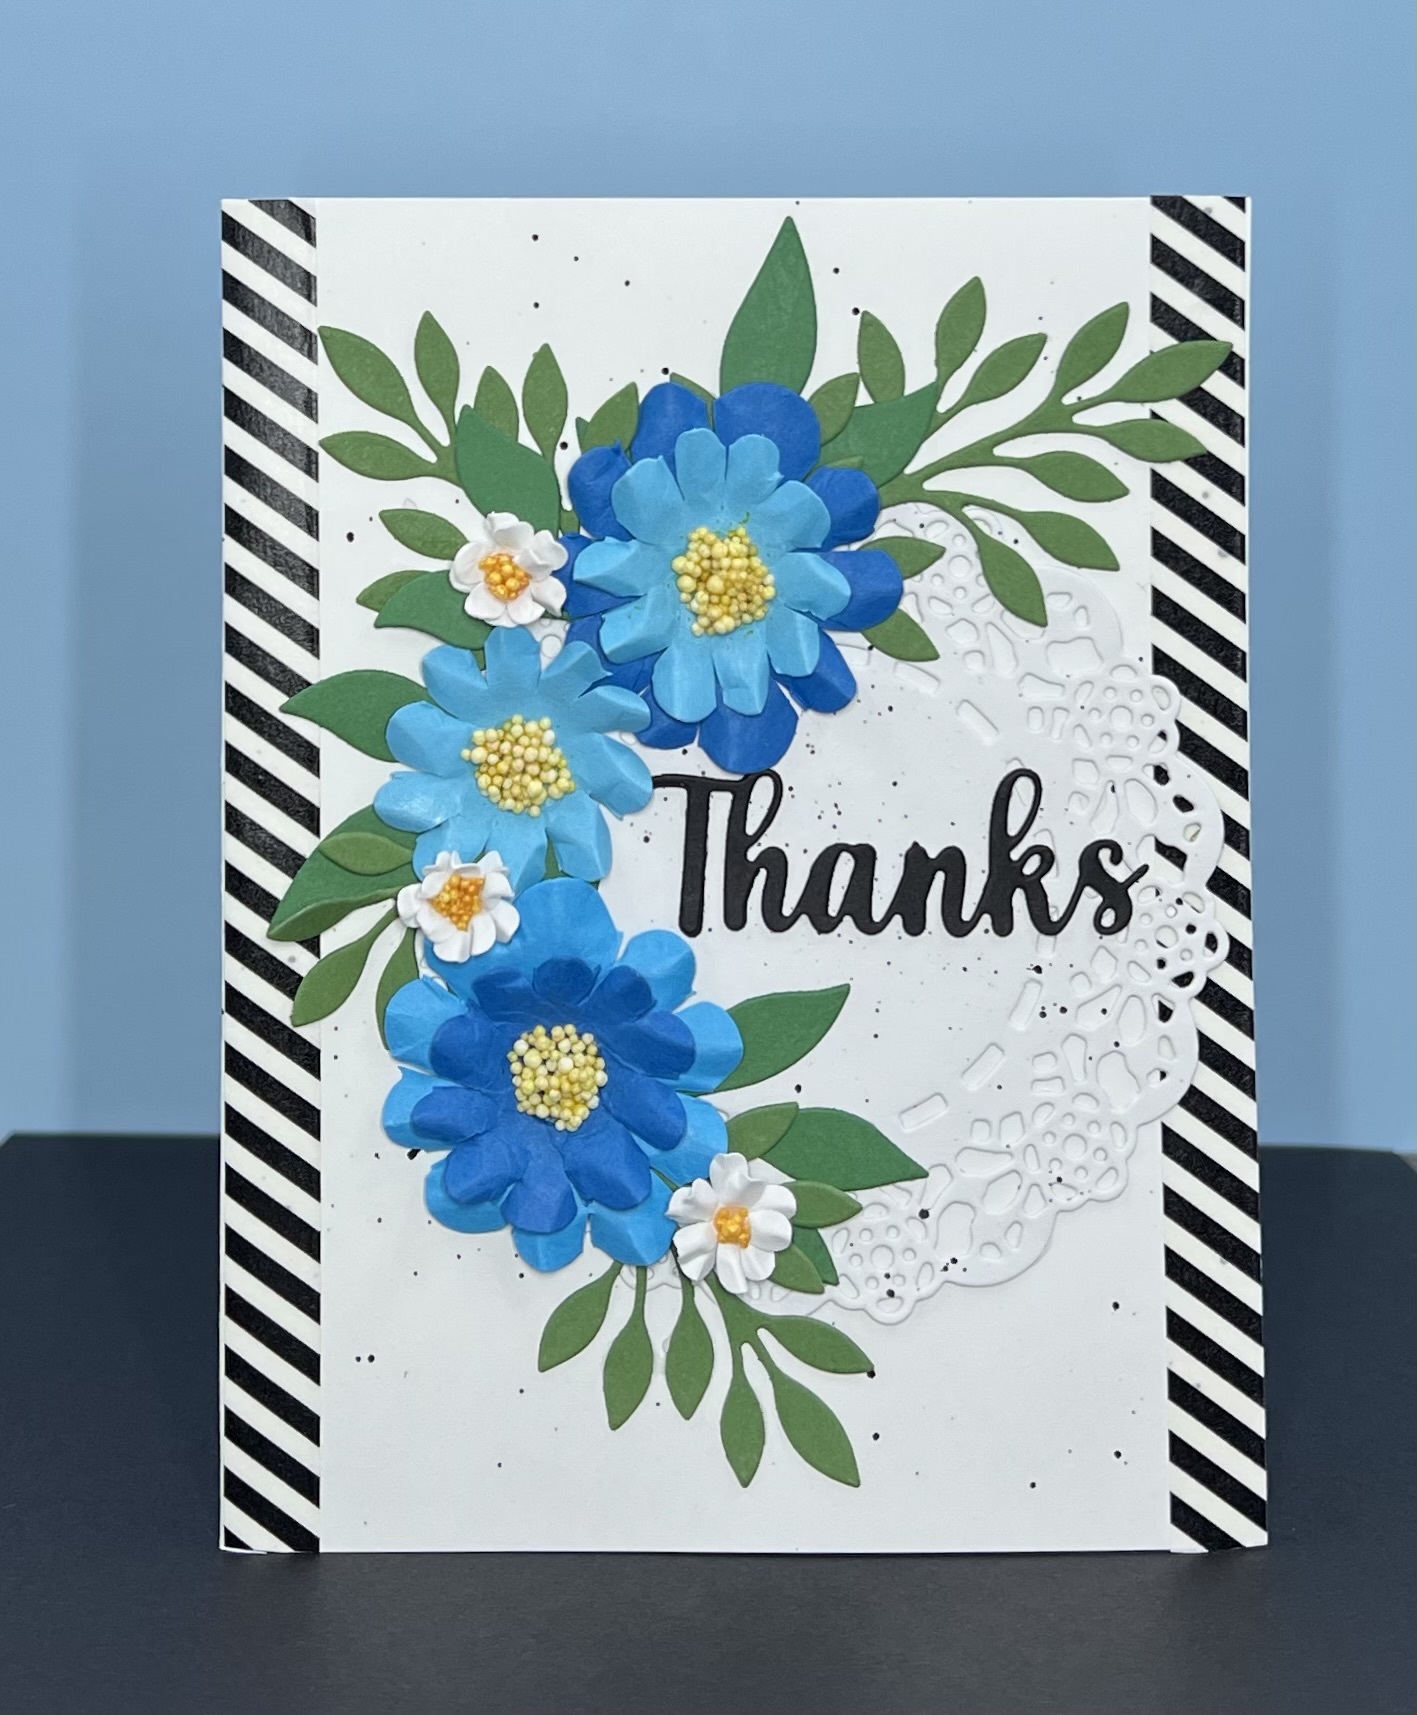
I noticed I was getting low on Thank you cards. So I decided the flowers in this release are so pretty they would make a beautiful thank you! I used Flower 5 and Leafy Branches 1, 2 and 3.  My inspiration for this card was one by Barbara Anders that I found on Pinterest.
Designer Steps:

1.  Using an A2 white card base splatter the card with black.  I used a watered down black acrylic paint
2.  Cut out a white doily with the Tea Time Doily then splatter it with the same black mixture as the card base


3.  Use a black striped washi tape to line each side of the card

4.   Using the following dies Leafy Branch 1, 2, and 3 cut out the leaves in 2 different shades of green card stock.  Using the Flower 5 cut out the large and small flower in 3 shades of blue card stock.  Using the Garden Wheelbarrow cut out 6 of the small white flowers
5.  I cut a slit in the blue flowers between the petals and then cupped then with a stylus.  After I cupped them I pinched the petals to give them a little shape.  I also did this with the white flowers only on the small white flowers I glued 2 together for a little more strength
6.  For the centers I used white Prills which I dyed yellow with some distress ink

7.  Cut two Thanks in black using the Thanks Expression die.  Glue the two Thanks toghether.  Glue the doily slightly to the right of center as shown above and then glue down the Thanks as shown

8.  Arrange the blue flowers and glue dot then down.  Tuck the leaves in and around the flowers.  Then add the small white flowers and your card is complete

CottageCutz Supplies


We have more inspiration on our YouTube Channel check it out HERE

Thanks so much for stopping by!  And I will see you next Thursday.

Blessings and Take Care


Tuesday, April 2, 2019

Tea for Two!

Good Morning Blogging Friends!

Today,  I am posting a card for a friend.  I am getting ready to move cross country and it is always hard to leave good friends.  So needless to say I will be making a number of these cards.  We are moving from South Carolina to Nevada!!  It is going to be a stressful couple of weeks I am sure!


Designer Steps:
 1.  Using the Spring Teapot & Cups die cut all of the pieces out of light pink
 2.  Use your favorite markers to color the flowers, trim and leaves.  Shade the pieces and then assemble
 3.  I used tiny rhinestones for the centers of the flowers on the cup and teapot
 4.  Use a white A2 card base and a piece of light pink card stock cut slightly smaller then the base. Then I cut two pieces of DP 3 x 4
5.  Glue the pink to the card base and then add the two pieces of DP.  Use the Tea Time Doily die and cut it out of white card stock then cut it in half
6.  Glue the white doily as shown and add a piece of satin ribbon between the two pieces of DP.  Pop the teapot and cups to the front and then add the sentiment


CottageCutz Products


This little Teapot set is so versatile I can think of a number of ways to use it. Plus it is so sweet and fun to make!  Please take some time for yourself and create! Glad you stopped by!
Blessings
Pam

Wednesday, September 19, 2018

Warm Wishes! - Scrapping Cottage

Hello Scrapping Cottage Friends

Before we get started I wanted to let you know we now have more new dies in the store.  Christmas Part 3 has arrive and some adorable Halloween dies as well.  Both of these sets are on sale for a limited time at 25% off.  So make sure you don't miss out on this great sale on new dies!!

I am using a die from the Christmas Part 2.  It can be used for a Christmas card, a thank you or even a winter birthday.

Design Steps:

 1.  Cut out the pieces in white card stock using the Coffee & Cocoa Warm Wishes die
2.  Use your favorite markers to color the pieces.  I used my copics
 3.  After you have colored the pieces assemble each cup.  Add glitter to the cups if you desire
 4.  Use an A2 white card base, cut a slightly smaller piece of red card stock and glue it to the base.  Cut a piece of snowflake DP slightly smaller then the red card stock.  Glue it to the red card stock
 5.  Using white card stock cut a doily using the Tea Time Doily die.  Glue it to the middle of the snowflake paper
6.  Pop up the three cups as shown on top of the doily
7.  Cut out warm wishes twice and glue them together.  Position them on the card as shown below and add glossy accents then glitter.  Your card is complete!

CottageCutz Products


As always thanks for stopping by!  We really appreciate your visit and take time to get crafty!
Blessings

Pam


Wednesday, November 29, 2017

Get Well - Scrapping Cottage

Good Morning Scrapping Cottage Friends!

A HUGE SALE IS GOING ON NOW!!! THIS SALE FEATURES OUR LATEST RELEASE DIES FOR THE ULTIMATE GET WELL CARD! HERE IS A PEEK of all the new release dies! Also make sure you check out our entire store there are many items on sale!! HERE IS THE LINK TO THE STORE!

Now on to today's card!

I am continuing to share our new release Get Well Dies.  They are just so perfect to cheer someone up who is not feeling well.  And we all know that this is the time of year for the nasty colds and flu.  As a matter of fact I think I will send this to myself because I have my first cold of the year!

Design Steps:

1.  Using the Bear Patient die cut the bear out of kraft card.  Then cut the soup can and tissue box out of white
 2.  Using TH Distress Oxides shade in the bear and add the rhinestones for his eyes
3.  Using Copic markers color in the soup can and the tissue box and assembly all of the pieces
 4. Using the Tea Time Doily die cut out a white doily.  Use the Expressions Get Well Phrase die cut get well out of red card stock

 5.  Us an A2 white card base cut a slightly smaller piece of red card stock and then a slightly smaller piece of DP and glue them all together
 6.  Glue the white doily to the top of the card
 7.  Pop dot the bear with the soup can and the tissue to the doily

8.  Glue the Get will to the bottom half of the card and your Get Well card is complete

Cottage Cutz Dies


I hope you will check out our massive sale and take a look at the new release Get Well Dies.  They are all so cute and perfect for a great Christmas Gift!
Blessings
Pam