Sunday, December 31, 2023

2023 Favorites

 Hi Friends 

Just thought I would share my favorite cards from 2023!


Thanks for taking a peek and have a ver happy and blessed New Year!

Pam

Monday, December 25, 2023

Valentine Time!

 Hello Friends 

I hope you all had a blessed time with family and friends this past Christmas. And I would like to wish you all a Happy New Year.  We are running an after Christmas Sale in the online store right now.  So use your Christmas money and save big! Click here to see what great values we have.

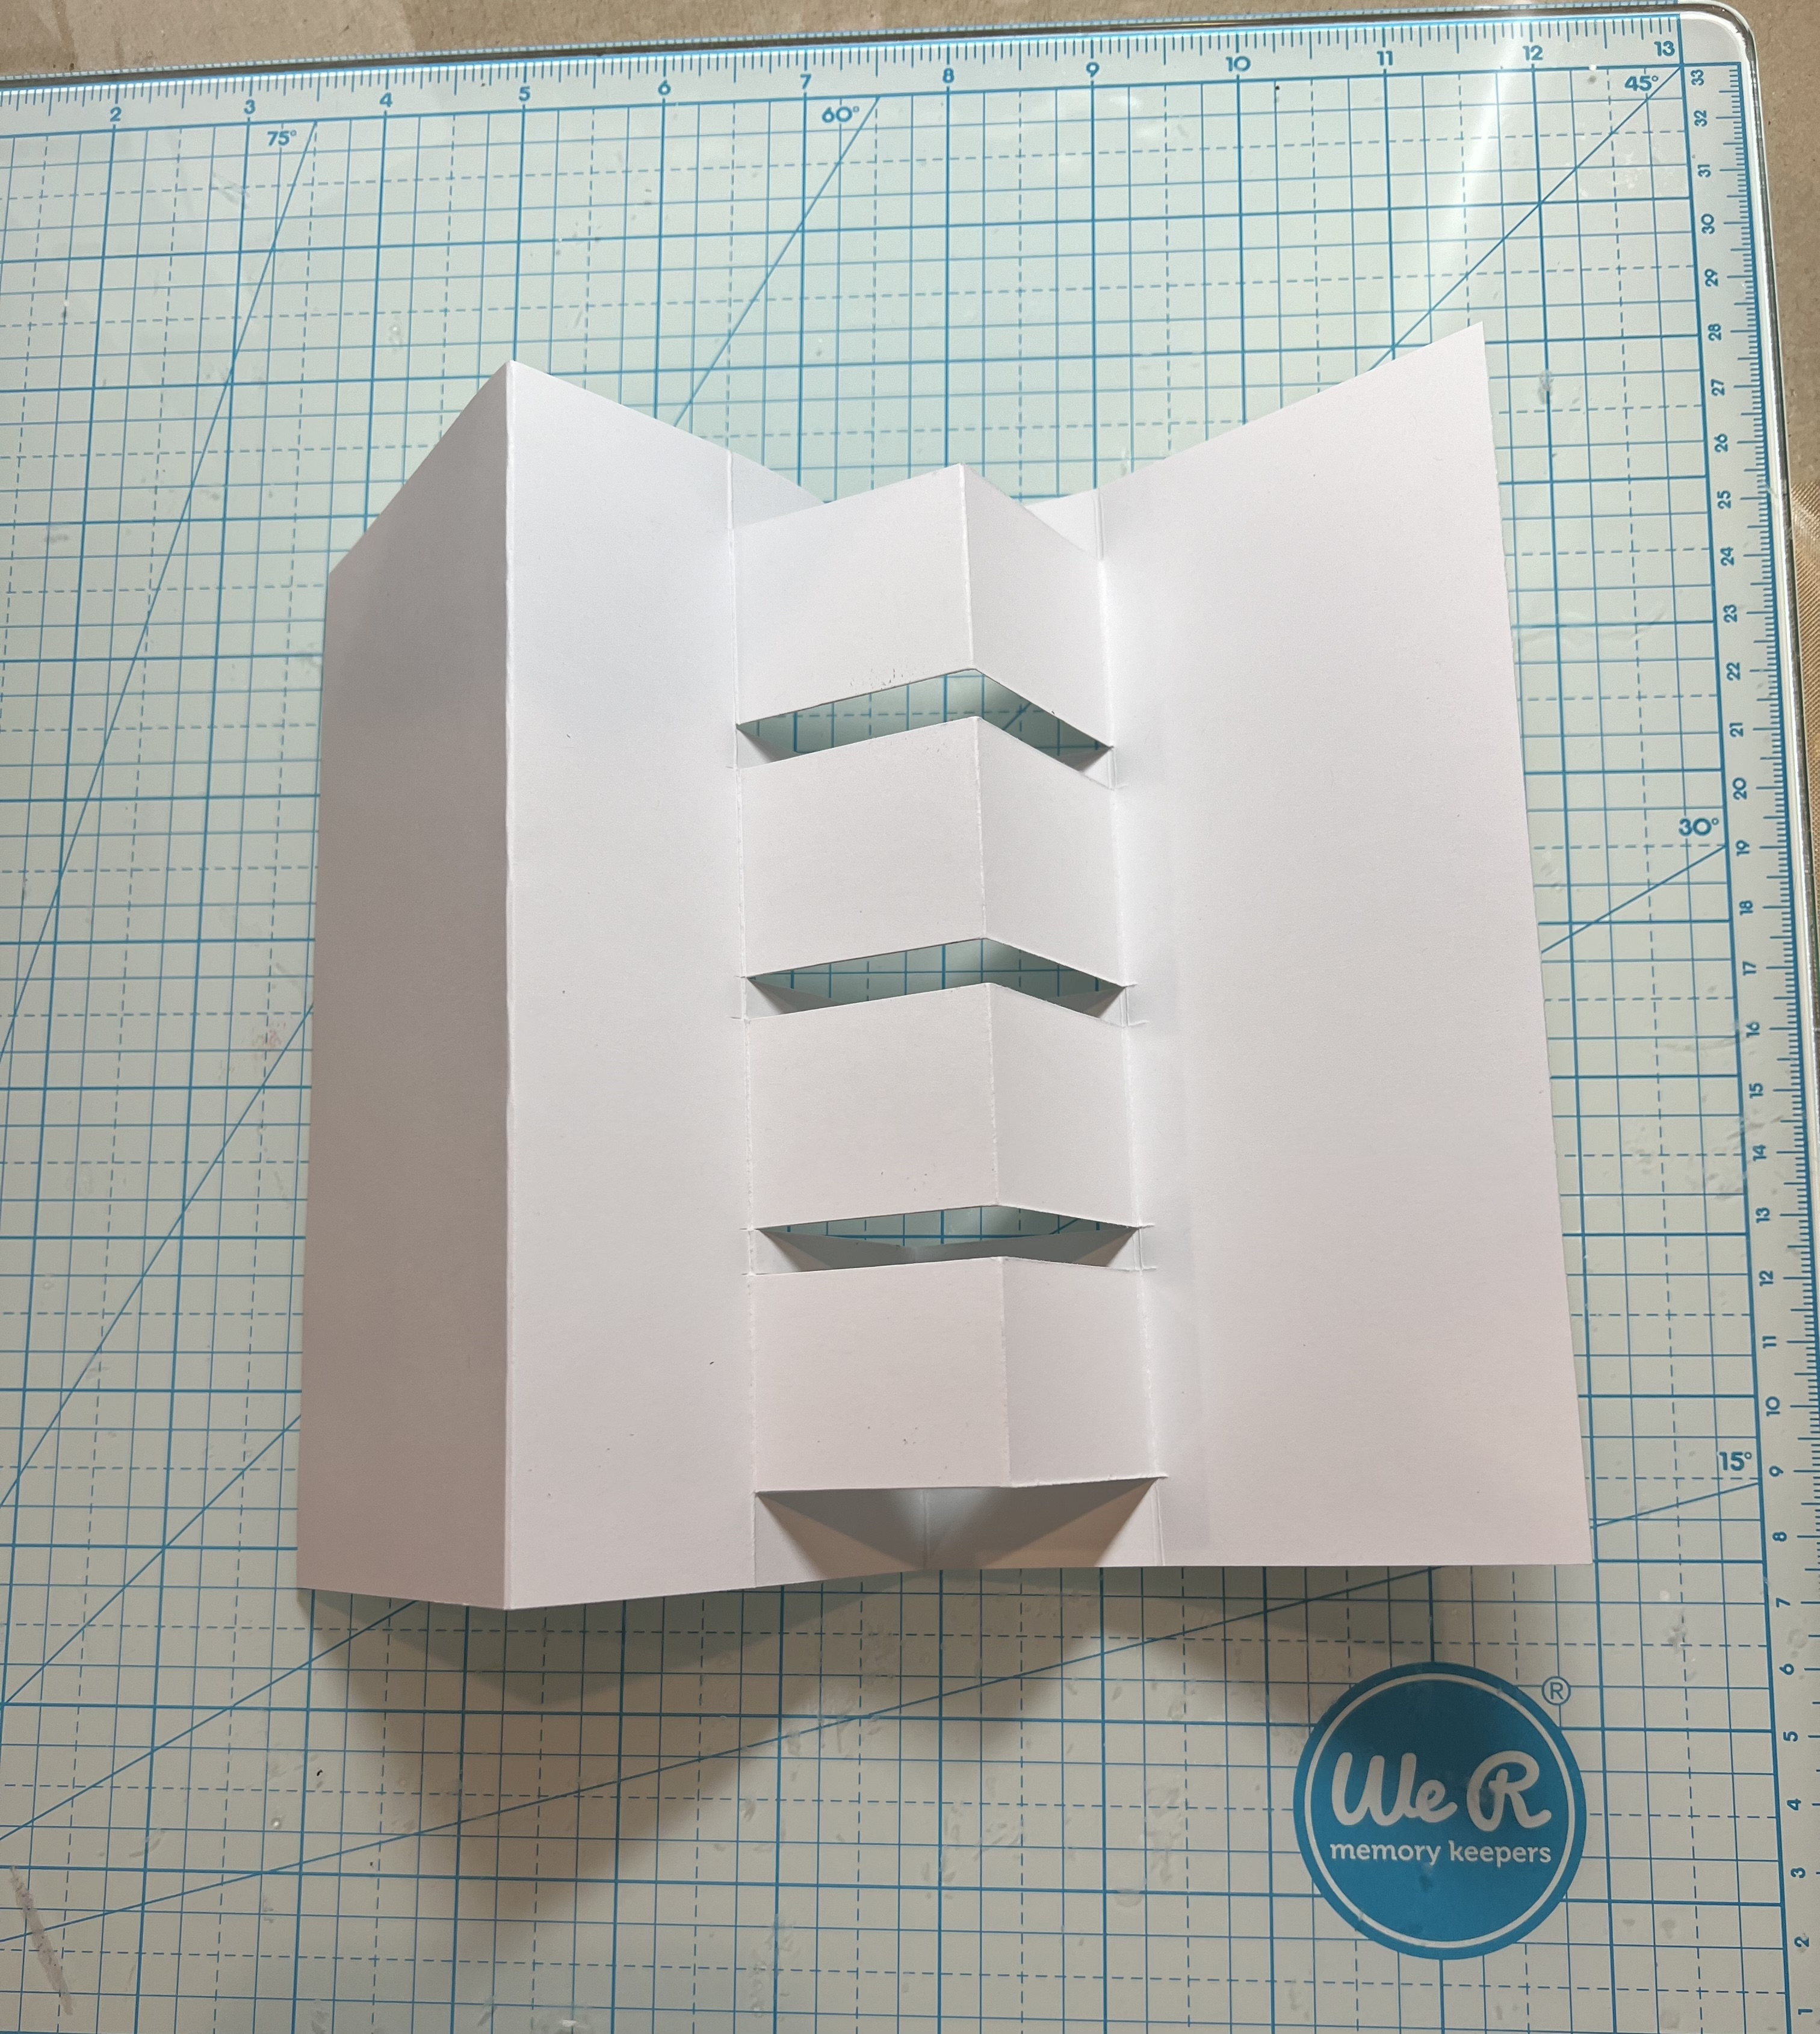
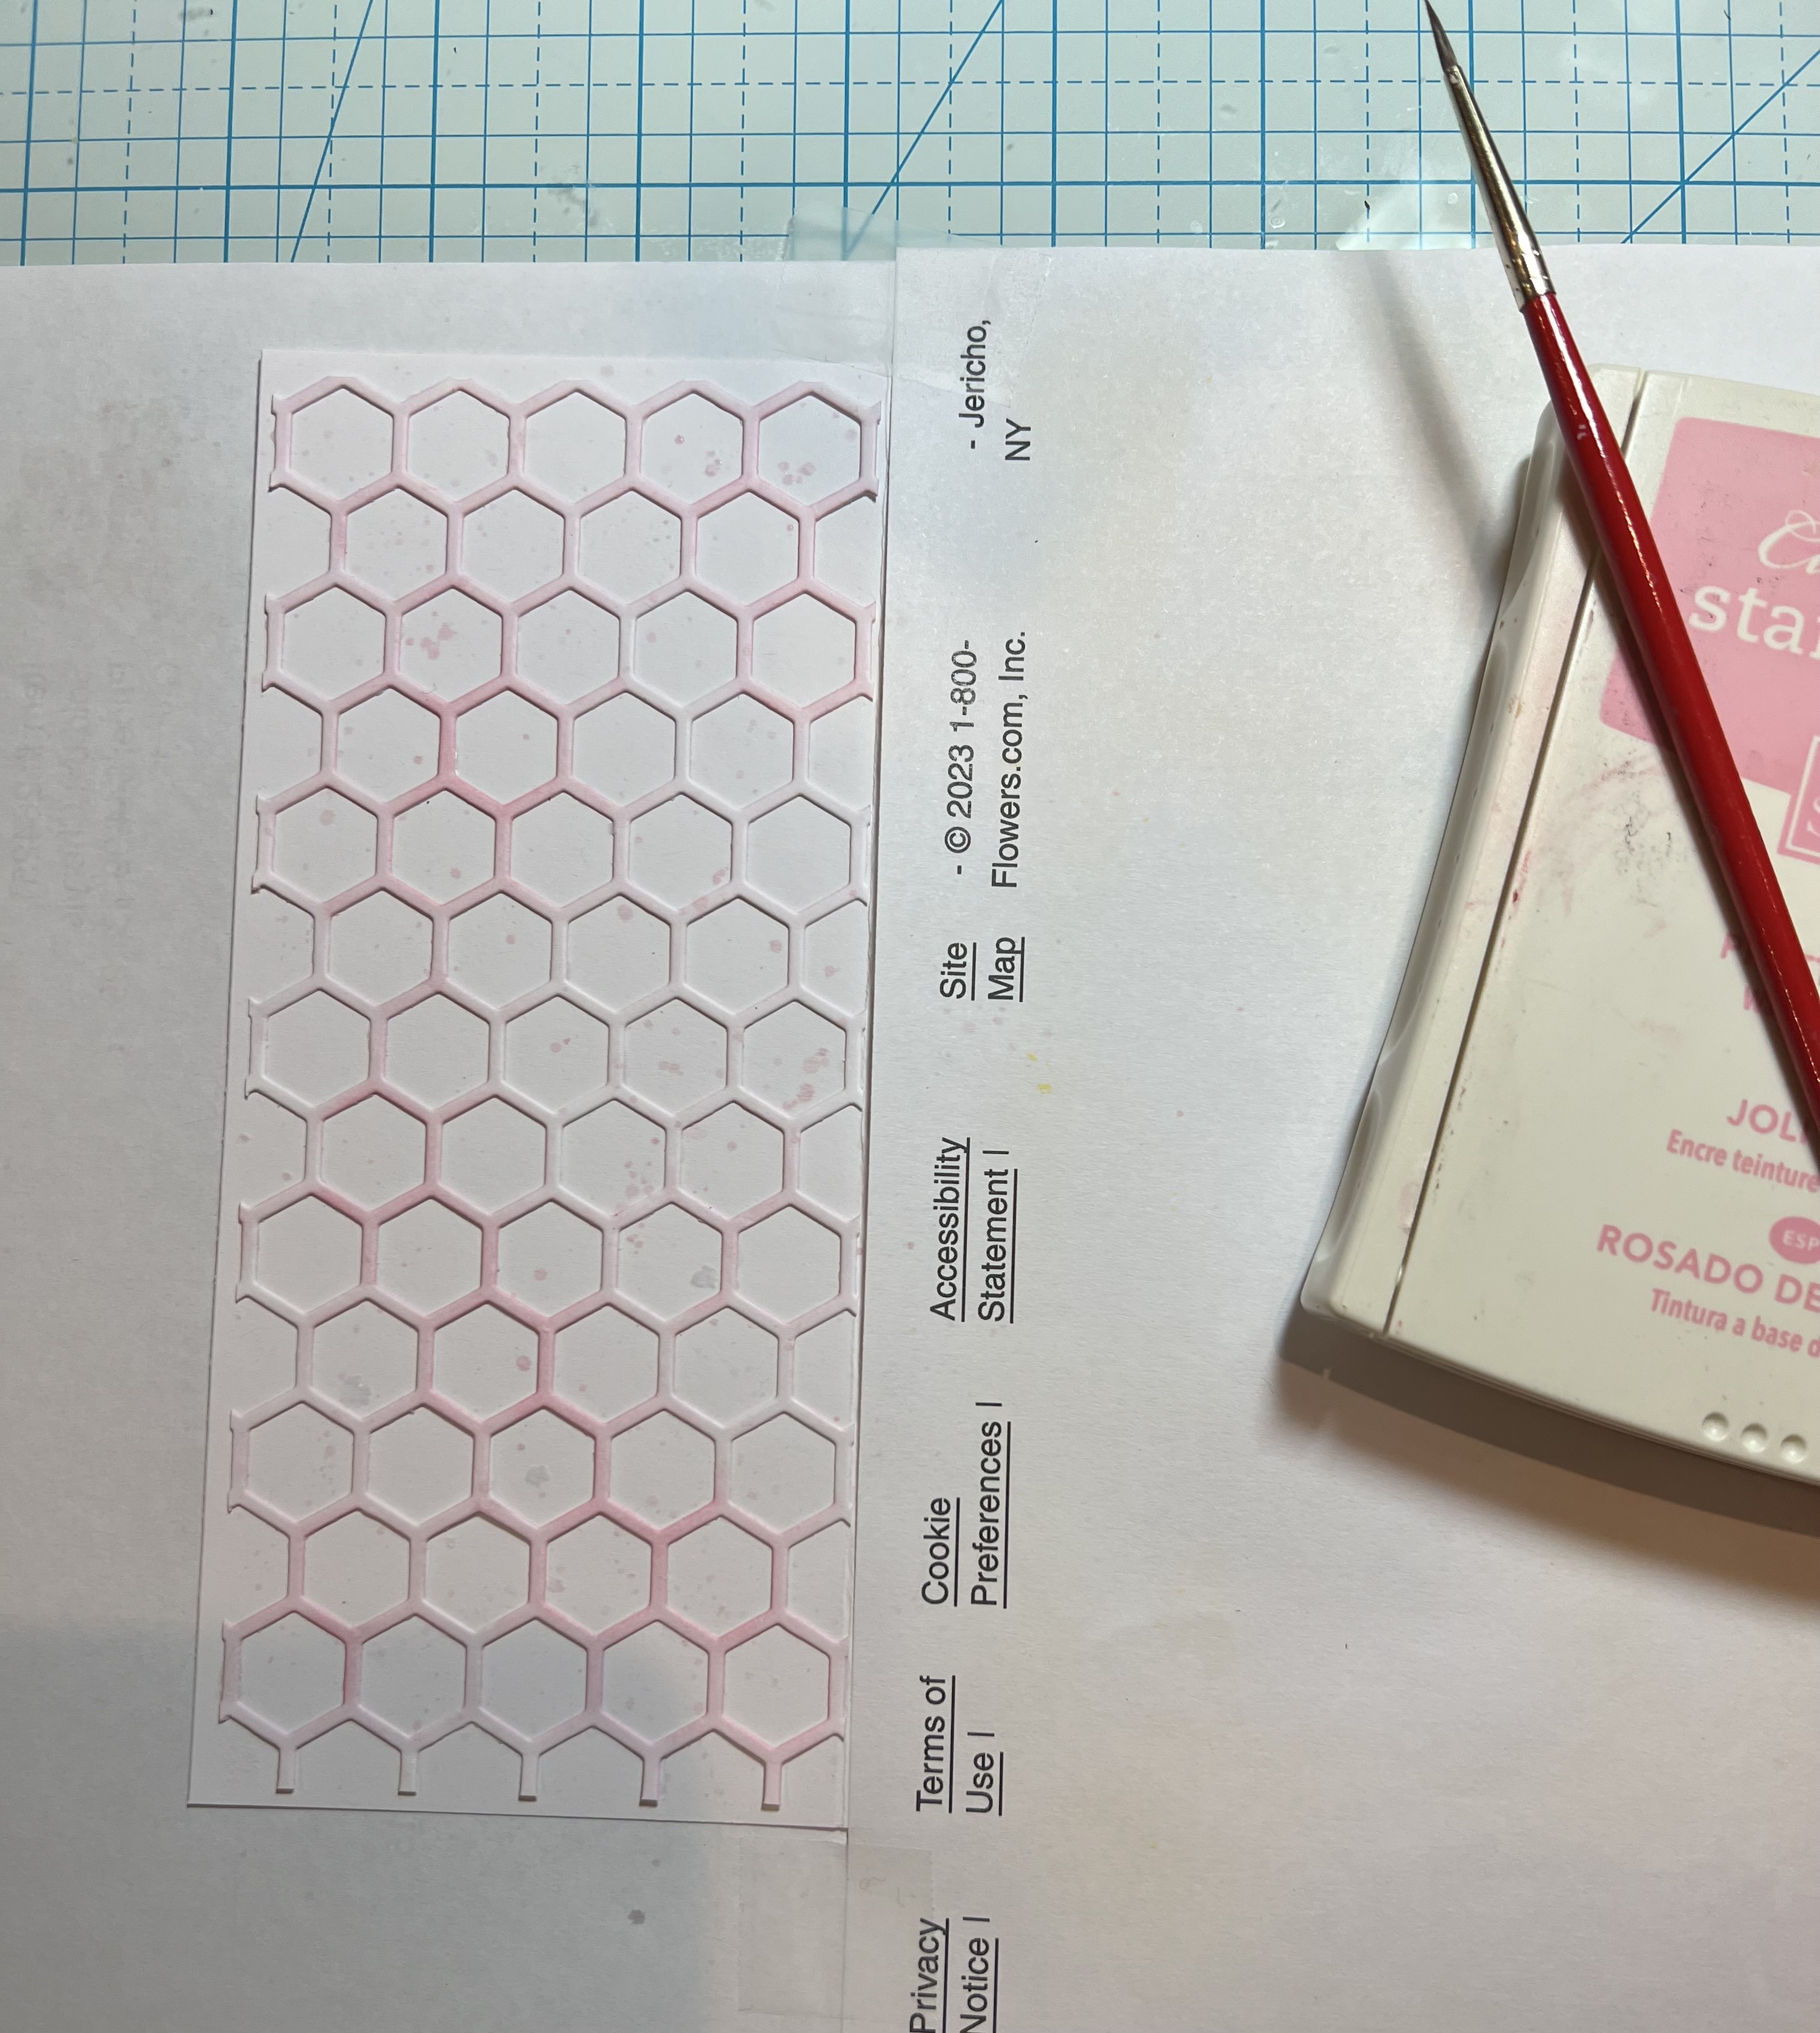
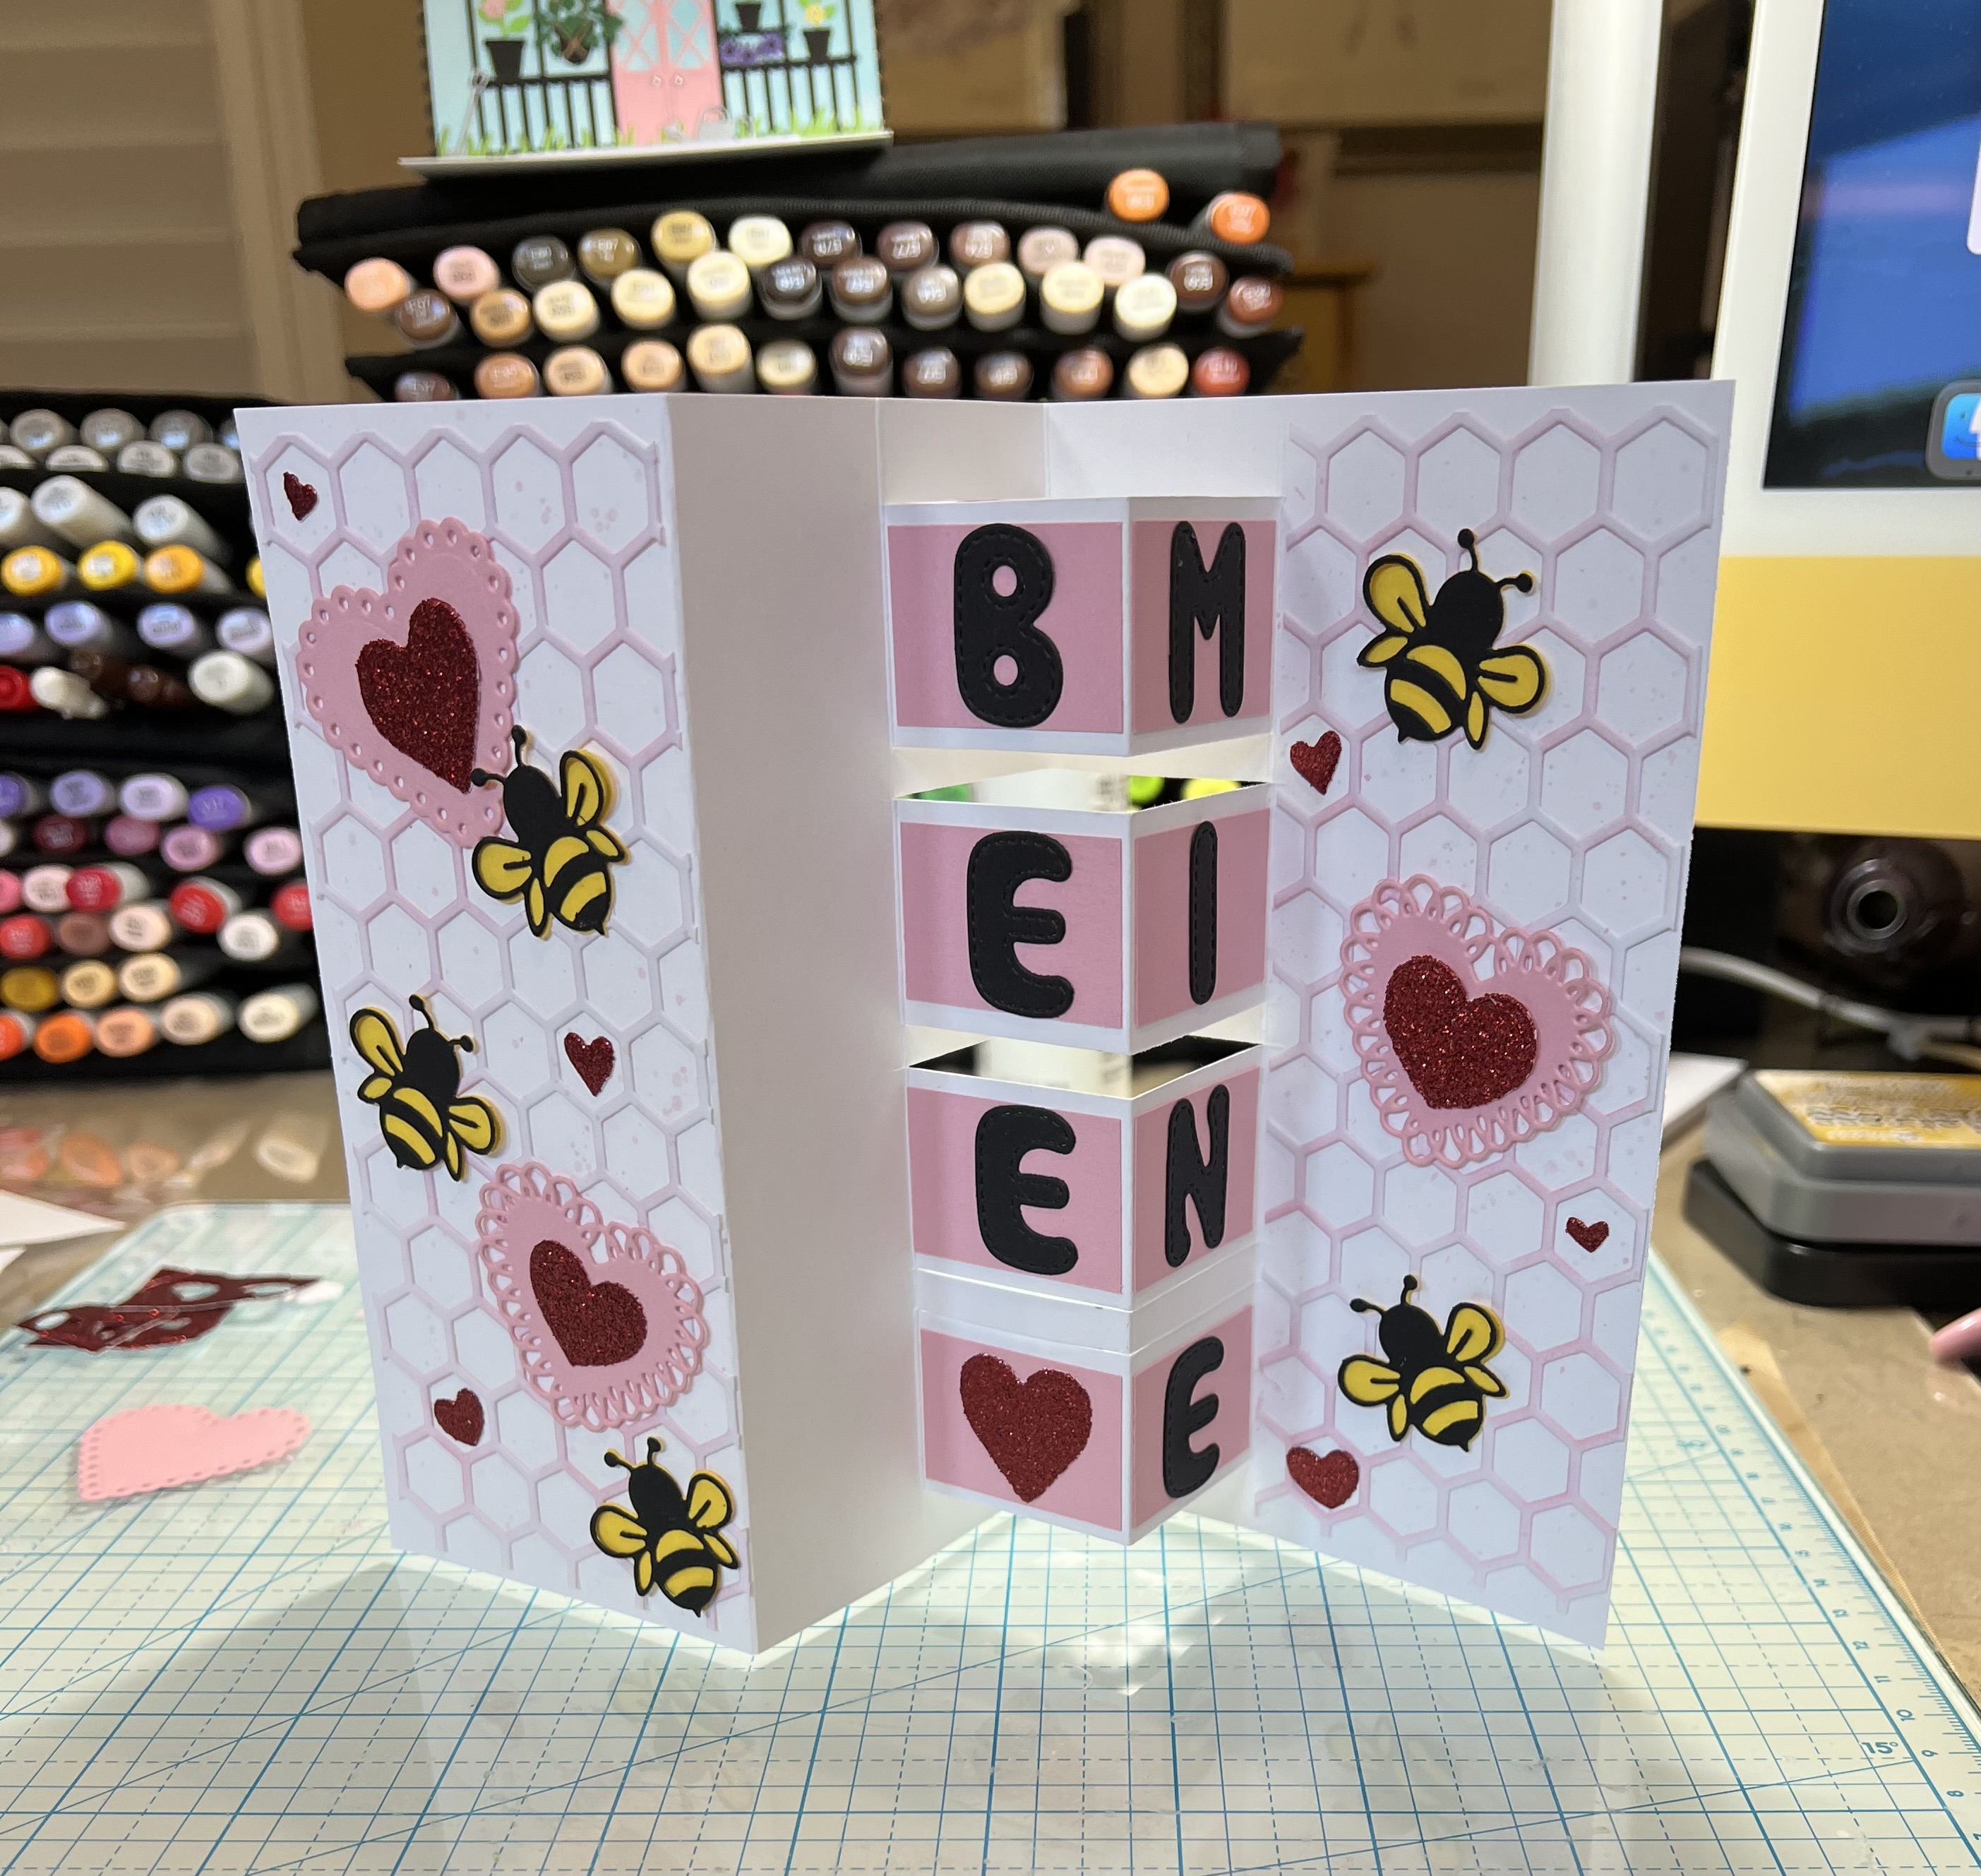
I am getting a jump start on my Valentines.  I am using the Garden Butterflies and Bee die from our Black Friday release for this fun little block card.


Design Steps: (Here is a link to a video that I used to make the base https://www.pinterest.com/pin/443534263317816376/ )

1.  Start with a piece of white card stock measuring 10 x 6 3/4.  Score at 3, 4 1/2, 6, 7 1/2
2.   Fold the flap back along the 6 inch score. Place a ruler at the bottom along the fold and use a pencil to mark small dots at 1/2, 1 3/4, 2, 3 1/4, 3 1/2, 4 3/4, 5, 6 1/2
3.  Place your card into a paper cutter and cut from the dots to the closest score line as shown above
4.  When you have completed the cuts fold as shown below

5. Using the Honeycomb Background Slimline cut 2 pieces in white: 6 1/2 x 2 3/4 and 6 1/2 x 2 1/4.  Using a blending brush and a pink ink to add some color to both pieces.
6.   Using the same pink ink place some of the ink onto a acrylic block and then add a little water.  Pick up the ink with a brush.  Hold the brush over the place you want splattered and gently tap the brush with your finger
7.  Cut 8 pieces of pink card stock 1 1/4 x 1.  Glue the pink rectangles to the card as shown above
8.  Using the following dies and card stock colors: Garden Butterflies and Bee black and yellow,  Fancy Heart pink, Be My Valentine Puppies red glitter card stock and Stitched Alphabet black
9.  Arrange your pieces as shown above and add a few silver sequins and your card is complete


We have more inspiration on our YouTube Channel check it out HERE

Thanks so much for stopping by!  And I will see you next Thursday.

Blessings and Take Care


Saturday, December 16, 2023

Last Minute Little Gift

 Hello Friends

I am using our new releases dies from Black Friday to create a last minute gift for a sweet friend.  She is like me and spends a lot of time at her craft desk. So I thought this little easel card calendar would be cute sitting on her desk. 

For my project I have used several of the new collection dies: Greenhouse, Hanging Plants, Wildflowers and Sentiment Thinking of You (the little flowers).

Design Steps: 

1.  Start by cutting all of pieces using the following dies and card stock: Greenhouse pink, black, silver and light green.  Sentiment Thinking of You yellow and pink.  Hanging Plants brown, green and dark green.  Wildflower purple and green.  Slimline Grass light green
2.  For the base cut a piece of card stock 8 1/2 x 5.  Fold in half and then fold the front flap in half again.  
This will create the base for your easel card.  Cut a piece of white card stock  5 x 4.  This will be the easel panel
3.  Use the piece of 5 x 4 white card stock and ink the background blue.  Glue down the grass at the bottom and making sure not to glue the top of the grass so you can slide in the greenhouse
4.  Glue the black greenhouse frame and then add the pink pieces
5.  Add the rest of you greenhouse plants as shown.  Place the shovel and watering can outside of the greenhouse as shown above.  I placed my entire panel onto a scalloped black retangle for stablitiy and just to make it pop a little more
6.  Place glue on the flap as shown above and then place the greenhouse panel on top of the panel only  glueing down the bottom portion of the greenhouse panel
7.  You card should look like the picture above.  Add some pearls, black rhinestones and silver gems to spice up your little greenhouse

8. For the background on the bottom piece cut out a piece of black polka dot paper 4 7/8 x 4 1/8.  Glue the paper down.  To create the stop for the easel you will use the little mini calendar


We have more inspiration on our YouTube Channel check it out HERE

Thanks so much for stopping by!  And I will see you next Thursday.

Blessings and Take Care


Saturday, December 9, 2023

Christmas Bells

Hello Crafty Friends

 Our new Christmas Release is available at a wonderful 30% off.  This collection has over 40 different dies.   It has everything you will need for your holiday paper crafting. Make sure to stop by the online store and check out all the fantastic new designs!

Today, I am featuring the Old Fashion Ornaments 4.  The bell ornaments are rather large die so it is a perfect size for an A2 card or larger such as a slimline.  


Design Steps:

1.  Using the Old Fashion Ornaments 4 cut out gold, hunter green and deep red card stock.  For the foliage I used the Holiday Candle Centerpiece and the Vintage Holiday Lantern.  Cut out the following colors of card stock hunter green, gold, brown and deep red.  Assemble the bells with a fine tip glue
2.  For the card base use a cream A2 card stock, 4 1/8 x 5 3/8 deep red, 4 x 5 1/4 holly DP, 2 3/4 x 4 3/4 piece of gold and 2 2 1/2 x 4 1/2 piece of cream.  Glue the red to the DP and then glue to the card front.  Glue the cream to the gold and then center it to the card front on top of the holly DP
3.  First I popped up the bells using dimension square making sure to leave room to tuck in the foliage.  Arrange the foliage as you wish and glue down

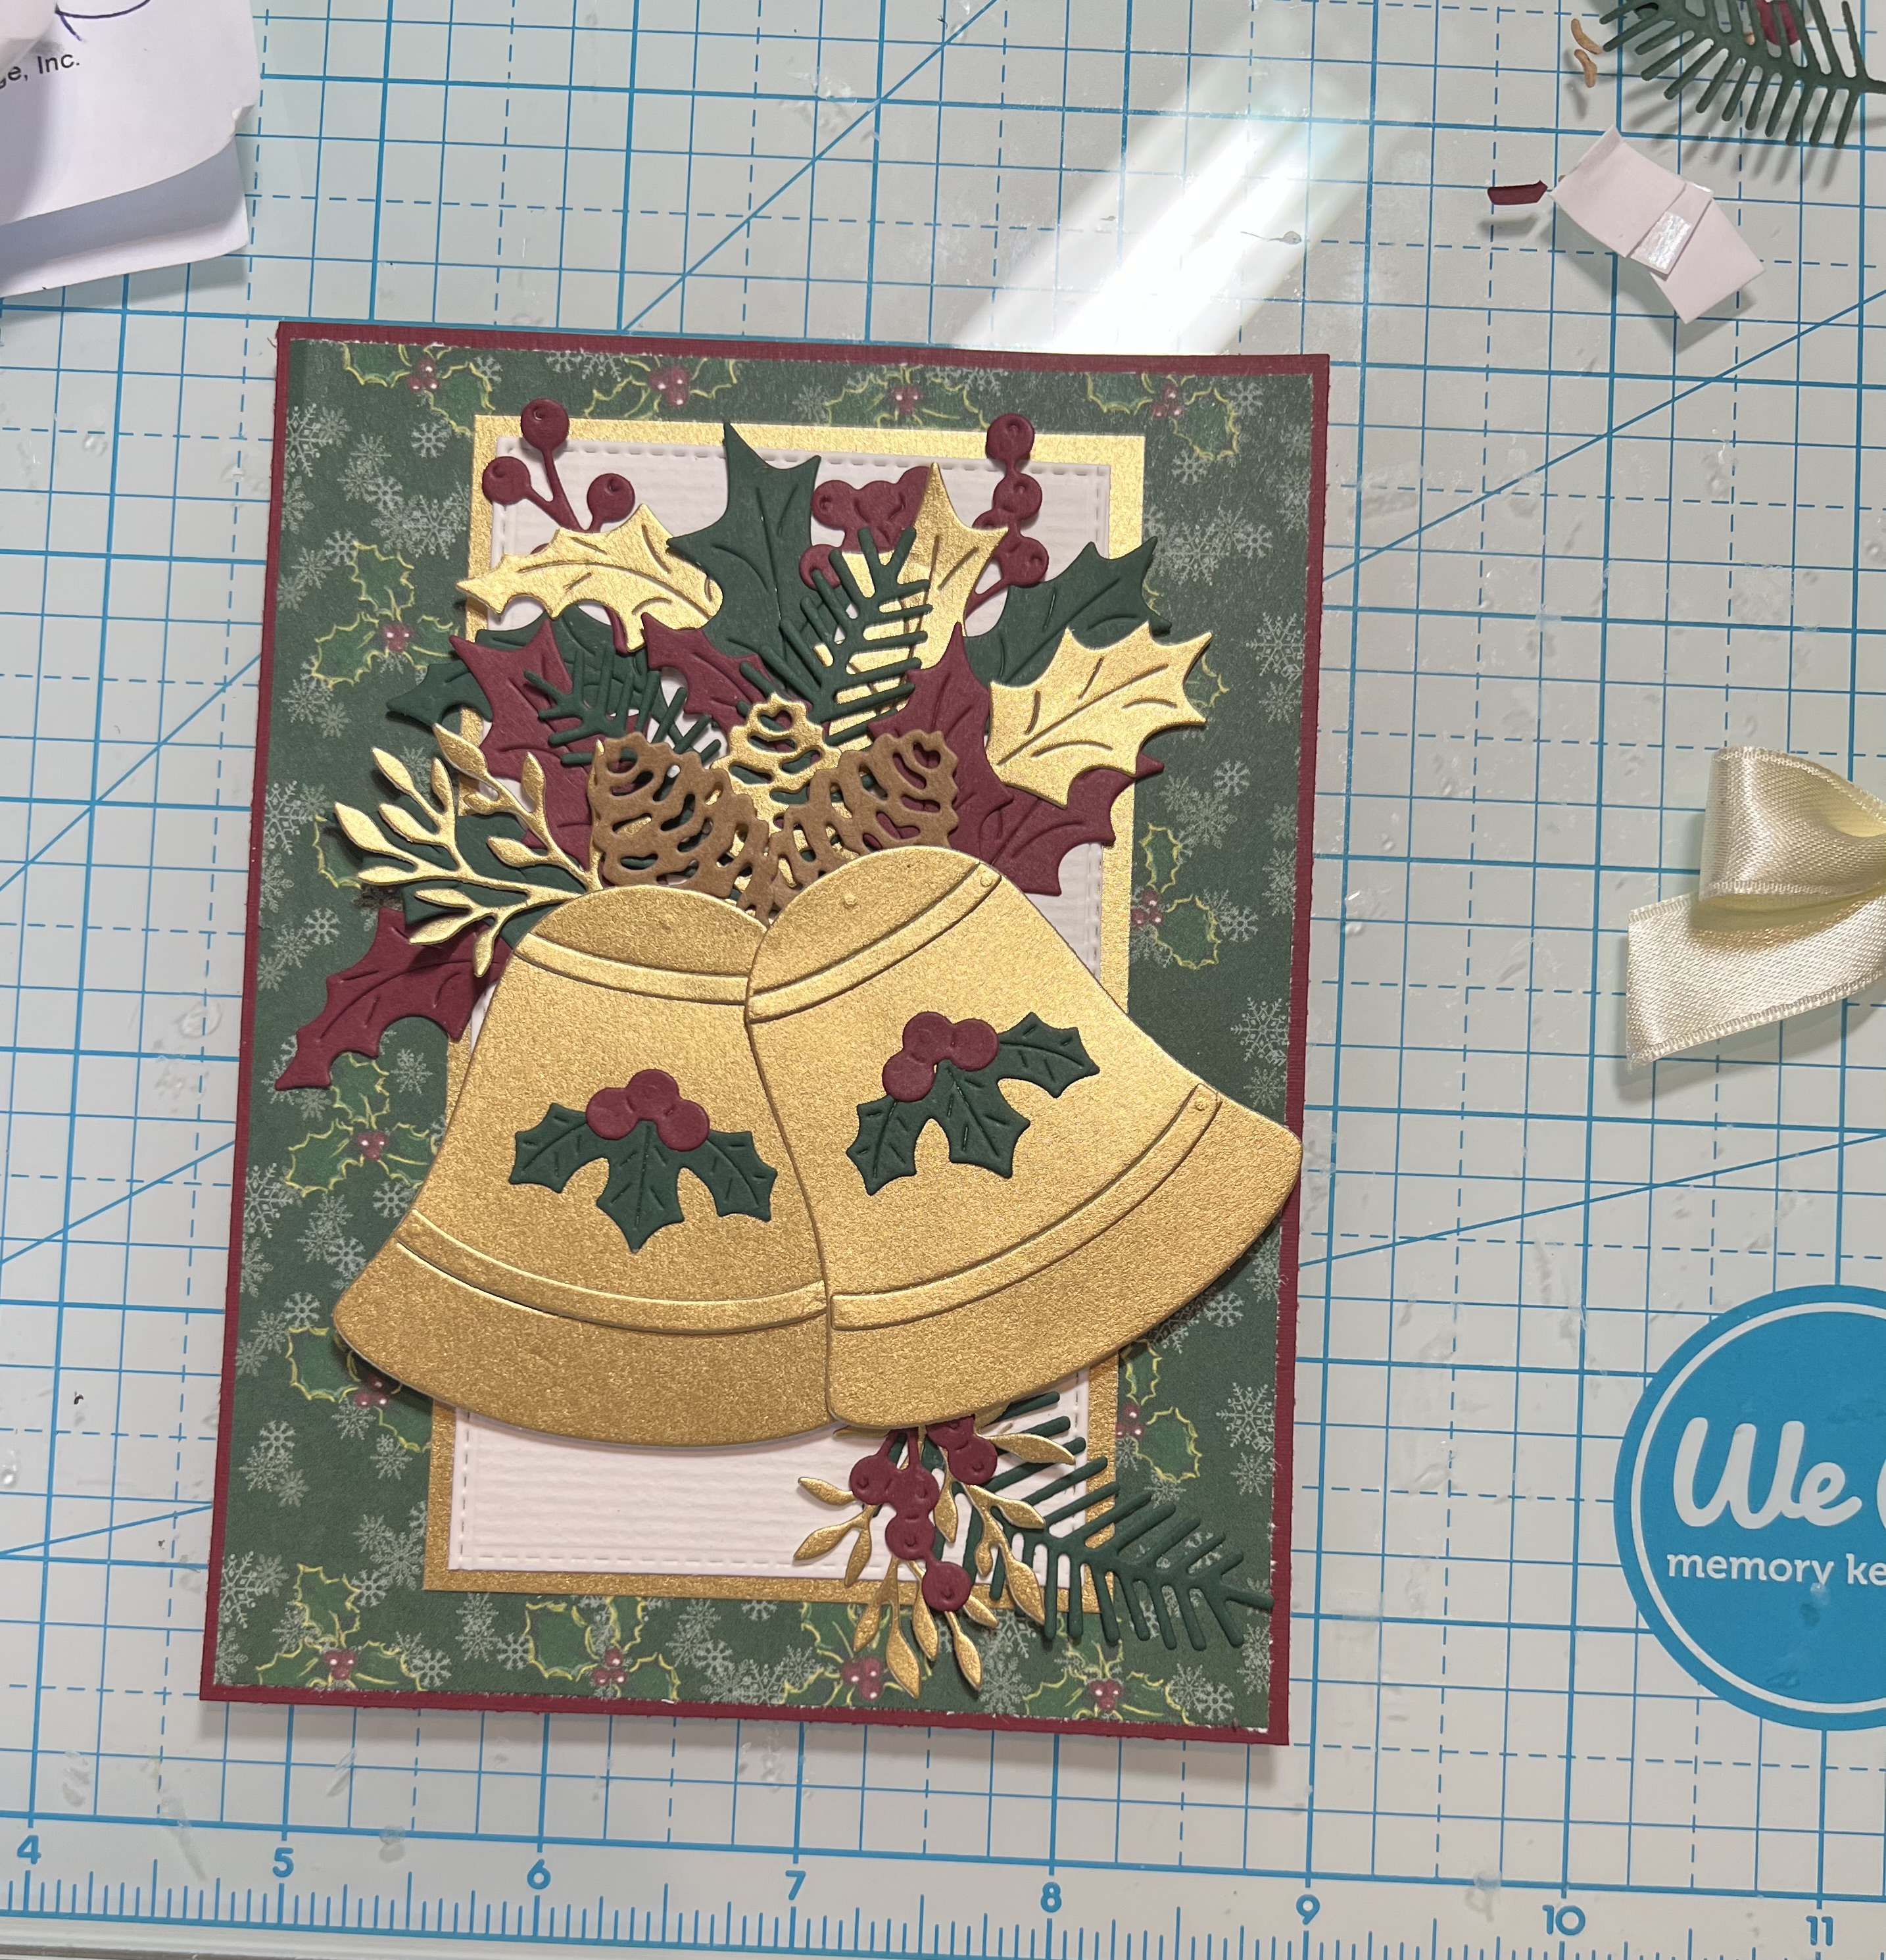
4.  Add a cream colored bow and your sentiment layered onto gold and your card is complete


We have more inspiration on our YouTube Channel check it out HERE

Thanks so much for stopping by!  And I will see you next Thursday.

Blessings and Take Care


Saturday, December 2, 2023

Puppy Carolers

 Hello Friends 

I can't believe I am finishing my Christmas cards!  I have to send many cross country so I need to complete the handmade ones. 

I am using our new Christmas Release which is available at a wonderful 30% off.  This collection has over 40 different dies.   It has everything you will need for your holiday paper crafting. Make sure to stop by the online store and check out all the fantastic new designs!

Today, I am using the Puppy Carolers and the Pine Tree Slim.  These pups are so sweet and make a perfect card for all those dog lovers in our lives!


Design Steps:

1.  Using the Pine Tree Slim die cut out the following colors of card stock: green, brown and white (I made three of these trees).  Using the Puppy Carolers die cut out the following colors of card stock: white, brown, red, green, blue, black, and mustard yellow.  Glue the pieces together with a fine tip glue
2.  Use a white A2 card base, cut a piece of navy snowy DP 4 1/8 x 5 3/8, use the Hills Slimline and cut the white bank of snow (cut it down to 4 1/8) and use the Picket Fence Slimline and cut it on white (cut the fence down to 4 1/8)
3.  Glue the navy DP to the white card base.  Next add the trees then fence and finally the snowy ground
4.  Glue the brown and black dogs down flat as shown above then put dimension squares on the yellow dog and pop him in the middle as shown below.  Add the sentiment layered on red and your card is complete


We have more inspiration on our YouTube Channel check it out HERE

Thanks so much for stopping by!  And I will see you next Thursday.

Blessings and Take Care