Saturday, December 26, 2015

Little Puppy! - Pink and Main

Good Morning!
I hope all of you had a very Merry Christmas! And I wish you all a fantastic New Year!
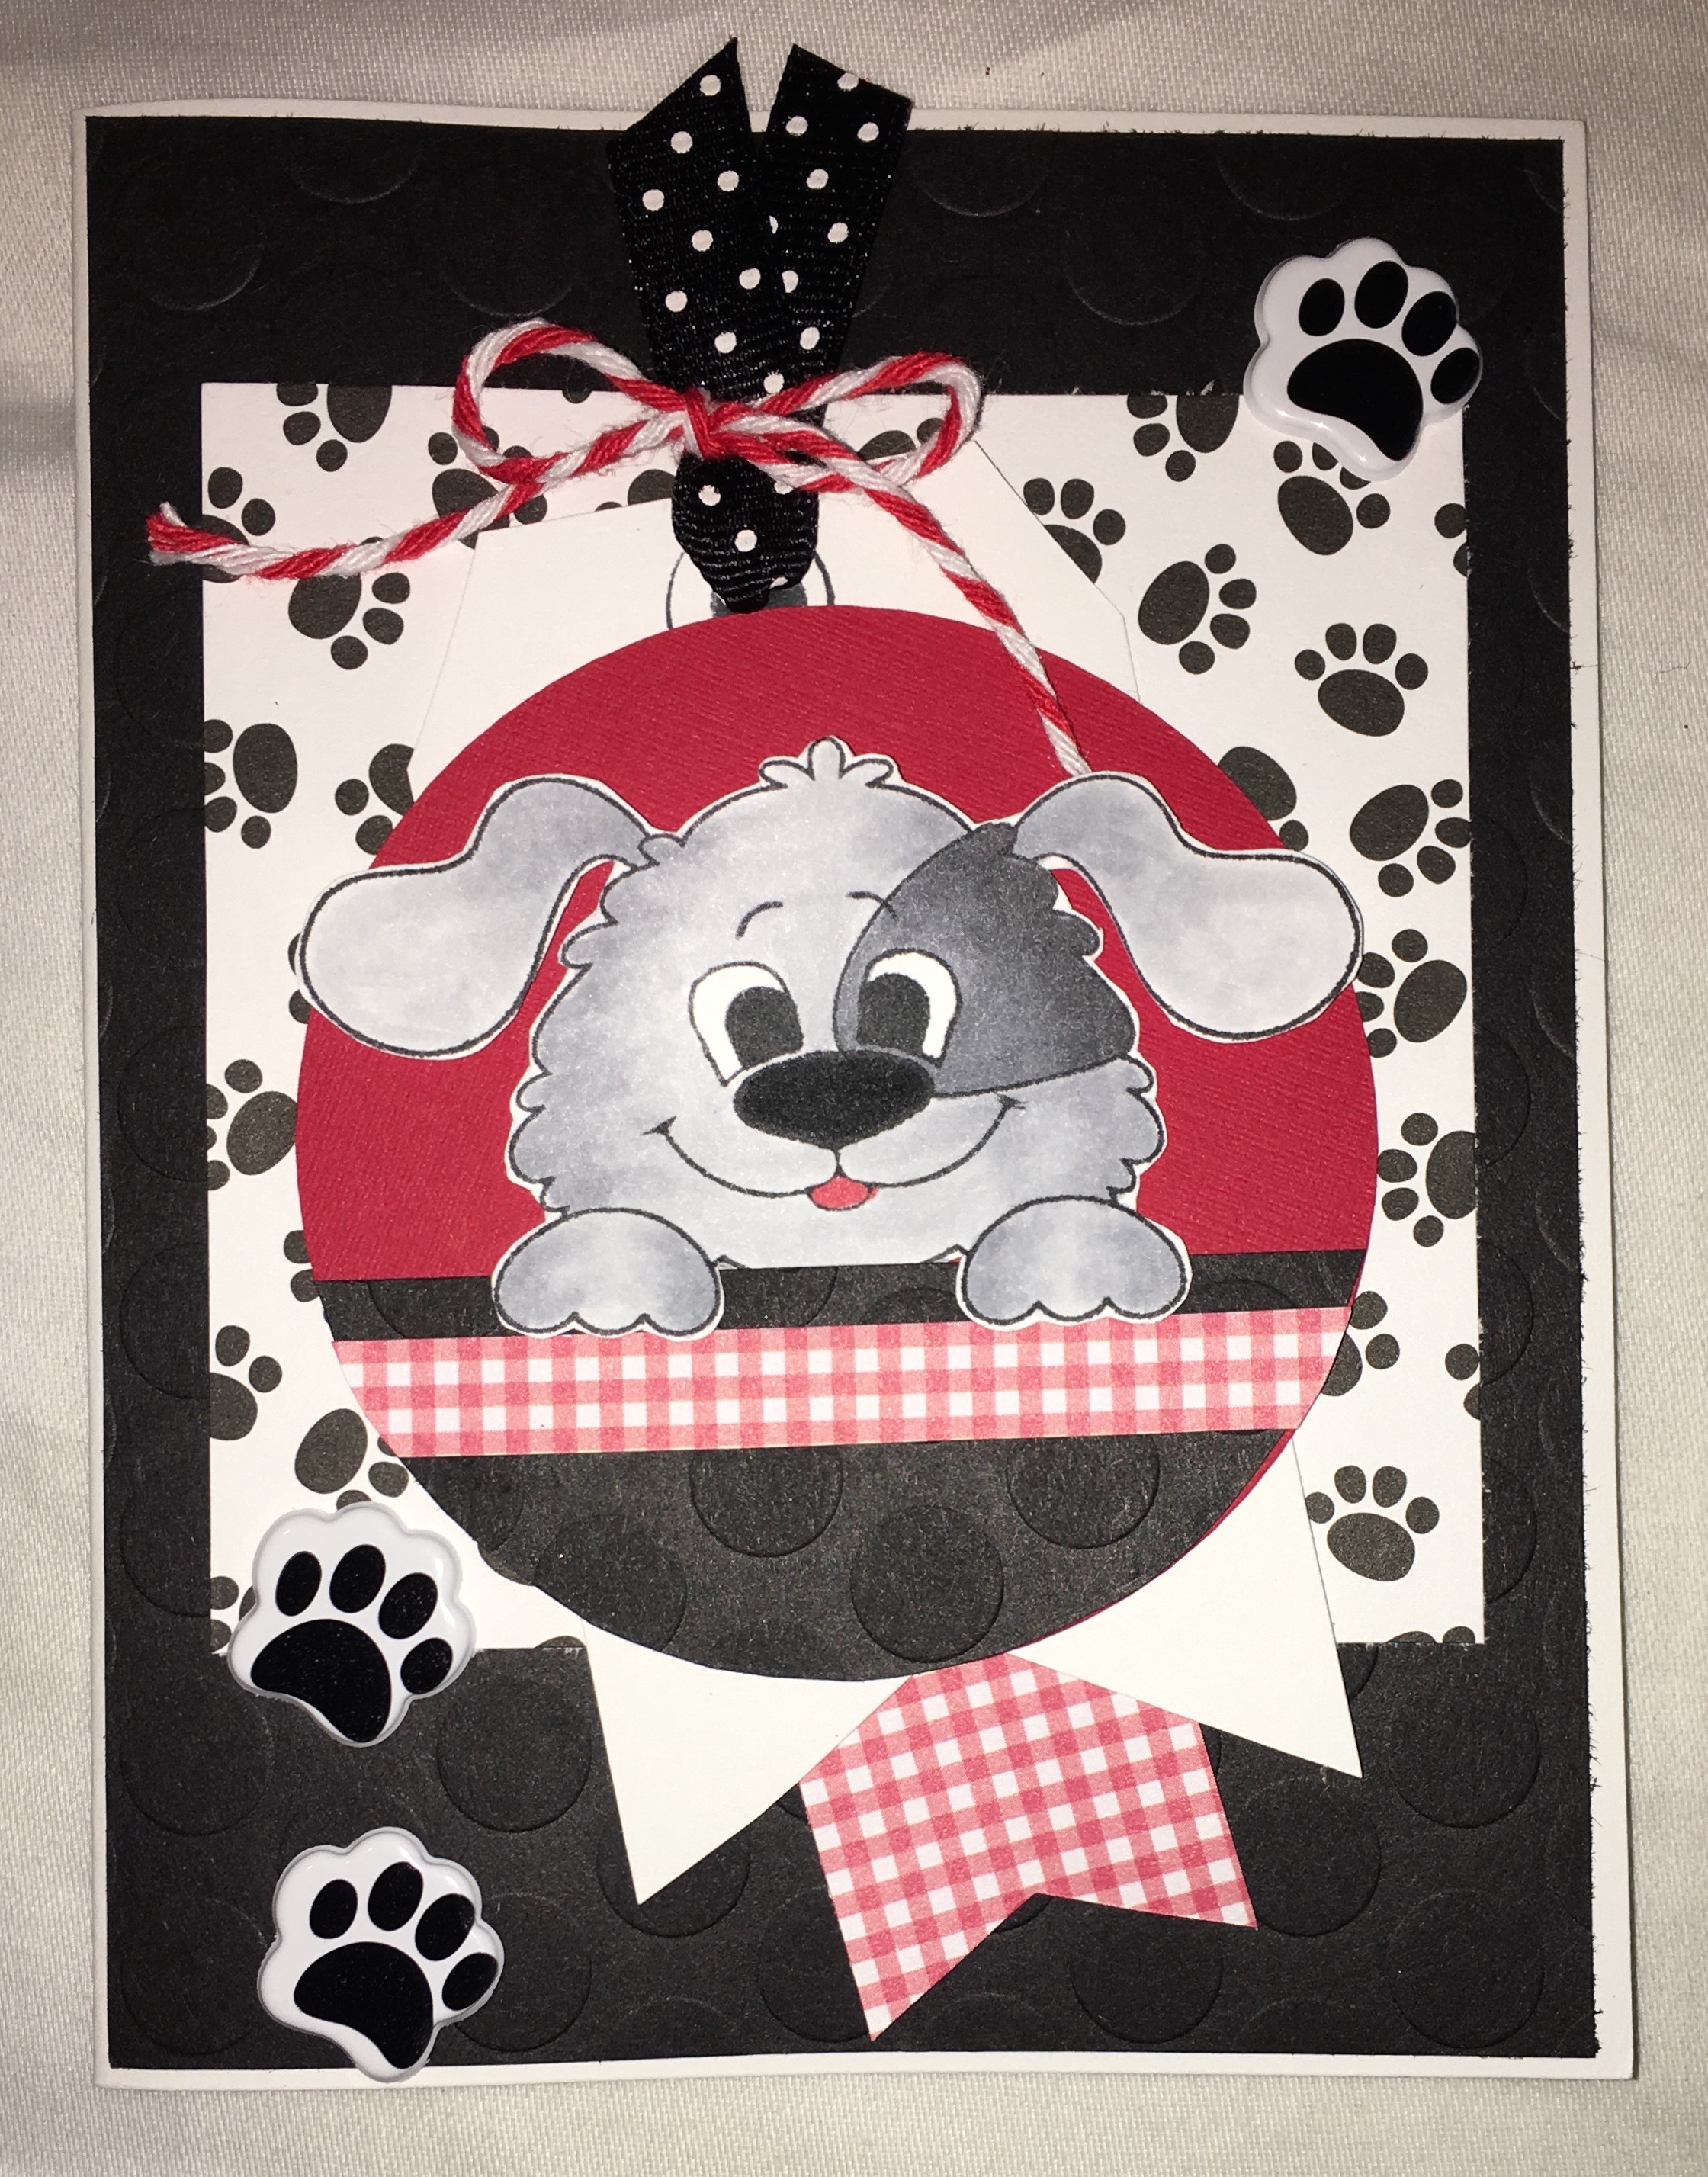
I made this fun little card from the Pink and Main sets Animal Faces & Sweet Faces set 2.
IMG_0371
My design steps:
  1. Use an A2 size white card, cut a slightly smaller dotted embossed piece of black card stock and glue to the front (Recollections Paper)
  2. Cut a 3 1/2 x 3 1/2 piece of designer Paw paper (Recollections Paper) glue to the center of the card
  3. Make a 4 x 2 inch white tag add the ribbon and twine.  Cut a 2 x 1 1/2 banner from check paper and glue behind the white tag. Glue the white tag at an angle as shown to the front of the card
  4. Cut a 3 inch circle from red card stock then add the embossed black paper and checked 1/2 strip checked paper to the circle.  Glue to the Paw paper as shown
  5. Stamp the dog (Pink and Main Animal Faces and Sweet Faces set 2) and color with copics. Cut out the dog and pop dot to the circle as shown
  6. Add the Paw stickers (Recollections)
Thanks for stopping by!
Happy New Year!
Pam

Saturday, December 19, 2015

Sparkling Christmas - Pink and Main

Happy Sunday!
As we get closer to Christmas I needed a few more quick cards. This is the design I came up with and no coloring!
IMG_0362
Design steps:
  1. Use a cream color card base A2 size
  2. Cut a slightly smaller piece of red card stock and glue to front.  Then cut the black checked paper slightly smaller then the red card stock and glue it to the red card stock. Designer paper (Bazzill Nordic Pine) Plain card stock (Recollections)
  3. Cut 3 1/2 inch banners with dove tails and mat to red card stock. Add gold snowflakes as shown (Recollections)
  4. Stamp Merry Christmas (Pink and Main Hollydays Set) on cream card stock with black ink (Memento Black) then mat on red card stock
  5. Add gold sequins
Thanks so much for stopping by!
Merry Christmas
Pam

Saturday, December 12, 2015

Frosty Fun - Pink and Main

Good Morning!
The card I am sharing with you today has a little twist.
Design steps:
  1. Use a standard A2 card and cut the front flap in half.
  2. Cut a 3 1/2 x 3 1/2 square of red swirl designer paper (Recollections) and mat on white.  Glue it to the inside of the card as shown
  3. Cut 2 3 inch scallop circles position one on the inside of the card and stamp the sentiment. The other circle should be placed directly on top of it attaching it to the front inside of the card front
  4. Glue a slightly smaller piece of red card stock (Recollections) to the front of the card add the border and the icicles
  5. Stamp the sentiment cut and mat and then stamp little boy and color with copics and use the matching die to cut out (Pink and Main stamps sets: Cocoa Cafe & Hollydays)
  6. Add snowflakes (Recollections)
Many Blessings and thanks for stopping by!
Pam
view 2view 3
view 4

Saturday, December 5, 2015

Santa in a Box - Pink and Main

Happy Sunday!
I live in sunny South Carolina so I thought this card would be a fun one to send to someone very special. And I do mean special because it does take some time to make.  If you look on YouTube you will find a bunch of tutorials on how to make this type of card.  Just type card in a box in the search and several will pop up.  I will give you a couple of angles to look at because there are lots of fun elements to the card. 
IMG_0331IMG_0333IMG_0334
Front and side views!
I hope you try one of these cards in a box!  They are so much fun!

Have a Blessed Day!
Pam