Monday, February 14, 2022

Risen

 Hello Friends

It is Pam sharing with you today.  I have another Easter card with a vintage twist from our wonderful Spring Release.  I don't know if you have check out the crosses in our store or not.  But if you haven't there are some really gorgeous ones available in many of the spring releases past and present.  Just search cross and you will see all of the beautiful cross dies available.


Design Steps:

1.  Use and A2 off white card base and distress the edges with a distress tool and then add a vintage ink to the edge
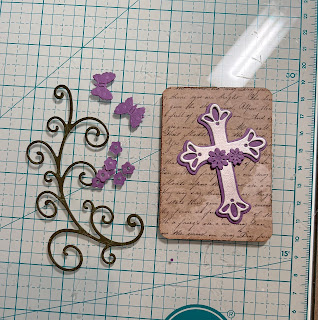
2.  Cut out the pieces for the front using the Flourish 1, Easter Cross w/Flowers and Spring Meadow.  Glue your cross together.  Cut a piece of DP Script paper 2 1/4 x  3 1/4 use a corner rounder and then distress the edges the same as the base of the card
3.  Cut a piece of DP dark green 4 x 3 and a piece of DP Script 4 x 3 scallop if you would like.  Wrap a piece of purple lace around the pieces as shown above and then glue to the front of the card base  
4.  Glue down your rectangle of the script DP and then glue down the flourish
5.  Glue the cross to the script DP rectangle as show above Add your little purple flowers to the floursih and the flowers on the cross
6.  Using the Faith Sentiments cut out risen in metallic silver card stock.  I cut it out twice and glued them together.  Add it to the card front along with the purple butterflies as shown below

CottageCutz Products


Don't forget to check out the new Spring Release.  These sweet dies won't last long!
We have more inspiration on our YouTube Channel check it out HERE
Thanks so much for stopping by!  And I will see you next Thursday.

Blessings and Take Care
Pam


Wednesday, February 9, 2022

Easter Peekers

 Hello Friends

It is Pam sharing with you on this fine Thursday.  I hope you all are doing well.  I am continuing with making my Easter cards using our New Spring release.  Today I am using Spring Windows w/Peekers.  Stacey,  a friend,  that teaches card classes at a local store made a really cute card using this sketch.  I loved it so much I thought I would give it a try.  Thanks for the inspiration Stacey.


Design Steps:

1.  Use a mini slimline base measuring 6 1/2 x 6 1/4 folded in half.  Cut a piece of Flower DP, Checked DP and pink card stock 6 x 3.  In the flower DP use the 4th from the largest Pierced Circle to cut the hole. In the pink card stock cut the hole using the 5th from the largest Pierced Circle making sure they line up

2.  Glue the pink behind the flower DP and then glue the checked DP behind the pink card stock (make sure not to glue to closely to the hole so you can slip in the bunny and chicks)

3.  Using the Spring Windows w/Peekers cut out the bunny and chick on: grey, yellow, orange, black, pink and blue card stock.  Color in the eyes with a fine tip black maker and add the white dots to the bunny's eyes with a white gel pen.  Assemble the pieces with a fine tip glue
4.  Glue in the chick on the right first then add the bunny and finally the chick on the left.  Add the little paws and chick feet
5.  To decorate the top left of the circle cut out blue flowers and greenery using the Spring Gnome Cottage die.  Glue them to the card as shown below and then add your sentiment

CottageCutz Products


Don't forget to check out the new Spring Release.  These sweet dies won't last long!
We have more inspiration on our YouTube Channel check it out HERE
Thanks so much for stopping by!  And I will see you next Thursday.

Blessings and Take Care
Pam


Sunday, February 6, 2022

Easter

 Hello Friends

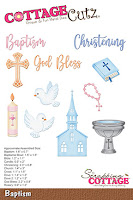
I am filling in for Wendy today.  I am starting to make a few of my Easter cards to get a little ahead.  The New Release die I am using is Baptism.  It has several really nice pieces that can be used in a number of different cards such as Easter, Weddings, Baptism and Sympathy.


Design Steps:

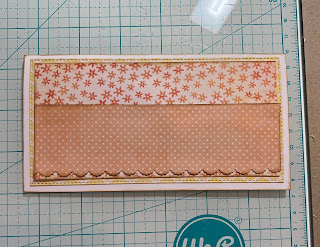
1.  I am using a mini white slimline for a base 6 1/4 x 6 1/2 folded in half.  Using the second from the largest Stitched Rectangle Slimline die I was able to make the cuts work using yellow DP.  Cut orange flowered DP 5 1/2 x 2 3/4.  Last cut a piece of orange dotted DP 5 1/2 x 1 3/4 and use a border punch on the bottom of it
2.  Ink all of the edges of the white card base and the DP before you glue together.  Glue down the yellow to card base next the flowered DP and last the dotted DP as shown above
3.  Using the Baptism die cut out the pieces in brown wood DP, white, yellow DP, and black (black Bible and little orange flowers not pictured). Cut the squares from yellow DP with the 4th from the smallest Pierced Square die
4.  Glue the squares at a diagonal as shown above.  Pop up the church in the middle, glue down the Bibles and the Cross flat.  Add the little orange flowers cut with Sending Hugs Bear add little pearls to the inside of the flowers and glue down your sentiment

CottageCutz Dies


Don't forget to check out the new Spring Release.  It is perfect for a number of different projects!
We have more inspiration on our YouTube Channel check it out HERE
Thanks so much for stopping by!  And I will see you Thursday.

Blessings and Take Care
Pam


Sunday, January 30, 2022

Never to Old to Puddle Jump

 Hello Friends

I am enjoying the versatility of the new Spring Release.  I have made two Valentines using them and today I am making a fun fancy fold belly band Birthday card.


Design Steps:

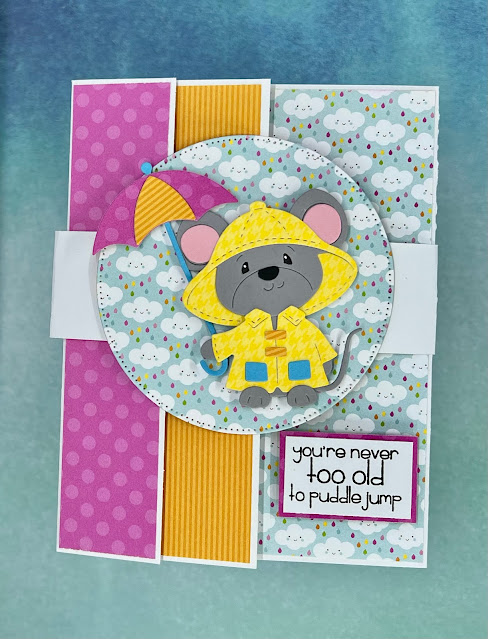
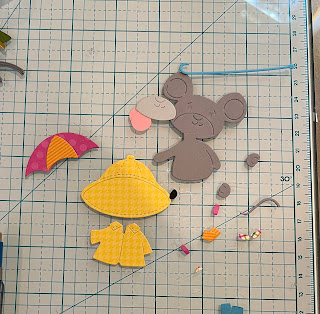
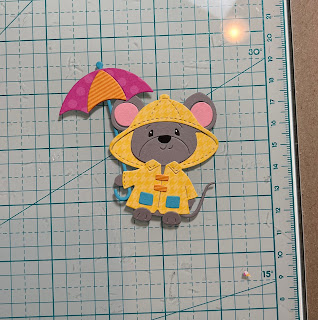
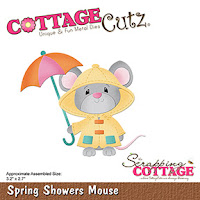
1.  Start with the Spring Showers Mouse die and cut out the pieces in: grey, pink DP, yellow DP, orange DP,  pink, black, and turquoise 


2.  Assembly the mouse using a fine tip, clear drying glue.  Color in the eyes with a fine tip black maker and add the white with a white ink gel pen.  Set the little mouse aside
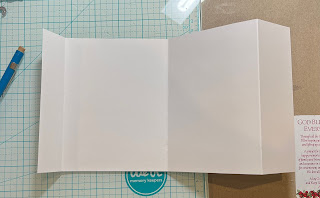
3.  For the base start with a white piece of card stock cut 5 1/2 x 11.  Score at 1 1/4, 5 1/2 and 9 1/4.
Fold as shown above first score is a valley fold, second score is a valley fold and the last is a mountain fold 
4.  When you close it up it should look like the above picture
5.  To cover the front cut 2 pink polka dot papers 1 x 5 1/4,  cut 1 orange stripe paper 1 1/2 x 5 1/4 and last cut the rain cloud paper 5 1/4 x 3 1/2
6.  Glue the pink to the first flap and then open the first flap and glue the second pink strip under the first pink strip, next flap glue down the orange strip and last open the orange flap and glue down the rainy paper
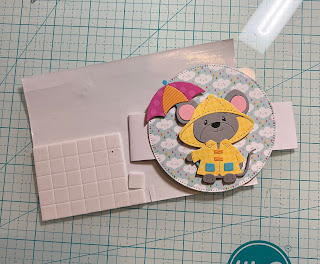
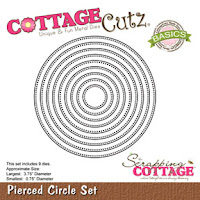
7.  To make the belly band cut a white strip 1 x 11 inches.  Wrap the belly band around the card and staple it together.  Make sure you don't get it to tight.  Use the second from the largest Pierced Circle die to cut out the rainy DP then glue to the center of the belly band
8.  Take your little mouse and pop him to the rainy DP on the belly band
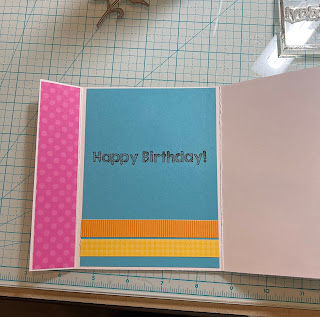
9.  For the inside I cut a piece of turquoise card stock 4 x 5 1/4 added some left over strips to the bottom and stamped Happy Birthday.  To complete the front stamp your sentiment and layer onto pink and pop to the side front of the card

CottageCutz Products


Don't forget to check out the new Spring Release.  It is perfect for Valentines, Spring Birthdays and of course Easter!
We have more inspiration on our YouTube Channel check it out HERE
Thanks so much for stopping by!  And I will see you next Thursday.

Blessings and Take Care
Pam


Sunday, January 23, 2022

Valentine Bunny

 Hi Friends,

We have a new Spring release with 20 sweet designs.  The bundle for the entire release is at 60% off right now.  And individual dies are at 25% off.  Just check it out HERE.  

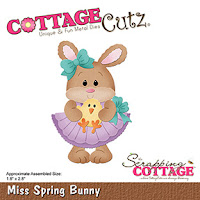
I am using the Miss Spring Bunny today.  And to show you how versatile these dies are I am using it as a Valentine.  

Design Steps:
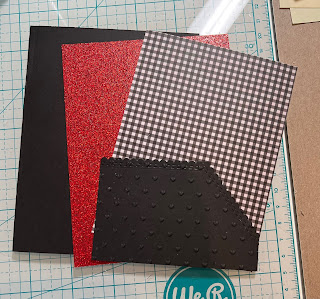
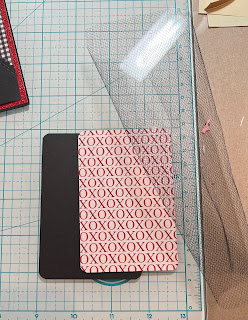
1.  The supplies for the base: A2 black card base,  red glitter card stock 4 1/8 x 5 3/8, Checked DP 3 5/8 x 4 7/8,  pocket 2 1/2 x 3 5/8 embossed with little hearts
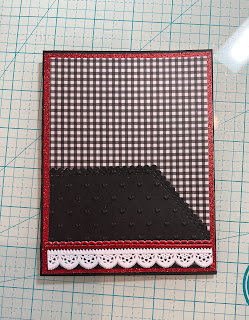
2.  Glue the red glitter paper to the black card base, glue the checked DP to the red glitter card stock, and finally add the pocket only putting glue on the sides and bottom so it will open on the top
3.  Add the white and red trim to the bottom of the pocket as shown above
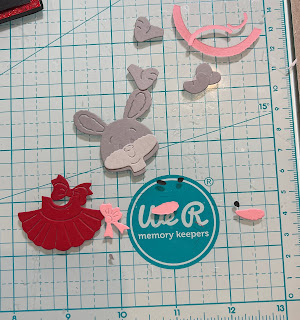
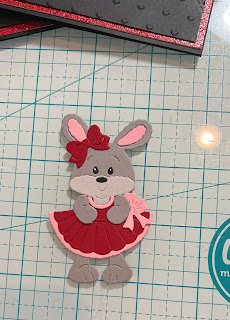
4.  Using the Miss Spring Bunny cut out the pieces in red, light grey, dark grey, pink and black
5.  Assemble the bunny with a fine tip, fast drying glue.  Add the little white dots on the eyes with a gel pen
6.  Cut out the pieces for the tag black is 2 3/4 x 4 and the DP is 2 1/2 x 3 3/4.  Glue the pieces together and punch a hole in the top.  Add the black tule and tie a knot.  Using the Stitched Heart die set the smallest one cut a little heart out of glitter card stock.  Place the heart into the bunny's hands as shown below.  Stamp your sentiment and layer onto some red glitter card stock and your card is complete
CottageCutz Products


Don't forget to check out the new Spring Release.  It is perfect for Valentines, Spring Birthdays and of course Easter!
We have more inspiration on our YouTube Channel check it out HERE
Thanks so much for stopping by!  And I will see you next Thursday.

Blessings and Take Care
Pam