
Hi Friends,
We have a new Spring release with 20 sweet designs. The bundle for the entire release is at 60% off right now. And individual dies are at 25% off. Just check it out HERE.
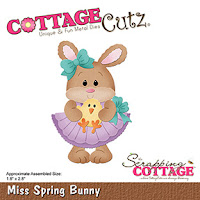
I am using the Miss Spring Bunny today. And to show you how versatile these dies are I am using it as a Valentine.

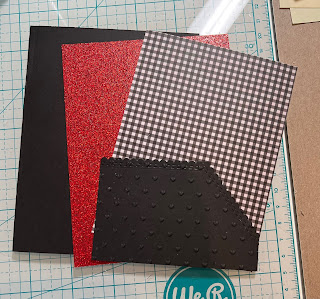

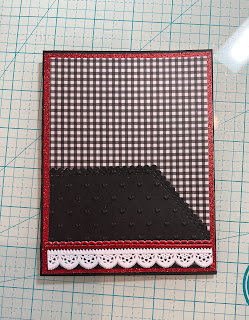
3. Add the white and red trim to the bottom of the pocket as shown above
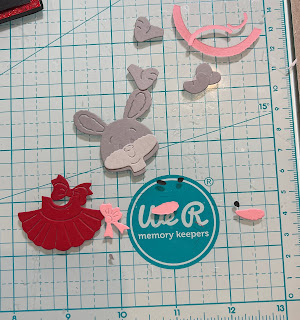
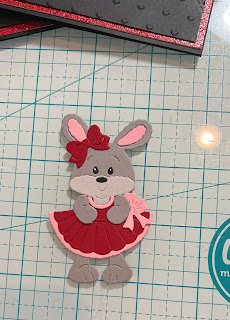

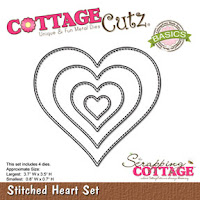
6. Cut out the pieces for the tag black is 2 3/4 x 4 and the DP is 2 1/2 x 3 3/4. Glue the pieces together and punch a hole in the top. Add the black tule and tie a knot. Using the Stitched Heart die set the smallest one cut a little heart out of glitter card stock. Place the heart into the bunny's hands as shown below. Stamp your sentiment and layer onto some red glitter card stock and your card is complete

CottageCutz Products
Don't forget to check out the new Spring Release. It is perfect for Valentines, Spring Birthdays and of course Easter!
We have more inspiration on our YouTube Channel check it out HERE
Thanks so much for stopping by! And I will see you next Thursday.
Blessings and Take Care
Pam
No comments:
Post a Comment