Showing posts with label Spring Meadow. Show all posts

Sunday, February 19, 2023

Happy St. Patrick's Day Pup

 Hello Scrapping Cottage Friends,

We have a huge Presidents Sale going on in the store right now!  It end this Friday midnight EST time.  You can save as much as 70% on some of the items.  It is a great time to stock up and cross off some of those dies on your wish list!! Check it out HERE.  

Today,  I am using 3 of the dies that are currently on SALE!  The Shamrock and Valentine Scottie, Pierced Oval Set,  and Spring Meadow.


Designer Steps:

1.  Use the Shamrock & Valentine Scottie die and cut the following colors of card stock: light gray, gray, green, light green, yellow, brown and black. Not pictured is the grass cut with the Spring Meadow die on green card stock

2. Ink the edges of the pieces with matching inks.  Assemble the pieces with a quick drying glue

3.  For the card base use an A2 cream card stock
  • Cut light green card stock 4 x 5 1/4
  • Cut cream card stock 5 x 3 3/4 and use the second from the largest Pierced Oval to cut the oval out of the center
  • For the oval backing cut a piece of cream card stock 4 7/8 x 3 5/8 
4.  On the 4 7/8 x 3 5/8 piece ink the bottom half with green
5.  Glue the cream inked card stock to the light green card stock.  Glue the pieces of grass as shown.  Use dimension tape on the back of the cream card stock with the cut out oval. Then pop it over the grass
6.  Glue the pup to the center of the grass
7.  I added 3 four leaf clovers to the edge of the card.  To give the clovers dimension I used a stylus, white ink pen for the little veins and to soften the white I went over it with my YG03 Copic maker.  I inked the edges of the leaves with a darker green ink.  I also decided to change up the sentiment to make it pop a little more.  Your card is complete

CottageCutz Products


Stop by the store today and save!!! 


We have more inspiration on our YouTube Channel check it out HERE

Thanks so much for stopping by!  And I will see you next Thursday.

Blessings and Take Care


Sunday, March 20, 2022

Spring Sheep

 Hello Friends

I have one more Easter card to share with you today.  I am featuring the sweet little Spring Sheep die set to create the card.


Design Steps:
1.  Start by cutting a rectangle out of white card stock using the Pinking Shear Edge Slimline second from the largest. Leaving the die in place, to create a nice white border, use a blending brush and some blue and soft green inks to blend out the background
2.  Cut out some green grass using the Grass Slimline die and cut it down to create the grassy hills
3.  Using the Picket Fence Slimline cut it on white then trim to fit the card.  Cut the Tree of Nature die with brown for the trunk and green for the leaves
4.  Glue the tree in the background and then add the fence tucked under the grass
5.  Cut out the flowers using the Spring Meadow die and pink card stock.  Glue the flowers and leaves to the tree.  The little sheep are cut from the new release Spring Sheep die.  I cut them in white, grey, pink and black.  I assembled with a fine tip glue and added a Sakura Glaze black to the eyes and hooves.  Tuck the little sheep into the grass as shown
6.  To finish the card glue to your white card base which measures 3 1/4 x 8 1/4.  I added Stickles to the flower centers. Stamped my sentiment then layered onto pink card stock.  Glued sentiment to the front as shown above and last made some little bluebirds to sit in the tree 

CottageCutz Products


We have more inspiration on our YouTube Channel check it out HERE
Thanks so much for stopping by!  And I will see you next Thursday.

Blessings and Take Care


Monday, February 14, 2022

Risen

 Hello Friends

It is Pam sharing with you today.  I have another Easter card with a vintage twist from our wonderful Spring Release.  I don't know if you have check out the crosses in our store or not.  But if you haven't there are some really gorgeous ones available in many of the spring releases past and present.  Just search cross and you will see all of the beautiful cross dies available.


Design Steps:

1.  Use and A2 off white card base and distress the edges with a distress tool and then add a vintage ink to the edge
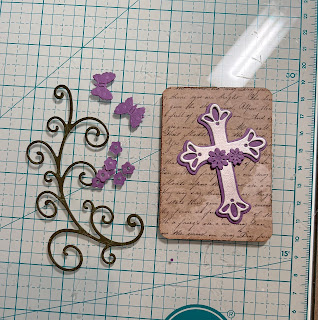
2.  Cut out the pieces for the front using the Flourish 1, Easter Cross w/Flowers and Spring Meadow.  Glue your cross together.  Cut a piece of DP Script paper 2 1/4 x  3 1/4 use a corner rounder and then distress the edges the same as the base of the card
3.  Cut a piece of DP dark green 4 x 3 and a piece of DP Script 4 x 3 scallop if you would like.  Wrap a piece of purple lace around the pieces as shown above and then glue to the front of the card base  
4.  Glue down your rectangle of the script DP and then glue down the flourish
5.  Glue the cross to the script DP rectangle as show above Add your little purple flowers to the floursih and the flowers on the cross
6.  Using the Faith Sentiments cut out risen in metallic silver card stock.  I cut it out twice and glued them together.  Add it to the card front along with the purple butterflies as shown below

CottageCutz Products


Don't forget to check out the new Spring Release.  These sweet dies won't last long!
We have more inspiration on our YouTube Channel check it out HERE
Thanks so much for stopping by!  And I will see you next Thursday.

Blessings and Take Care
Pam


Sunday, April 11, 2021

Friends are Like Sunshine!

 Hello Scrapping Cottage Friends!

We have a new release of Slimline dies and they are just a great addition to any card makers collection.  There are 9 designs and everyone of them can be used on ever single kind of card I can think of!!

Today,  I am using the Windows Slimline and the Scalloped Stitched Rectangle Slimline with a variety of additional dies.


Design Steps:

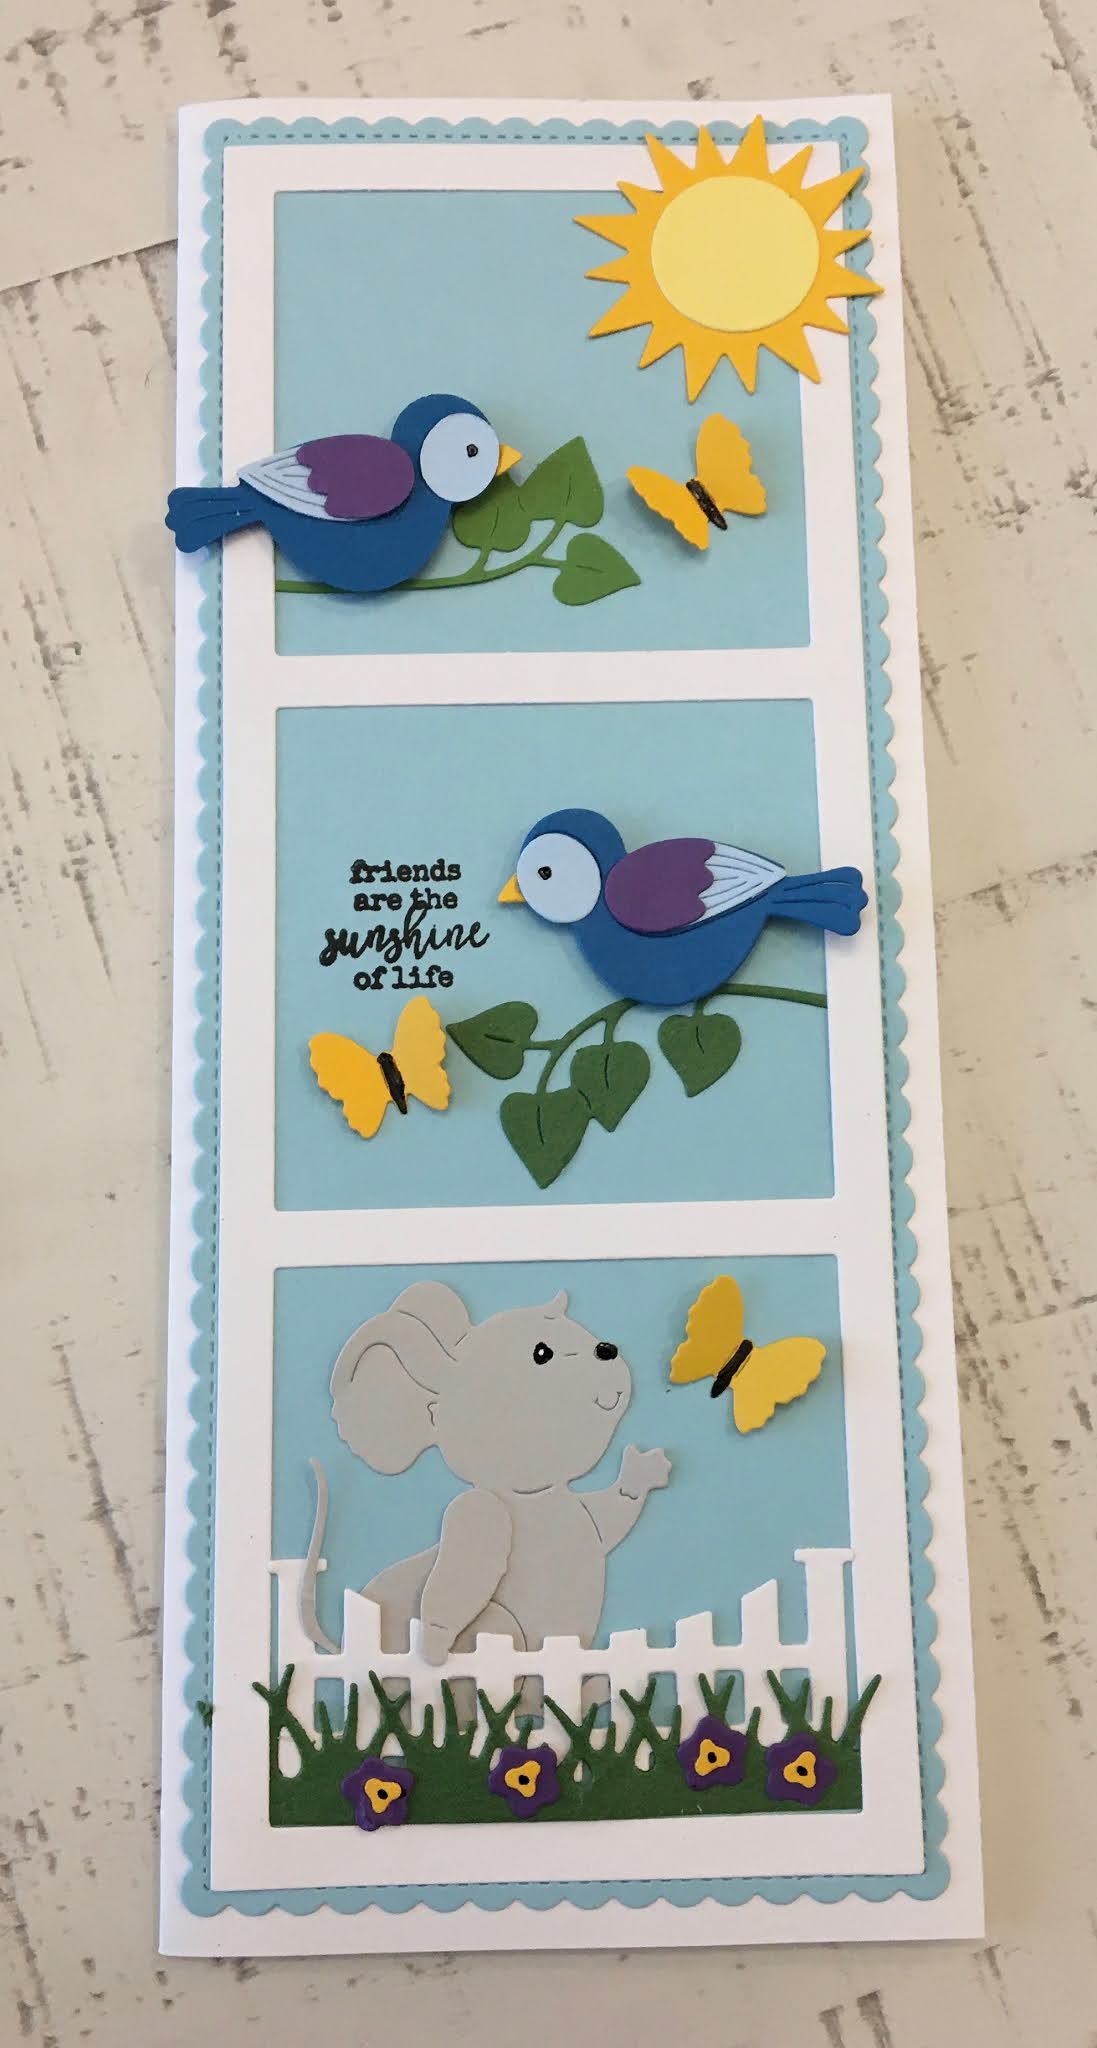
1.  Base card is a white slimline, using the largest Scalloped Stitched Rectangle die cut blue card stock,  use the Windows Slimline die and cut white card stock 
2.  Use the Bird with Bluebells cut out the leaves and the birds in green, blue, light blue, and purple.  Use the Rooster and Chick die and cut out the sun in yellow and light yellow.  Using Garden Accessories cut the white fence. Use Spring Meadow for the green grass and purple flowers 
3.  Assemble the birds and sun using a fine tip glue
4.  Glue the blue scalloped rectangle to the white base card.  Glue down the Window frame and then quickly tuck in the grass, fence and branches.  Add the sun to the top right corner of the card
5.  As I was working on the card I decided that I needed some butterflies so I used the Spring Meadow die again and yellow paper to create the butterflies.  I colored the butterflies bodies with a black Sukura Jelly Roll Pen.  I also used this pen on the eyes along with a white one
6.  Pop up the birds on the branches and stamp your sentiment.  I felt like the bottom of the card needed something more so I used the Mouse with Flower Cart die.  I cut the mouse out of gray card stock assembled him and then tucked him behind the fence.  Add your flowers onto the grass and butterflies and your card is complete

CottageCutz Products