Showing posts with label Pierced Circle Set. Show all posts

Sunday, September 17, 2023

Happy Fall Y'all

 Hello Friends,

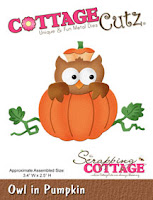
I have another fall card for you.  It can be used to welcome in autumn or for a Thanksgiving card.  I am using the Owl in a Pumpkin die. It is an oldie but a goodie and still available in our store today! 


Design steps:

1.  Using the Owl in a Pumpkin die cut out the following pieces of card stock: brown, green, yellow, white, black and a DP orange
2.  Using coordinating ink colors shade the pieces and then glue together
3.  For the base use an A2 blue card, cut a piece of brown 4 1/8 x 5 3/8, and a piece of leaf DP cut 4 x 5 1/4.  Using the largest Pierced Wide Circle Frame die cut out 2 circles in brown and glue together.  Using the second from the largest Pierced Circle die cut out blue and then run through an embossing folder of your choice.  I used a leaf embossing folder
4.  Glue the brown to the blue card base and then add the leaf DP.  Glue down the blue circle slight above center as shown above.  Place dimension dots on the back of the circle frame and pop of the blue circle
5.  Place dimension dots on the back of the Owl in the Pumpkin and pop it to the blue circle as shown.  Add your green leaves.  I cut a few extra leaves as you can see below
6.  Finish your card by adding the sentiment


We have more inspiration on our YouTube Channel check it out HERE

Thanks so much for stopping by!  And I will see you next Thursday.

Blessings and Take Care


Wednesday, February 9, 2022

Easter Peekers

 Hello Friends

It is Pam sharing with you on this fine Thursday.  I hope you all are doing well.  I am continuing with making my Easter cards using our New Spring release.  Today I am using Spring Windows w/Peekers.  Stacey,  a friend,  that teaches card classes at a local store made a really cute card using this sketch.  I loved it so much I thought I would give it a try.  Thanks for the inspiration Stacey.


Design Steps:

1.  Use a mini slimline base measuring 6 1/2 x 6 1/4 folded in half.  Cut a piece of Flower DP, Checked DP and pink card stock 6 x 3.  In the flower DP use the 4th from the largest Pierced Circle to cut the hole. In the pink card stock cut the hole using the 5th from the largest Pierced Circle making sure they line up

2.  Glue the pink behind the flower DP and then glue the checked DP behind the pink card stock (make sure not to glue to closely to the hole so you can slip in the bunny and chicks)

3.  Using the Spring Windows w/Peekers cut out the bunny and chick on: grey, yellow, orange, black, pink and blue card stock.  Color in the eyes with a fine tip black maker and add the white dots to the bunny's eyes with a white gel pen.  Assemble the pieces with a fine tip glue
4.  Glue in the chick on the right first then add the bunny and finally the chick on the left.  Add the little paws and chick feet
5.  To decorate the top left of the circle cut out blue flowers and greenery using the Spring Gnome Cottage die.  Glue them to the card as shown below and then add your sentiment

CottageCutz Products


Don't forget to check out the new Spring Release.  These sweet dies won't last long!
We have more inspiration on our YouTube Channel check it out HERE
Thanks so much for stopping by!  And I will see you next Thursday.

Blessings and Take Care
Pam


Sunday, January 30, 2022

Never to Old to Puddle Jump

 Hello Friends

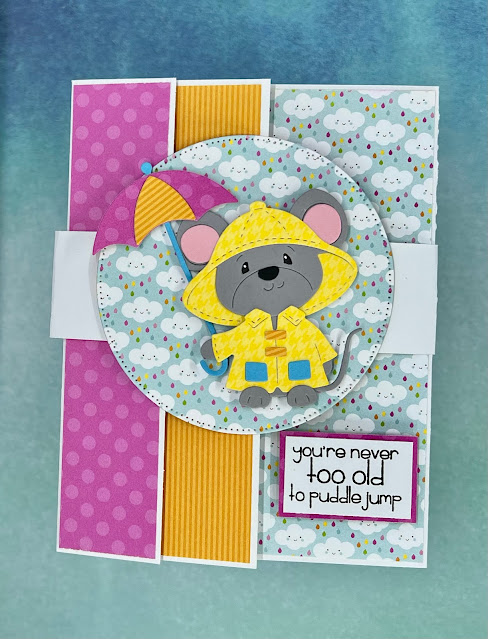
I am enjoying the versatility of the new Spring Release.  I have made two Valentines using them and today I am making a fun fancy fold belly band Birthday card.


Design Steps:

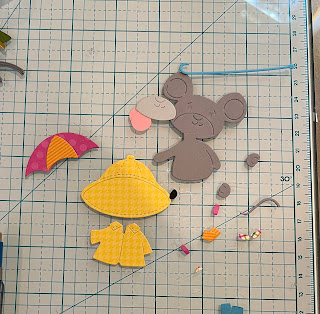
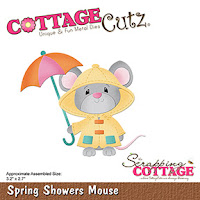
1.  Start with the Spring Showers Mouse die and cut out the pieces in: grey, pink DP, yellow DP, orange DP,  pink, black, and turquoise 


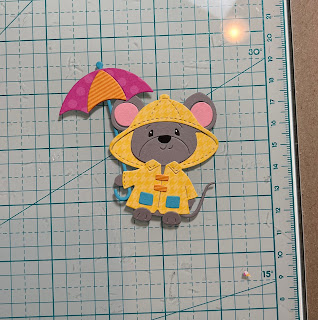
2.  Assembly the mouse using a fine tip, clear drying glue.  Color in the eyes with a fine tip black maker and add the white with a white ink gel pen.  Set the little mouse aside
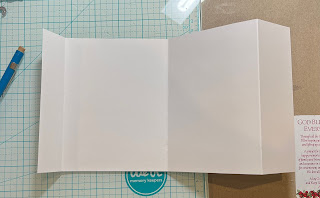
3.  For the base start with a white piece of card stock cut 5 1/2 x 11.  Score at 1 1/4, 5 1/2 and 9 1/4.
Fold as shown above first score is a valley fold, second score is a valley fold and the last is a mountain fold 
4.  When you close it up it should look like the above picture
5.  To cover the front cut 2 pink polka dot papers 1 x 5 1/4,  cut 1 orange stripe paper 1 1/2 x 5 1/4 and last cut the rain cloud paper 5 1/4 x 3 1/2
6.  Glue the pink to the first flap and then open the first flap and glue the second pink strip under the first pink strip, next flap glue down the orange strip and last open the orange flap and glue down the rainy paper
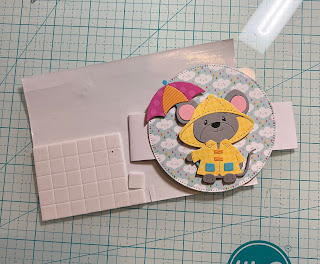
7.  To make the belly band cut a white strip 1 x 11 inches.  Wrap the belly band around the card and staple it together.  Make sure you don't get it to tight.  Use the second from the largest Pierced Circle die to cut out the rainy DP then glue to the center of the belly band
8.  Take your little mouse and pop him to the rainy DP on the belly band
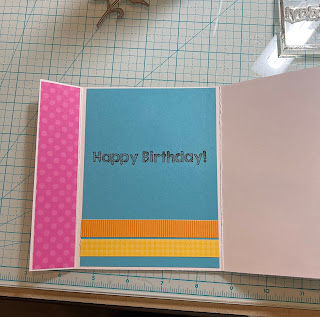
9.  For the inside I cut a piece of turquoise card stock 4 x 5 1/4 added some left over strips to the bottom and stamped Happy Birthday.  To complete the front stamp your sentiment and layer onto pink and pop to the side front of the card

CottageCutz Products


Don't forget to check out the new Spring Release.  It is perfect for Valentines, Spring Birthdays and of course Easter!
We have more inspiration on our YouTube Channel check it out HERE
Thanks so much for stopping by!  And I will see you next Thursday.

Blessings and Take Care
Pam


Sunday, October 10, 2021

Christmas Dog and Owl

 Hello Scrapping Cottage Friends


Our new release for Christmas is available for purchase today!!  It has 40 darling dies that would make gorgeous cards, gift tags, banner or toppers for a bag.  In this release there is everything from farm animals to beautiful Navitiy Scenes.   Today, I am using the Holiday Hound Dog.
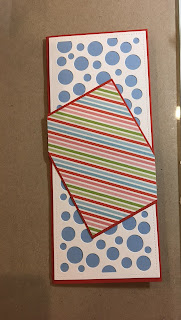
My card was inspired by a fun and playful design by Meghan Kennihan.  I just loved the sketch she created so I had to give it a try.  Thanks for the wonderful idea Meghan.  


Design Steps:
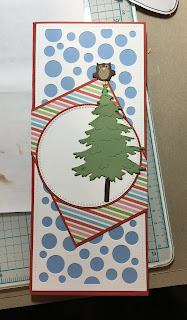
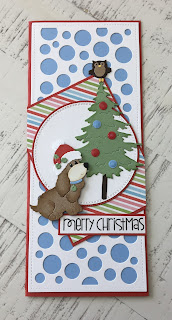
1. Start out with a red slimline card base 8 3/4 x 3 3/4.  Next use the Random Circle Slimline die and cut it out of white card stock.  Cut a piece of blue card stock 8 1/2 x 3 1/2.  Cut a piece of red card stock 3 x 4 1/3 and a piece of striped DP 2 3/4 x 3 3/4.  Glue the blue to the red card front, next glue the white random  circle piece to the blue and last mount the striped DP to the red and glue to the card front at an angle as shown
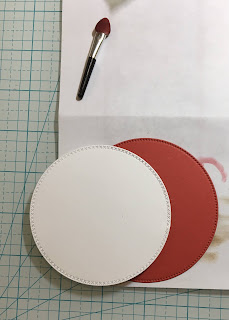
2.  Cut out a white circle using the Crossed Stitched Circle die second from the largest and a red circle cut with the second from the largest Pierced Circle die
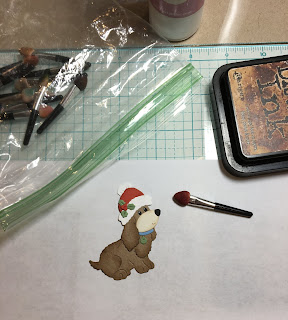
3.  Using the Holiday Hound Dog die cut him out of brown, blue, green, red, black, tan and white.  Shade the dog and assemble

4.  Using the Moose and Tree die cut out the tree in green and the trunk in dark brown.  Assemble and glue to the card front as shown.  The little owl is from the die Snowman w/Woodsy Friends

5.  Pop up the dog using dimensionals add the little bulbs on the tree and coat them with glossy accents.  Add the sentiment and your card is complete

CottageCutz Products


Thanks so much for stopping by and don't forget it is never to let to start on those Christmas cards or even start to shop for our crafty friends!  One more bit of info our YouTube channel is up and running with some wonderful video inspirations check it out HERE.

Blessings and Take Care
Pam