Wednesday, June 26, 2019

Welcome!

Hi Scrapping Cottage Friends!

Our New Release Magical Garden is just perfect for fun projects in the summer months.  There are lots of wonderful whimsical dies and all of them just let your imagination go wild!  They are 25% off in the store right now so please stop at the online store and take a peek.  The card I am showing you today is made with the popular Bridge Fold. Hope you enjoy!


Designer Steps:
 1.  Cut all of the pieces using the Stone Fairy Door.  I used white, green, gray and dark brown card stock plus DP for the door.
 2.  Shade and color your pieces with your favorite inks and markers
 3.  Assemble the door and set aside
 4.  I colored all the little accessory pieces and then assemble them
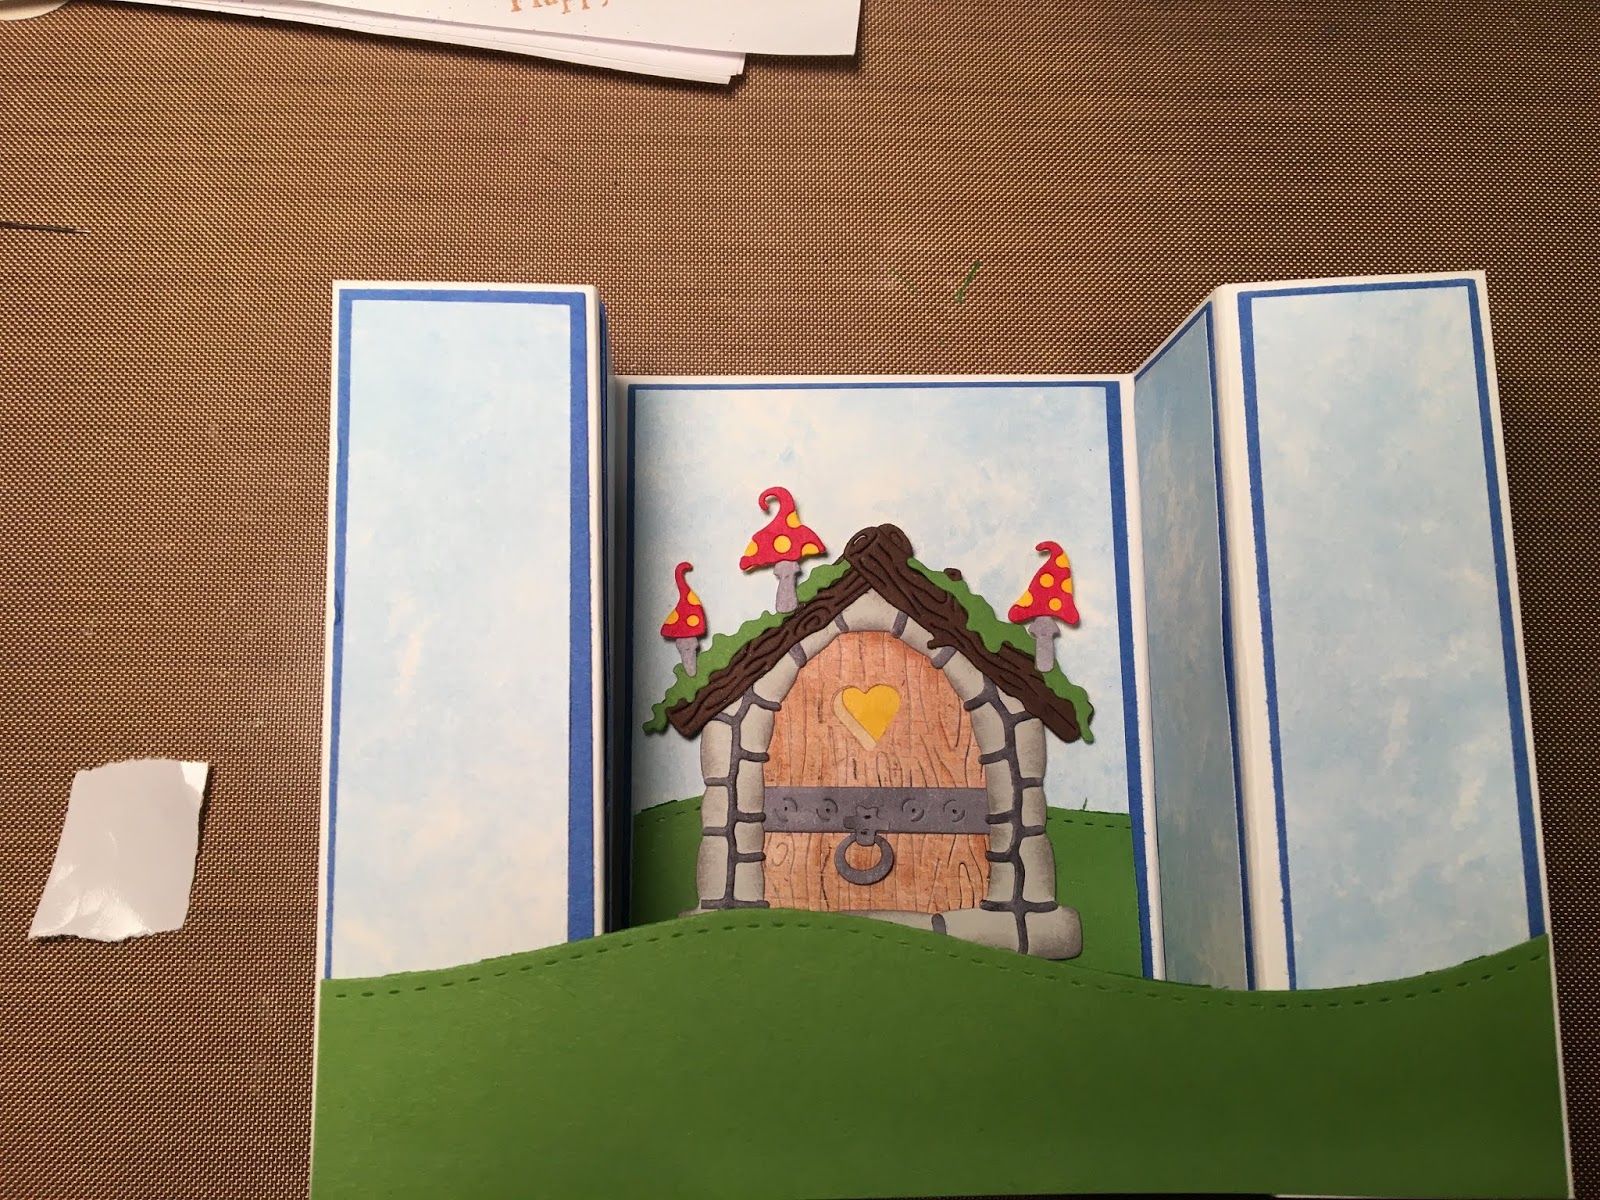
 5.  Glue the mushrooms to the top of the door and the door is complete


6.  To begin the Bridge fold you will need a piece of white card stock 8 x 4 1/4.  Scored at 1 1/4, 2 1/2, 5 1/2, and 6 3/4.
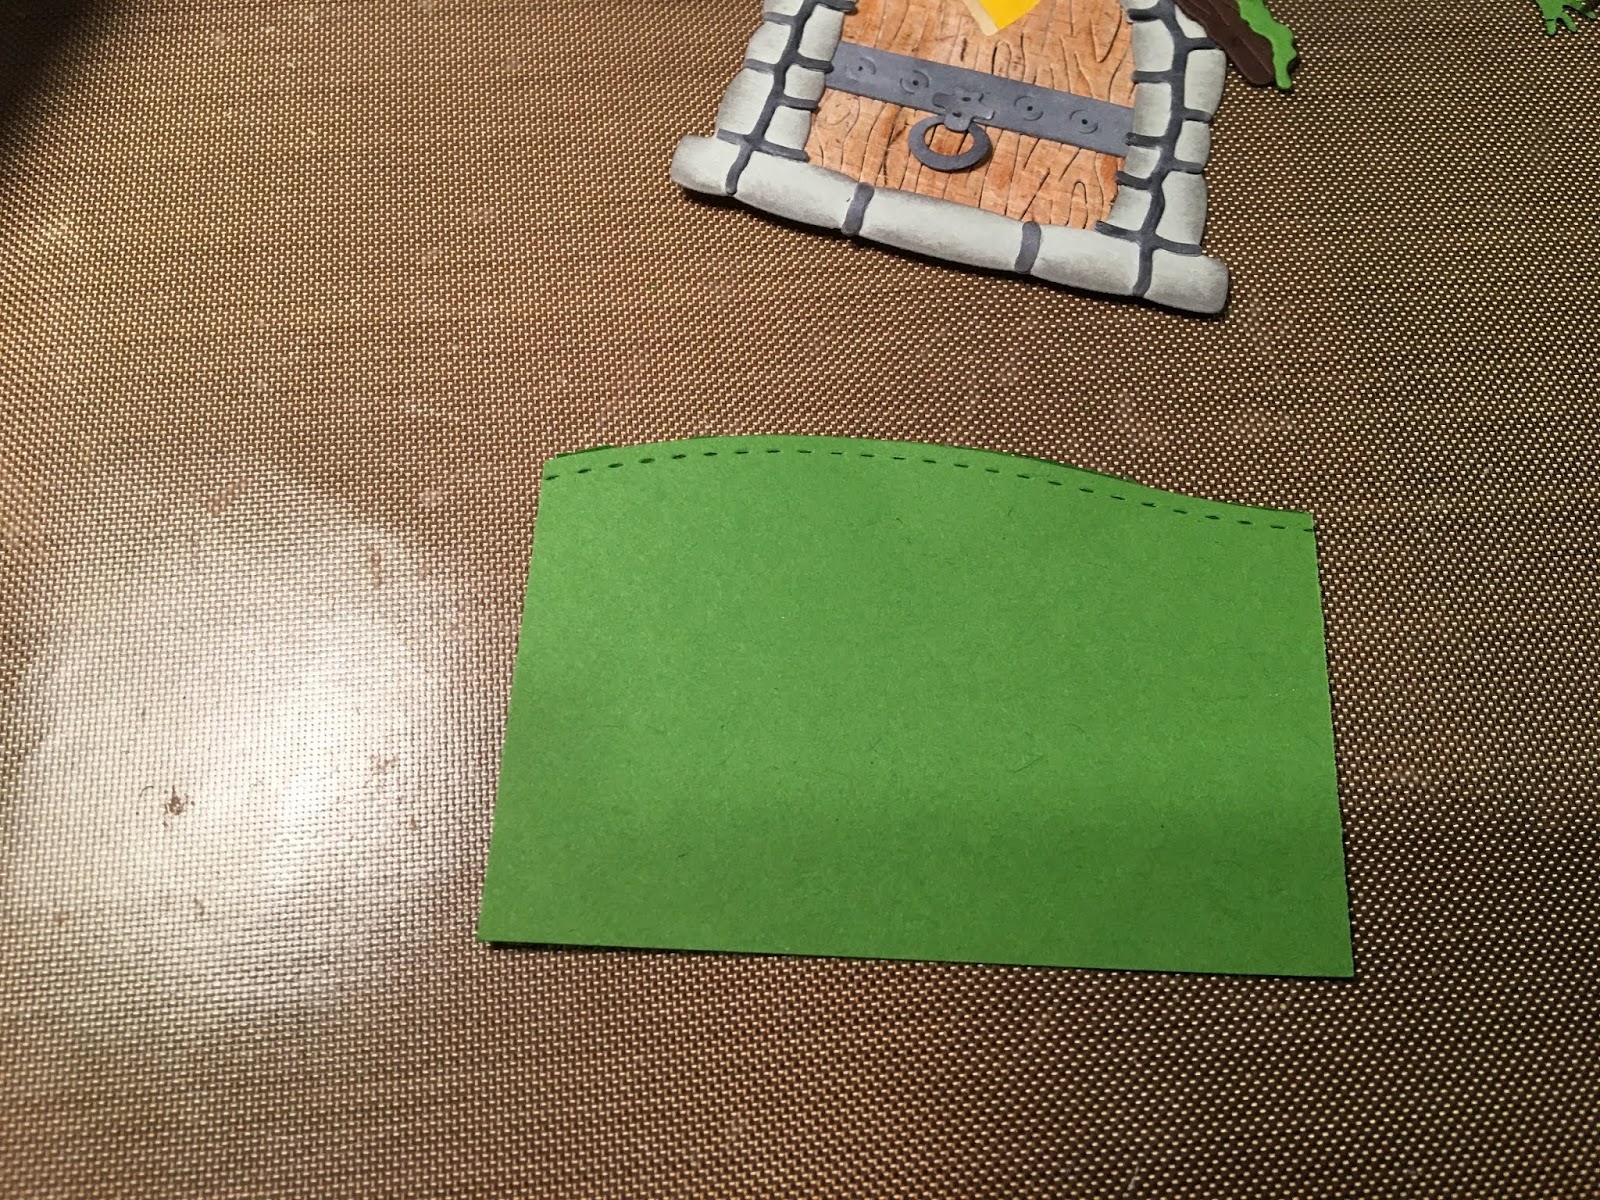
 7.  Cut (4) 1 x 4 strips and (1) 2 3/4 x 4 piece of DP then layer them on blue card stock just slightly bigger then the DP. Cut a green strip of green card stock 1 1/4 x 5 1/2.  Cut the top of it to resemble a rolling hill.

 8.  Glue the strips to the scored white card base
 9. Then fold the front flap on the left in and glue the grass to it.  The right side fold is open and you glue the grass it it.  The glue is only on the front left flap and last right flap
 10.  You should be able to stand the card up at this point
 11.  Cut another piece of green card stock 2 3/4 x 2 1/2 and cut the top to look like a rolling hill.  Glue this piece to the bottom of the middle in the center of the card
 12.  Place dimension tape on the little door and pop it to the middle of the card as shown below
13.  Using the Mushroom Fairy Garden die cut out 2 mushrooms in white and color with you markers
 14.  Add the extra large mushrooms and the mailbox to the small front flaps and then add your sentiment.  Your card is finished
CottageCutz Products

Have a wonderful summer day and thanks for stopping by!
Blessings
Pam


Hidden Door

Hi Friends

CottageCutz has an adorable new release.  I have another samples from that release.  Right now the Magical Garden release is 25% off.  Don't miss out on this sweet, fun group of dies!


Have a wonderful first day of summer!
Blessings
Pam

Friday, June 21, 2019

New Release

Hi Friends

CottageCutz has an adorable new release.  I have two samples from that release.  Right now the Magical Garden release is 25% off.  Don't miss out on this sweet, fun group of dies!


Have a wonderful first day of summer!
Blessings
Pam


Tuesday, June 11, 2019

Knight on Guard!

Hi Everyone,

I have two of the cutest little great nephews. They both just love any kind of action movie that has to do with super heroes! I thought I would take them back a few centuries and give them a super hero from the past.  A knight in shining armor!  This fantastic knight is in our Magical Fantasy collection.  I think I am going to make 2 of these cards. One for each of them because it turned out so cute.


Designer Steps:
1.  Using the Knight die cut out all of the pieces.  I used light gray, flesh, and soft yellow card stock
2.  Before assembling the knight use your makers and ink to shade the knight. Add the blush to the cheeks and black for the eyes.  I used a white gel pen for the white on the eyes
 3. Cut out the Castle using the Fantasy Castle die and black card stock line the back of the castle with soft yellow card stock
 4.  Use an A2 white card base cut out a piece of blue dotted paper 4 1/4 x 4 1/2 and cut a piece of dark green card stock 4 1/4 by 3 for the hill
 5.  Glue the blue dotted paper to the front of the card and then using dimension tape add the green to the bottom
6.  Tuck the castle behind the hill as shown

7.  Pop the knight to the grass as shown above and add the sentiment

8.  For the inside I cut an additional lance and shield then glued them right under the sentiment

CottageCutz Products


Thanks so much for stopping by and please check our amazing new release call the Magical Garden.  It is now available at 25% off!
Blessings 
Pam


Tuesday, June 4, 2019

By the Sea!

Good Morning Everyone!

I live near the beach and in the summer that is the place to be here in South Carolina!  I was already to move cross country as some of you may have read in my earlier post a couple of months ago.  But our house sale fell through so we are still in SC.  It really is a nice place to live!  But the summers are pretty steamy!!  Anyway the beach is what inspired my card today.

Design Steps:

 1.  You will need a white A2 card base, a slightly smaller piece of navy, then a slightly smaller piece then the navy of blue, then a piece of sand card stock 3 3/4 x 5. You will also need a 3 1/4 x 3 1/4 blue square, 3 1/8 x 3 1/8 navy square and a 3 x 3 white square.
 2.  Stamp the sand color card stock with a bunch of splashes using Versa Mark ink
 3.  Glue the blue to the navy then add the sand card stock on top of the blue.  Add the strip of striped navy ribbon using double sided tape

4.  Attach the panel to the front of the card and set aside
 5.  Round the corners of all of the squares.  And on the white square use blue ink spray to create a watery look
6.  Stamp the sentiment with black ink.  I used a positioning took to stamp it twice to get a nice dark black
 7.  Cut out the shells on tan card stock using the Sand Dollar and Trumpet Shell die.  Cut the sea grass using the Spring Meadow die and green card stock.  Use TH vintage ink for the shells and grass then add a little coral ink to the Trumpet Shell
 8.  I then sprayed the shells with some Walnut ink
9.  Glue the layers of square together and add the sea grass first then the shells
 10.  Pop the shell panel to the front of the card
11.  For the inside I added a Scallop Shell which I inked in the corner.  Next layered the sentiment on blue and glued it to the card.  Glue the panel to the inside of the card
CottageCutz Products


Thanks for stopping by and make sure to check out our new release call Magical Garden you won't be disappointed and happy summer!!

Blessings
Pam