Monday, December 27, 2021

Banjo Birthday Bear

 Hello Scrapping Cottage Friends

 I want to wish you all a very Happy New Year filled with good health and many blessings!  

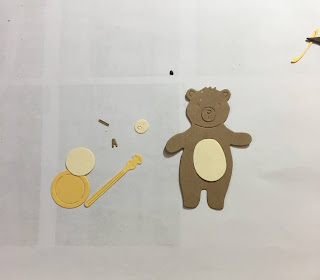
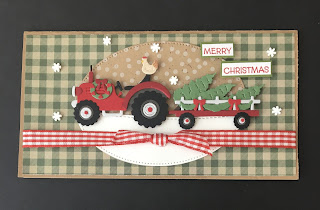
I have a birthday in January.  And he is a very special great nephew!  He will be turning 5 so I am making him this fun and festive card using the Campin Out Bear w/Banjo.  The Camping release can be used for a variety of different cards especially with all of those adorable critters.


Design Steps:

1.  Use the Campin Bear w/Banjo and cut out the pieces using dark brown, brown, tan, yellow, mint green,  and black
2.  Shade and assemble the pieces with a fine tip clear drying glue.  For the cup cake I used Pastry Goodies cut out of mint green and red
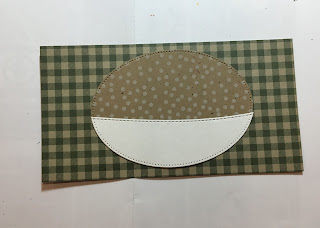
3.  Use a yellow A2 card base, 4 x 5 1/4 piece of Party Hat Dp and a Piece of Music Happy Birthday DP cut 2 3/4 x 4.  I also used a piece of yellow grosgrain ribbon
4.  Glue the Music DP to the bottom of the Party Hat DP.  Add the ribbon to the top of the music paper by taping it to the back.  Then glue the Party Hat panel to the yellow card base
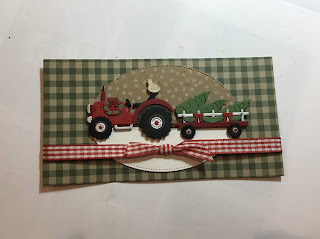
5.  Using the Expressions Happy and Birthday cut them out of red
6.  Place pop dots on the back of the bear and the tree stomp and add them to the front of the card.  Glue the Happy Birthday to the bottom half of the card.  I added a little sparkle to the Happy Birthday and the icing on the cup cake with my Wink of Stella.  Your card is complete

CottageCutz Products


Thanks so much for stopping by!  I hope you have a great New Years Celebrations!

And just to remind you we have a wonderful YouTube Channel for more inspiration.  Check it out HERE

Blessings

Pam


Monday, December 20, 2021

Holy Night

 Hello Scrapping Cottage Friends

I just want to wish you all a Merry Christmas and a very Blessed New Year!  My last Christmas card for the season is featuring the true meaning of Christmas.  I love cards that bring this message to friends and family.  I am using the Nativity Ornament w/Harp.

Design Steps:

1.  Use an A2 white card base, silver 4 1/8 x 5 3/8, snowy DP 4 x 5 1/4 and using the second from the largest Wide Rectangle Frame die cut out 3 grey DP frames then glue them together
2.  Glue the silver to the white card base then glue the blue snowy DP to the silver
3. Using the Nativity Ornament w/Harp die cut it out of the silver paper.  Using a fine tip glue adhere it to the middle of the card as show above
4.  Place dimensional adhesive strips to the back of the frame and then pop it to the card front over the nativity scene as shown
5.  Using the Holy Nativity die cut out just the sentiment 3 times in a lightly striped DP.  Glue them together and then glue to the frame as shown below.  Add the bow and your card is complete

CottageCutz Products

I hope you have a wonderful Christmas filled with fantastic memories and I will see you next Thursday! And just to remind you we have a wonderful YouTube Channel for more inspiration.  Check it out HERE

Blessing and Take Care

Pam


Monday, December 13, 2021

Christmas Tree Tractor

Hello Scrapping Cottage Friends

I have a few more Christmas cards to finish up so I thought I would try a farm themed mini slimline.  The adorable tractor is perfect for this theme and style of card.  The die I am using is called Christmas Tree Farm Tractor.


 Design Steps:

1.  Use the Christmas Tree Farm Tractor die and cut out the pieces using: green, red, dark red, silver black, brown, and tan.  Glue the pieces together using a fine tip clear drying glue
2.  For the mini slimline base use kraft card stock cut 6 1/2 x 6 folded in half measuring 3 1/4 x 6.  Piece of checked green DP 3 1/8 x 5 7/8.  Cut a Pierced Oval using the 3rd from the largest oval out of snow dotted kraft card stock, and a piece of white cut out with the same oval then cut in half with the Hills Slimline 
3.  Glue the kraft oval to the center of the green checked DP and then glue down the half white oval
4.  Pop up the tractor and then add the red checked ribbon.  Glue the checked piece to the kraft card base
5.  Stamp the sentiment and layer onto green card stock.  Pop the sentiment as shown above.  Add the tiny snowflakes and your card is complete

CottageCutz Products


Thanks so much for stopping by!  I hope you are well on the way to finishing your Christmas Cards!  

And just to remind you we have a wonderful YouTube Channel for more inspiration.  Check it out HERE

Blessings

Pam


Sunday, December 5, 2021

Snowman Shaker

 Hello Scrapping Cottage Friends

I have a few more Christmas cards to finish up so I thought I would try a shaker since I bought some really cute little sparkles to put in the shaker window.  I am using the Snowman w/Woodsy Friends for this card.


Design Steps:

1.  Use an A2 white card base and a piece of snowy DP 4 x 5 1/4.  Using the Pierced Wide Rectangle Frame second from the larges cut out 4 in white cards stock.  Glue the snowy DP to the white card base
2.  Glue the 4 frames together sandwiching in a piece of acetate.  Place strip dimensional tape on the back of the window
3.  Above are the different bits and pieces that I placed in the shaker window
4.  Carefully pile up your shaker bits onto the card front and then place the window over the pieces
5.  Using the Snowman w/Woodsy Friends die cut out the pieces in white, green, blue, red, dark brown and black
6.  Assemble the snowman and gifts using a fine tip clear drying glue.  Pop the snowman and gifts to the front of the card as shown below then stamp your sentiment and layer onto red cards stock.  Glue the sentiment as shown below and your card is complete

CottageCutz Products


Thanks so much for stopping by today and I will see you next Thursday!  And just to remind you we have a wonderful YouTube Channel for more inspiration.  Check it out HERE

Blessings
Pam