Hello Scrapping Cottage Friends
I am working with our new release called Winter with 15 snowy fun designs! I decided to use 3 of the dies and made an adorable box card perfect for my friend who loves all the winter activities! I am using Winter Penguin Snowboarding, Winter Hockey Bunny and Winter Bear on Sled.
Here are the design steps for this cute little box card. (For the first few steps I am using kraft card stock so you can see it a little better. Then I will switch back to white)
1. Start with a 5 1/2 x 9 inch piece of white card stock. Score with paper placed horizontally on the scoreboard at 2 1/8, 4 1/4, 6 3/8, and 8 1/2. Then flip card stock vertically on the scoreboard and score at 2 3/4
2. On the top half of the card cut down to the center line and stop. On the bottom half on the 1/2 inch score line make a diagonal cut all the way to the top and remove that piece as shown
3. Silver card stock (2 Pieces) 2 x 5 3/8 glue the mats to the card closest to the 1/2 flap on the front. This piece of the box will not bend
4. Cut the silver card stock for the rest of the box (9 pieces) 2 x 2 5/8. Glue the green mats to the outside of the box as shown below
5. Flip the box over and glue the rest of the Silver card stock to the inside of the box as shown below. The bottom that is not covered is the inside of the box which will not be seen
6. Flip the box over again. Cut one piece with white card stock 1 7/8 x 5 1/4 for the outside of the box and glue down. This is where you will stamp your sentiment and sign your name. You should do your stamping and signing now because it is much easy at this point
7. Flip the box over again and cut one piece of snow designer paper 1 7/8 x 5 1/4 for the inside of the box and glue down. Cut snow designer paper (3 pieces) 1 7/8 x 2 1/2 glue to the inside of the box on top of the silver card stock
8. Flip the box over and cut different red polka dot designer paper (6 pieces) 1 7/8 x 2 1/2 glue to the outside of the box
9. Using a sturdy tape place several pieces of tape to the small flap and close up the box. Make sure that you have the side of all the rectangles covered with designer paper on the outside of the box
10. You can't see the red because it is on the bottom of the box under the flaps. The inside of the box is just white
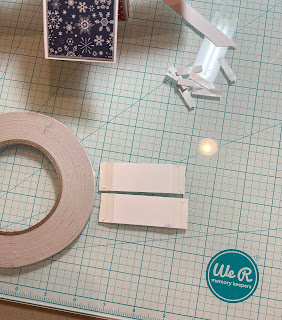
11. Cut (2 pieces) of kraft card stock 3 x 1 score them on each end 1/2. Fold them and add sturdy tape to each folded end as shown below
12. Place the first brace toward the front of the box as show making sure to really press down the tape. Place the second brace about an 1 1/4 behind the first brace as shown
13. Use the following dies to create you snow critters:
Winter Penguin Snowboarding,
Winter Hockey Bunny and
Winter Bear on Sled14. Use
Expressions Let it Snow and the
Hills Slimline for the snowy banks
15. Place the snowy backs into the box card first and then add your critters starting from the back
This box is so much fun to make and it is sure to delight whomever you decide to send it to! I am including a link to a video done by
Sandi MacLver on how to make the box just in case!
CottageCutz Products


And just to remind you we have a wonderful YouTube Channel for more inspiration. Check it out HERE
Blessings
Pam

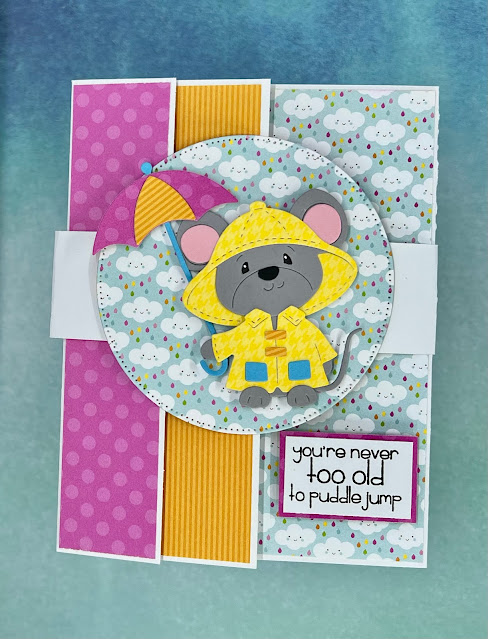
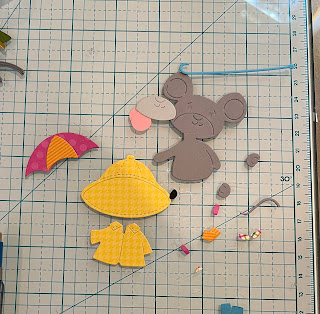
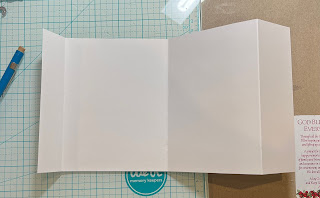
 4. When you close it up it should look like the above picture
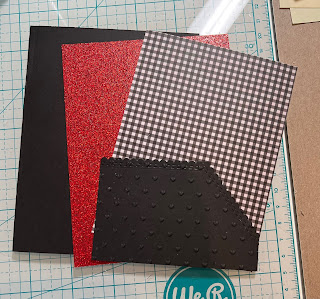
 5. To cover the front cut 2 pink polka dot papers 1 x 5 1/4, cut 1 orange stripe paper 1 1/2 x 5 1/4 and last cut the rain cloud paper 5 1/4 x 3 1/2
 6. Glue the pink to the first flap and then open the first flap and glue the second pink strip under the first pink strip, next flap glue down the orange strip and last open the orange flap and glue down the rainy paper
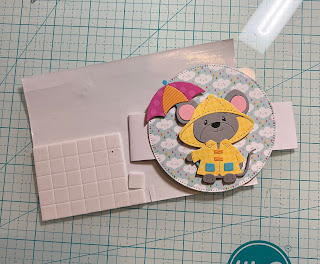
 7. To make the belly band cut a white strip 1 x 11 inches. Wrap the belly band around the card and staple it together. Make sure you don't get it to tight. Use the second from the largest Pierced Circle die to cut out the rainy DP then glue to the center of the belly band