Hello Friends
Guess What!! It is New Release Time! The collection is Christmas Part 2! There are are 19 new designs just as adorable as the Christmas Part 1 release. For a limited time you can save 55% off the entire bundle or 30% off individual dies. You can check all of these fantastic dies out right HERE!
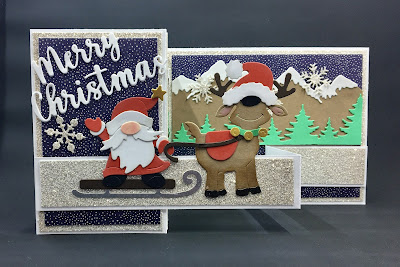
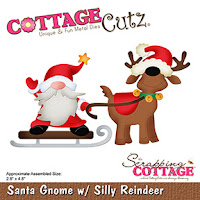
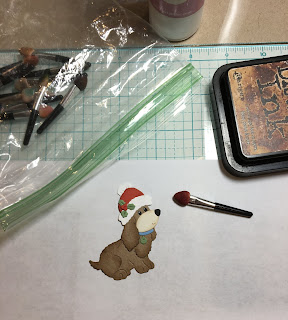
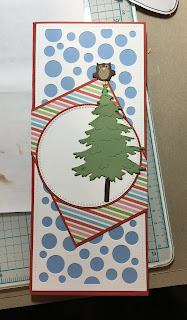
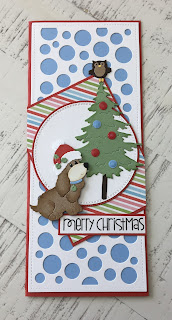
Today my Z-Fold card is using Santa Gnome w/ Silly Reindeer. There are several gnomes in this release and who doesn't love gnomes!!
Design Steps
1. Cut the pieces out using the
Santa Gnome w/Silly Reindeer and red, brown, dark brown, gold, silver, white green, tan and black
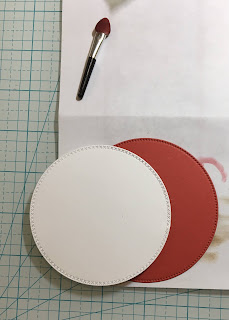
2. Shade the pieces and assemble with a fine tip glue
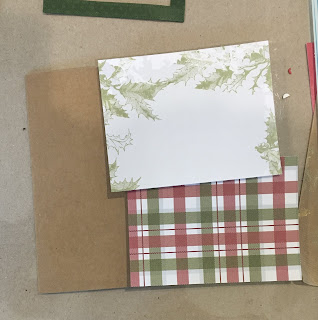
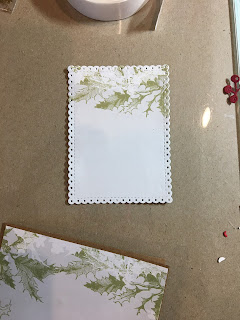
3. For the card base cut white card stock 4 1/4 x 11. Fold in half and then fold the front fold in half again. Cut 2 pieces of silver glitter paper 2 7/8 x 4 1/8 and 2 pieces of navy dotted DP 2 1/2 x 4. Next cut a silver glitter piece 5 1/4 x 4 1/8 and a piece of navy dotted DP 5 x 3 3/4
4. Glue the silver layer down first and then the navy dotted DP down next
5. For the Z- Fold arm cut a piece of white card stock 11 x 1 fold in half. Then fold in half one of the flaps again. Before attaching it to the card front cut silver glitter paper 3/4 x 5 1/4 and two pieces of glitter paper 3/4 x 2 1/2 and glue to the arm. Glue the strip to the card front as shown above and below
6. Using the
Merry Christmas w/Shadow die cut out two in white card stock and glue them together
7. Glue the Merry Christmas to the card front. I decided I needed a little interest in the background. So I used the
Slimline Mountain and Trees die and cut out the snowcapped mountains and the tree line. I then cut them to fit the large background panel and the small side panel. Then glued them down. I glued down the gnome and reindeer on the front arm of the z-fold. I also used the
Snowflake Background Slimline to cut out a few snowflakes glued them down and the card is complete
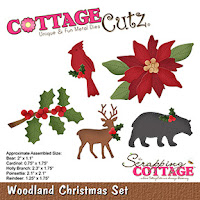
CottageCutz Products
Thanks so much for stopping by and make sure to check out this latest Christmas release. I will see you next Thursday!
Take Care and Blessings
Pam