Tuesday, December 29, 2020

Jungle Birthday

 Hello Scrapping Cottage Friends

I hope you all had a wonderful Christmas.  And I also want to wish you a very Happy New Year! I am getting started on my Birthday cards for 2021!  Luckily I don't have any birthdays in January so that gives me a months head start.  I am using some of the adorable critters from the Safari Release.  Today I used the cute lion and giraffe on this fun birthday card.


Design Steps

1.  Use a piece of kraft card stock as the A2 base, green card stock cut 4 1/8 x 5 3/8, DP cut 3 7/8 x 5 1/8, use the second from the largest Wide Pierced Rectangle Frame Die to cut a green frame and finally a piece of white card stock 2 1/2 x 3 1/2
2.  On the small piece of white card stock sponge in clouds using blue ink and a stencil
3. Glue the green card stock to the kraft card base and then glue down the DP to the green card stock.  Glue the white cloud rectangle to the center of the card.  Place dimension tape to the back of the frame
4.  Center the frame right over the top of the clouds and then pop it down
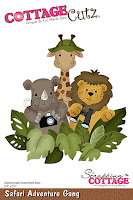
5.  Cut all of the leaves out of 3 shades of green using the Safari Adventure Gang die and the Safari Monkey, cut the pieces for the lion using the Safari Lion die and last cut all the pieces for the giraffe using the Safari Giraffe die.  Assemble the animals using a fine tip glue

6.  Arrange your animals and leaves to create your jungle scene

7.  Stamp the sentiment and then use the Pierced Circle die to cut it out.  Add to your scene and your card is complete

CottageCutz Products


Happy 2021 to everyone and I hope you have a very blessed year!

Pam

Monday, December 21, 2020

Gift Box

 Hi Everyone!

It is Pam sharing on the blog today!

I am giving a few gift cards to friends this year.  So I have created a little box that I can put the gift card in and add a few homemade lemon drop cookies.  This little box is also perfect for any other small gift you may have in mind such as jewelry or candies.  I decorated the box to make it extra special using the Baking Spirits Bright die.


Design Steps:

1.  Using Baking Spirits Bright cut kraft and white card stock.  Glue the white on top of the baking and bright.  I used a little brown ink on the rolling pin
2.  Also cut out all of the little snowmen using white, green, blue, tan, orange and red card stock
3.  Assemble the snowmen using a fine tip glue
4.  You can either buy or create your little box
5. Glue you snowmen to the front and sides of the box
6.  Glue you baking spirits bright to the back of the box. Add your snowflakes and ribbon


CottageCutz Products


Well it is almost the most wonderful season of the year!!  Can't wait to see my family!
Hope you have a few minutes to relax and enjoy creating!

Blessings
Pam


Saturday, December 12, 2020

Holy Nativity

 Good Morning Scrapping Cottage Friends,


Only a few more days until we can celebrate my favorite holiday!  I am all finished making my cards but I thought there is always some surprises last minute. So that is why I thought I would make a few more just in case.   And if I don't use them this year I have a head start for next year!

I am using one of the most beautifully detailed dies today and it is the true meaning of Christmas. The die is The Holy Nativity die.  This is a fancy fold card called Tent Topper.  There is a great tutorial for this card on Splitcoaststamper.  


Design Steps:
1.  White card base 4 1/4 x 8 folded in half.  Copper card stock 4 1/8 x 4, Navy DP 4 x 3 3/4
2.  Glue the Navy DP to the copper card stock then add your white square knotted ribbon.  Glue to the white card base
3.  Use your Holy Nativity die and cut it out using a piece of copper card stock.  Using the same navy DP line the back of the Nativity scene with the DP as shown
4.  Next lay your white card base on you cutting tool our just use a ruler to line up where you are going to place the topper.  Making sure it is just slightly smaller then 5 1/2 so you can use an A2 envelope.  Glue the top in place and your card is complete

I hope you are just about done with your cards!  Now I am on to shopping for family and friends!

Blessings
Pam

Monday, December 7, 2020

Santa Express

Hello Scrapping Cottage Friends

I am continuing to make a few more Christmas cards for friends and family.  Believe it or not I am almost finished.  My family all live back east so I need to get them in the mail very soon.   I am using a few new dies today to create this fun flip/swing card. There is also a cute surprise on the inside!


Design Steps:

1.  Use the Santa Reading to His Reindeer die and cut out all the pieces.  I used mainly Kraft and white card stock then colored the different pieces as needed
2.  Shade the pieces and then assemble with a fine tip glue
3.  Create the base of the flip card.  There are a number of great videos on YouTube to create the base.  Just type in flip card or swing card.  I used designer paper to create the layer of snowflakes and glitter paper for the snow on the bottom.  Glue the DP to the flaps and the snow to the bottom

4.  On the right side I popped up two deer as shown
5.  On the left side I popped up the largest deer and I cut a circle for the center using the snowflake DP and the Cross Stitched Circle die.  I also cut white glitter card stock using the Santa's Express Tag and glued it to the cross stitched circle
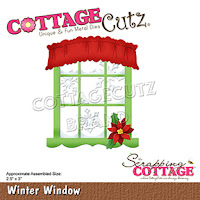
6.  When you flip open the card you will see Santa.  I colored him with copic makeres and nudged him a little off center so the card would flip.  For the Ho Ho Ho I used part of the Hot Cocoa Tag and just cut away the HO cutting it three times. Add a few snowflakes cut from the Winter Window die.  Stamp the Merry Christmas and your card is complete

CottageCutz Products


This was a fun card to create.  I will probably send it off to one of my fellow card makers! Thanks so much for stopping by.  I really appreciate it!

Blessing
Pam


Tuesday, December 1, 2020

Sweet Baby

 Hello Scrapping Cottage Friends

Just for your info we have one more day of our amazing Black Friday Sale.  And believe me you do not want to miss these fantastic prices.  Today, I am using the little baby zebra from our new Safari Release.  And I am really loving how versatile these dies are.  Everything from birthdays to babies!


Designer Steps:

1.  Use a white A2 card base and cut a piece of polka dot card stock 4 x 5 1/4.  Using the Stitched Heart die second from the largest cut out a heart positioned as shown.  Next using the same heart die cut out a piece of star DP.
2.  Stamp the star heart with the word welcome.  Glue the blue polka dot paper to the A2 white card base.  Then fill in the heart with the star DP heart
3.  Next cut out 3 sets of letters using the Stitched Alphabet die.  Stack and glue the letters together with the star DP on the top
4.  Using the Safari Zebra die cut out the animal using grey, white and black card stock
5.  Put together the zebra with glue that has a fine tip for easy and accurate glue placement

6.  Pop the zebra up on the right side of the heart.  Glue the BABY letters below as shown.  Stamp the word sweet in black ink and layer onto blue polka dot designer paper.  Pop it above the word baby.  Last I added a little banner using the Spooky Camper die.  I cut it in white and colored with Copics and finally added two rhinestones to the bows


CottageCutz Products


Just for you info our great Black Friday sale is going on until December 4th!  These dies are a must for any card maker or scrapbooker on your shopping list.  So don't miss out on these awesome prices. And don't forget to treat yourself!


Blessings
Pam