Showing posts with label Pierced Oval die. Show all posts

Sunday, February 19, 2023

Happy St. Patrick's Day Pup

 Hello Scrapping Cottage Friends,

We have a huge Presidents Sale going on in the store right now!  It end this Friday midnight EST time.  You can save as much as 70% on some of the items.  It is a great time to stock up and cross off some of those dies on your wish list!! Check it out HERE.  

Today,  I am using 3 of the dies that are currently on SALE!  The Shamrock and Valentine Scottie, Pierced Oval Set,  and Spring Meadow.


Designer Steps:

1.  Use the Shamrock & Valentine Scottie die and cut the following colors of card stock: light gray, gray, green, light green, yellow, brown and black. Not pictured is the grass cut with the Spring Meadow die on green card stock

2. Ink the edges of the pieces with matching inks.  Assemble the pieces with a quick drying glue

3.  For the card base use an A2 cream card stock
  • Cut light green card stock 4 x 5 1/4
  • Cut cream card stock 5 x 3 3/4 and use the second from the largest Pierced Oval to cut the oval out of the center
  • For the oval backing cut a piece of cream card stock 4 7/8 x 3 5/8 
4.  On the 4 7/8 x 3 5/8 piece ink the bottom half with green
5.  Glue the cream inked card stock to the light green card stock.  Glue the pieces of grass as shown.  Use dimension tape on the back of the cream card stock with the cut out oval. Then pop it over the grass
6.  Glue the pup to the center of the grass
7.  I added 3 four leaf clovers to the edge of the card.  To give the clovers dimension I used a stylus, white ink pen for the little veins and to soften the white I went over it with my YG03 Copic maker.  I inked the edges of the leaves with a darker green ink.  I also decided to change up the sentiment to make it pop a little more.  Your card is complete

CottageCutz Products


Stop by the store today and save!!! 


We have more inspiration on our YouTube Channel check it out HERE

Thanks so much for stopping by!  And I will see you next Thursday.

Blessings and Take Care


Saturday, July 9, 2022

Daisy Birthday Wishes

Hello Scrapping Cottage Friends, 

We have a new release and it is just plain adorable.  It is called Strawberries and Bees perfect for those fun summertime cards. There are 16 designs in this new collection and you can get the individual dies for 30% off right now! This sale will not last so shop today to get the incredible savings.

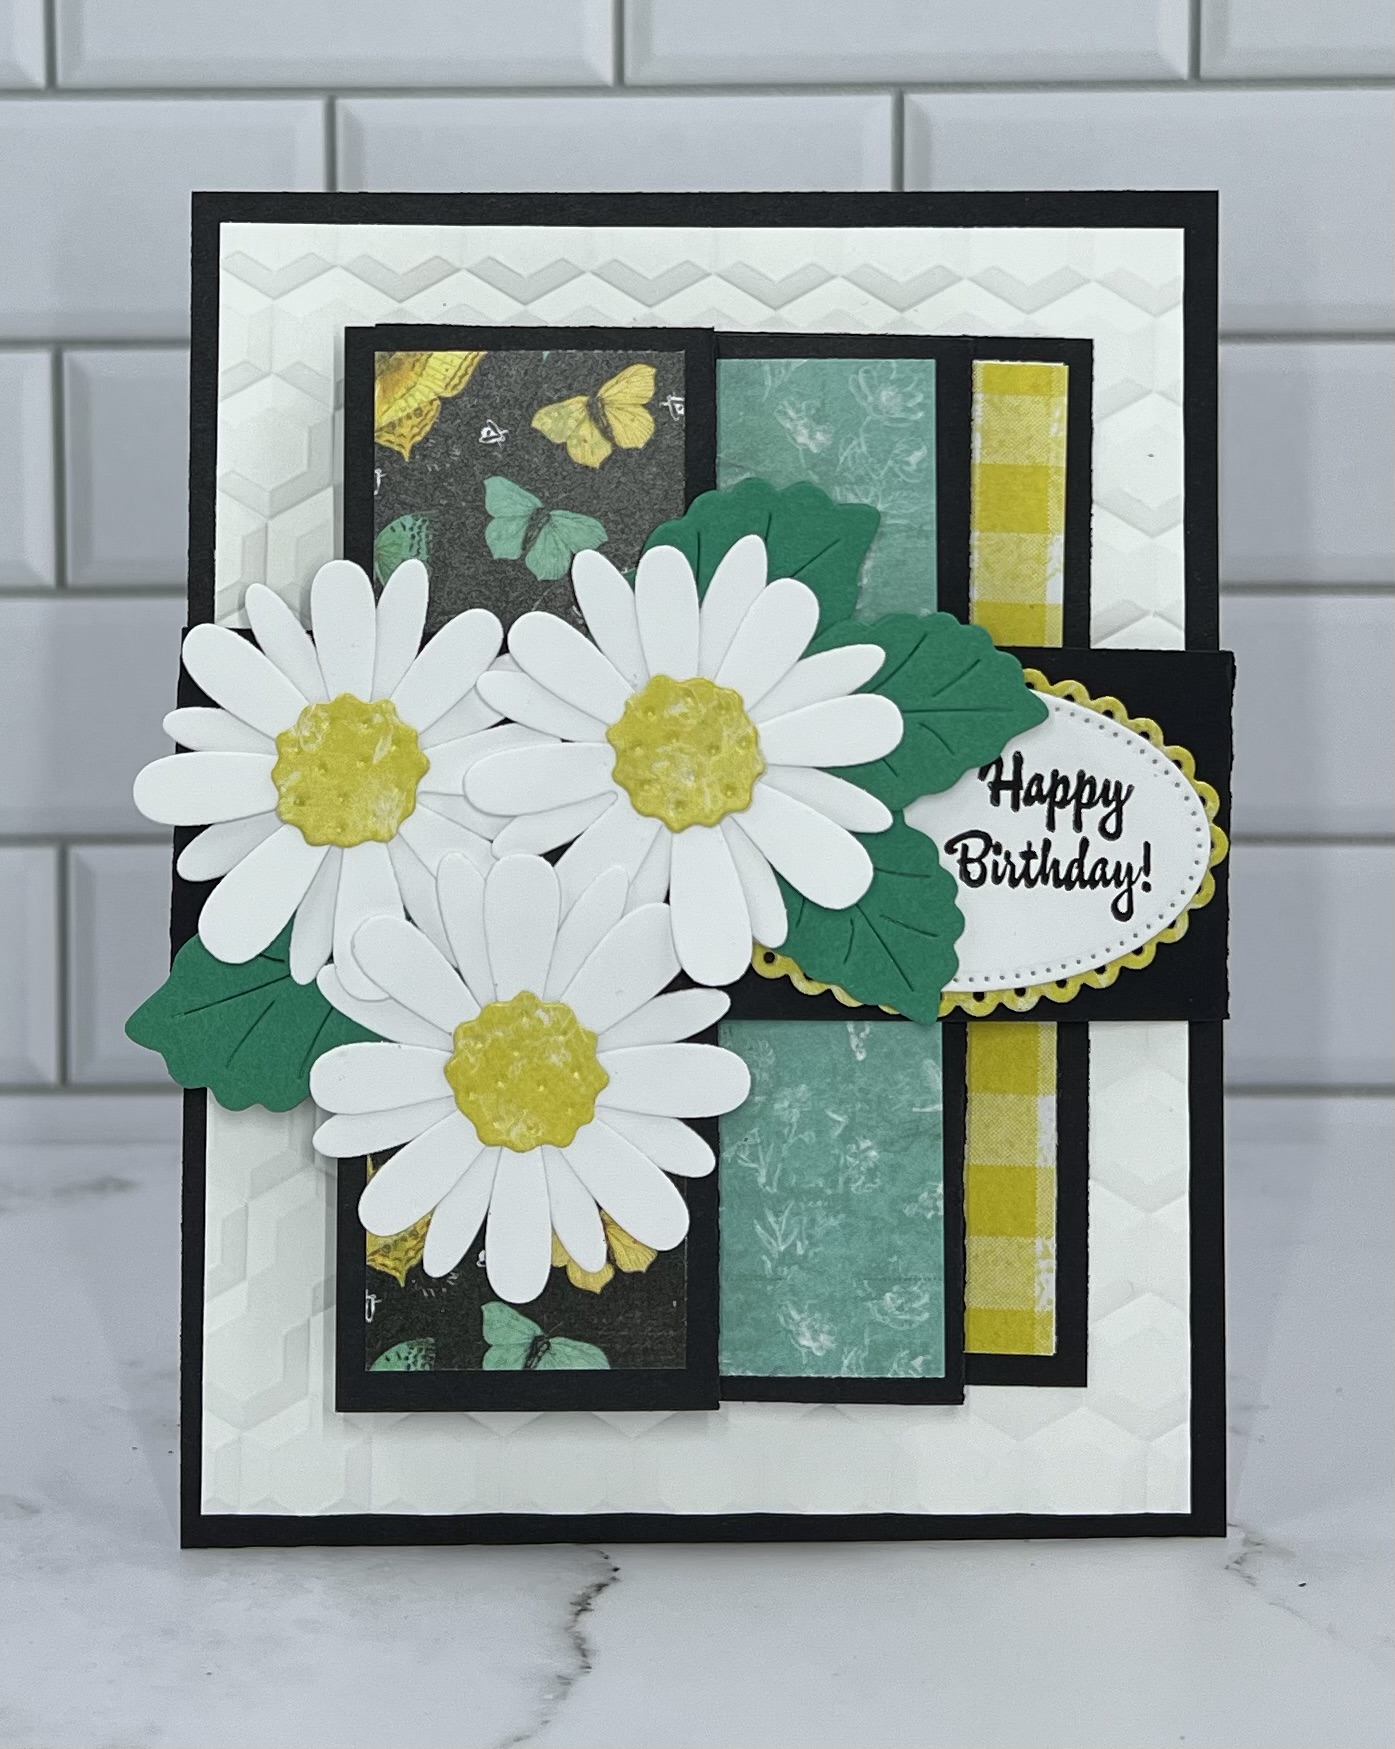
Here is my card for today using the new release die Flowers and a fancy fold.  The idea for the fancy fold design is from Sharon Hashimoto Burkert.  I just loved her card so I had to give it a try.


Design Steps:

1.  For the fancy fold part of the card use a piece of black card stock 4 1/4" x 11" scored at 3", 5 1/2", 8", 9 1/2"
2.  The base of the card is a piece of black card stock 4 1/4" x 5 1/2" and white card stock embossed with a honey comb 4" x 5 1/4".  The decorative pieces for the fancy fold are as follows: two pieces cut at 1 1/4" x 4" (black checked and butterfly paper) one at 2 1/4" x 4" (teal flower paper) one at 1/2" x 4" (yellow checked) and white cut at 2 1/4" x 4" and 2 3/4" x 4".  The belly band is black 1 1/2" x 9 1/2"
3.  Glue the white honey comb card stock to the black base, glue the butterfly paper to the first flap, next is the black checked DP, 3rd panel is the teal flower DP, next two panels are the white and finally next to the white on the last panel add the strip of yellow checked DP

4.  Fold your fancy fold piece and glue it to the card base and then place the belly band around the card and glue the band together

5.  Using the Flowers die cut out 3 of the Daisies in white, 3 centers in yellow, and 4 leaves in green.  Assemble the flowers using a fine tip glue.  Using the 2nd from the smallest Scalloped Oval cut it out in yellow.  Using the 2nd from the smallest Pierced Oval cut it out in white.  Stamp the right side of the white oval with Happy Birthday and then glue to the yellow oval

6.  Place your belly band around the card and glue down the sentiment oval to the right on the band.  Glue one of the flowers just below the belly band and the other two flowers on the belly band as shown in the pictures above and below.  Stamp the inside of your card and it is complete

CottageCutz Products


Here is the new release so please check it out in our store today!!

We have more inspiration on our YouTube Channel check it out HERE
Thanks so much for stopping by!  And I will see you next Thursday.

Blessings and Take Care


Sunday, September 19, 2021

Llama Love

 Hello Scrapping Cottage Friends

Today, I am making a fun little card that is sure to bring a smile!  I am using the Lil' Bluebird Llama Love stamp set.  The dies and stamps are still at a 25% savings so hop on over to the store and check them out!

Design Steps:

1.  Stamp your images using Memento Black ink and the Llama Love stamp set.  Color the images with copics.  The copics I used are in the picture above
2.  Use the coordinating die set to cut out the images
3.  Use an A2 white card base and a piece of white card stock cut to 4 x 5 1/4.  I used the second from the largest Pierced Oval die to cut the oval from the center of the piece of white card stock.  Then I ran it through an embossing folder.  Next I used a blue ink and blending brush to create the sky behine the oval
4.  Take the embossed piece of card stock and place dimension tape on the back
5.  Place the embossed piece onto the A2 white card base and then glue down the llama as shown
6.  Glue down he remaining stamped images and then stamp your sentiment and glue it between the cactus and basket of flowers and your card is complete

Lil' Bluebird Stamps and Cottagecutz Dies


Thanks so much for stopping by today and don't forget the stamps and dies are still at a wonderful savings of 25% off!  They make great Christmas gifts for all of your crafty friends.  So check them out HERE!

Take Care and Blessings
See you next Thursday
Pam


Monday, May 17, 2021

Love My Cat

 Hello Scrapping Cottage Friends

As I was telling you a couple of Thursdays ago I have a lot of spring and summer birthdays.  My sister and I both have July birthdays.  She is such an animal lover.  She lives in a very rural area so she is constantly feeding any little critter that comes in her yard especially during the cold winter days.  She also has a way of picking up stray or ferral cats.  She has quite a family of both indoor and outdoor cats and she dearly loves them all! So the card I am making today is for her birthday.


Design Steps:
1.  Use a slimline kraft card base, use your Nested Rectangle Slimline dies to create your red layer,  then cut a piece of plaid DP  5 2/4 x 3 1/8 and a piece of cat name DP 3 1/8 x 3.  Cut out your cat using the Cat w/a Spring Bird
2.  Shade your cat using a brown ink and small applicator then assemble it with a fine tip glue.  Ink in the eyes with a Sukura Black Glaze pen and then dot it with Sukura White Gelly Roll pen
3.  Glue the two different DP to the red card stock as shown.  Add a knotted ribbon where the two DP meet and glue to the kraft card base
4.  Using your Pierced Oval 4th from the largest cut out a dark brown oval.  Glue the oval to the card as shown.  Next place pop dots to the back of the cat and pop it to the center of the oval
5.  Using the Love My Dog, Love My Cat die cut out 3 Love My in dark brown and glue them together,  cut out 3 red and dark brown hearts with paws and place pop dots on the back of them
6.  Glue the Love My to the top of the card and add the little paw hearts as shown and your card is complete
CottageCutz Products


Thanks so much for stopping by today!  I hope you have time to get crafty and stop in our store to look at all of the wonderful dies we have just waiting for you!

Blessings and Take Care
Pam


Wednesday, May 27, 2020

A Little Birdie Told Me!

Hello Scrapping Cottage Friends!


Just for your information this is the last day for the Memorial Day sale!!  You can save up to 70% off on most of the dies and the new Gardening release is 25% off.  You don't want to miss this money saving sale!

Today I am using the Tomte.  He has many different looks and little tools you can use with him.  I think is is just adorable!

Background Photo by Lukasz Szmigiel on Unsplash

Design Steps:


1.  Cut all of the pieces using the Flower Power Tomte die.  I used yellow, green, blue and white card stock
2.  Using a variety of inks shade the pieces and then assemble using a fine tip glue
3.  Use an A2 white card base cut a piece of green 4 x 5 1/4 and DP 3 3/4 x 5.  Use the 4th from the largest Pierced Oval die to cut out a white oval.  Use the 2nd from the largest Stitched Scallop Oval die to cut out a green oval
4.  With the pieced oval die in place shade in the opening with a light blue.  Also stamp your sentiment on yellow and layer onto green
5.  Glue the DP to the green card stock then add the ribbon tying a knot in the center.  I use a glue dot to keep the knot in place
6.  Glue the ribbon panel to the front of the A2 white card base.  Add the green oval and then the shaded blue oval
7.  Place pop dots to the back of the little Tomte and add him to the oval on the front
8.  For the inside I used the Happy expressions die to cut out a yellow and green happy. Glued them together slightly off center then placed inside card.  Add the Birthday sentiment and the strip of DP to the bottom with the little flowers.  To finish I added some rhinestones to the front and inside

CottageCutz Products


I appreciate you stopping by today!  It was so much fun creating this card. I hope you are able to take sometime for yourself today!  And don't forget the awesome sale!

Blessings and see you next time!
Pam