Showing posts with label Nested Stitched Scallop Rectangle. Show all posts

Monday, June 16, 2025

Happily Ever After

Hi Friends,

I am making a card for a couple who are celebrating their 60th wedding anniversary!  The bride carried Lillies of the Valley in her bouquet.  So I thought I would incorporate them into their card.  The stamp I am using is called Lilly of the Valley Flower and comes with a matching die.


Design Steps:

1.  Use an A2 white card base,  cut a blue piece of card stock 4 1/8 x 5 3/8, cut polka dot DP 4 x 5 1/4, cut the checked DP 3 1/2 x 5
2.  Stamp your flower using Memento Black ink and color with copic markers.  Use the 3rd from the largest Pierced Retangle die and cut it out.  Use the 2nd from the largest Stitched Scalloped Rectange die and cut out a piece of the blue card stock.  Glue the flower image to the scalloped blue retangle as shown above
3.  Glue the polka dot DP to the solid blue card stock and then on top of the polka dot DP glue down the checked DP.  Cut a piece of ribbon and take the two ends and tie a square knot.  On the opposite side of the knot cut the ribbon in half.  Then tape it to the back of the card as shown above.  This trick makes the ribbon lay really flat
4.  Flip the card over and trim up the ribbon edges.  Glue this to the white card base
5.  Use dimension dots and pop up the flower just above the ribbon.  Stamp your sentiment and layer it onto blue card stock then add to the card.  Your card is complete

And Stamp Used


Thanks so much for stopping by! 

Blessings and Take Care


Sunday, June 12, 2022

Happy 4th of July

 Hello Friends

I make a few 4th of July cards for friends and family so I thought I would get a little head start.  Even though time just seems to fly!   I think this release is perfect for the old red, white and blue!!

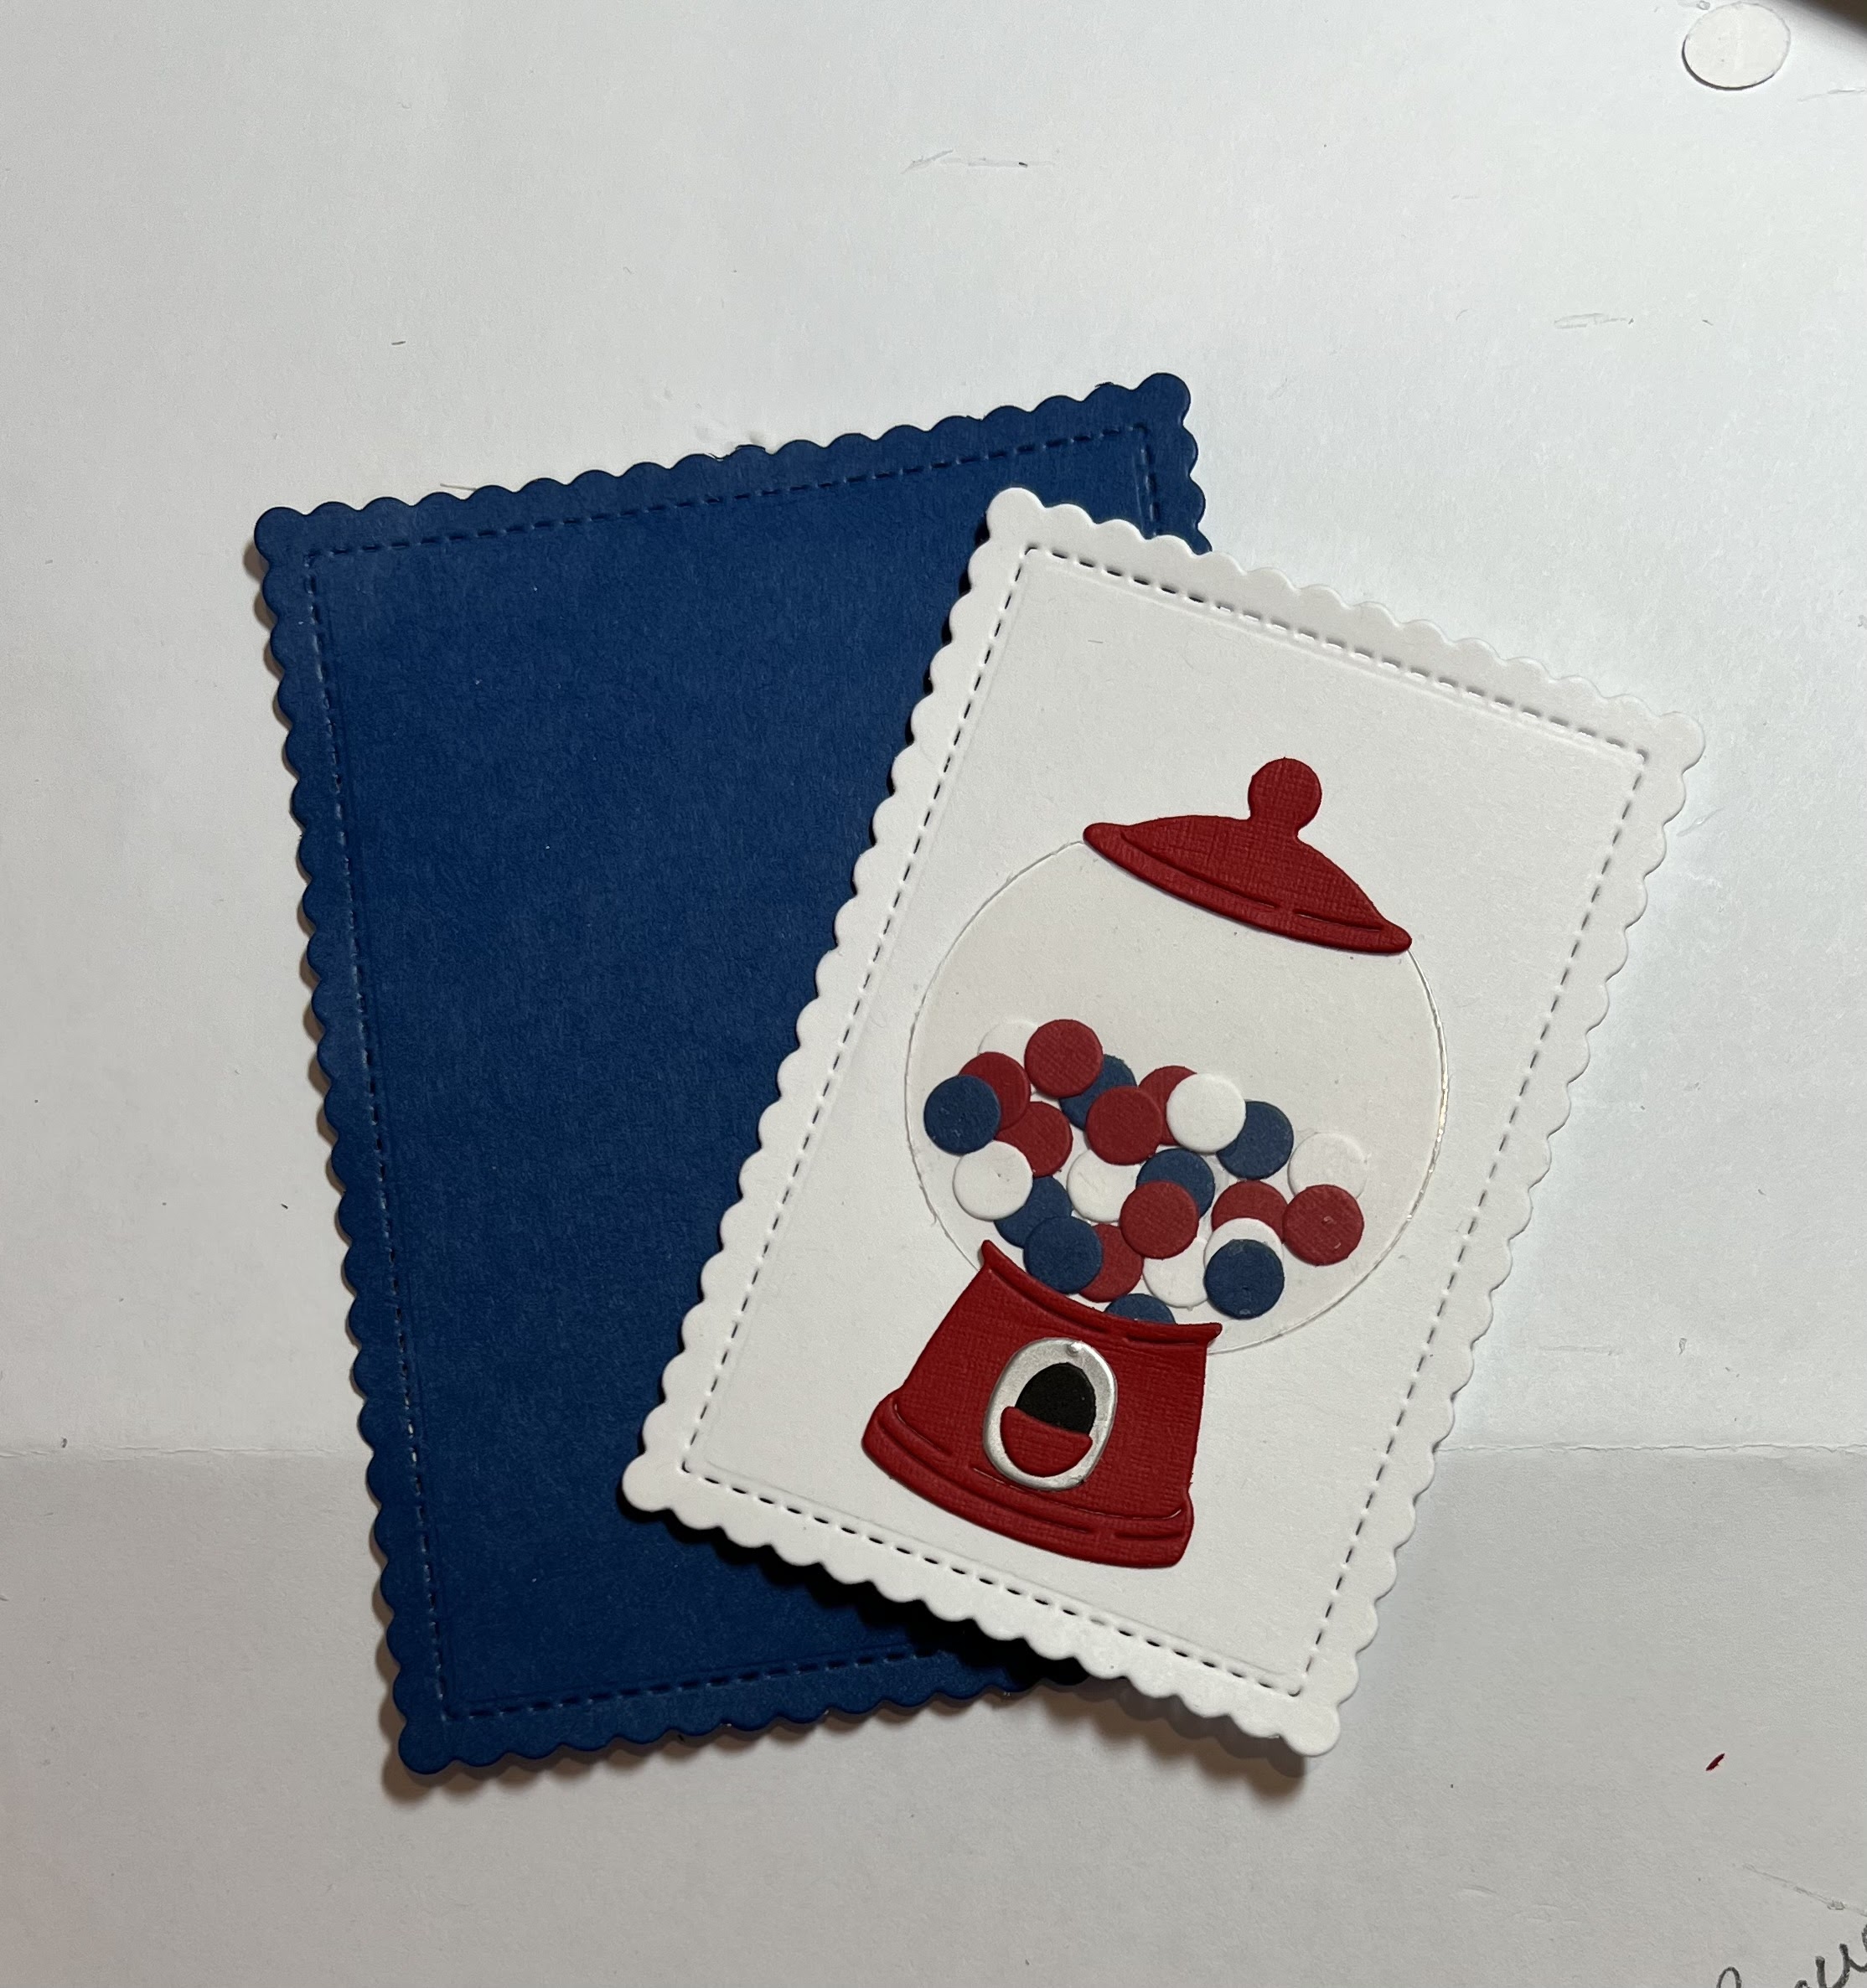
I am using the Candy and Gumballs die to create this little mini slimline card. (I did get a little glare off of the ascetate that I used for the glass.)


Design Steps:

1.  Use the Candy and Gumball die and cut: red, white, blue, silver, acetate and black.  Next use the Scallop  Rectangle die third from the largest and cut white card stock.  Use the second from the largest Scallop  Rectangle die and cut out a blue rectangle
2.  Assemble the Gumball machine on the white rectangle using a fine tip glue (careful not to get the glue on the acetate.) 
3.  Card base is white card stock 3 1/4 x 6 1/4.  Red is 3 1/8 x 6 1/8 and the DP is 3 x 6.  Glue the red to the base and then add the DP
4.  Glue the blue rectangle flat to the card. Add the white rectangle using dimension tape.  Stamp the sentiment on blue and emboss in white then layer onto red card stock. Add dimension tape to the sentiment and adhere to the front as shown below.  Add a few stars and your card is complete

CottageCutz Productions


We have more inspiration on our YouTube Channel check it out HERE
Thanks so much for stopping by!  And I will see you next Thursday.

Blessings and Take Care


Sunday, July 11, 2021

Rose Anniversary Card

Hello Scrapping Cottage Friends

We have a HUGE SLIMLINE DIE RELEASE with 20 fantastic dies.  The dies are at a savings of 25% off right now in the store.  The new designs are just so amazing.  They are sure to put your imagination into overdrive!!  Check them out right HERE.

I wanted to make a beautiful, classy Anniversary card for a friend so I decided to use our new Rose Background Slimline.  It is hard to see in the photo but I used a red foil paper for the background behind the die and it is so shiny and pretty.  It also came together very quickly!


Designer Steps:

1.  Using the Expression Happy and the Expressions Anniversary cut out the dies one time on the red foil and 2 additional times in black.  Glue them all together placing the red one on top
3.  Use a black slimline for the card base.  Cut a piece of red foil 3 1/2 x 8 1/2.  Use the Rose Background Slimline die and cut it out of black card stock.  Also using the second from the smallest Scalloped Stitched Retangle die cut out a small black rectangle
4.  Glue Happy Anniversary to the scalloped rectangle
5.  Glue the red foil panel to the front of the black slimline card base.  Then glue the rose die cut piece to the red foil as shown above.  Pop up the Happy Anniversary rectangle and add the bow.  Your card is complete

CottageCutz Products


Thanks so much for stopping by.  Please take sometime and check out the new dies so many of them make wonderful fast background for your slimline cards.

Blessings and Take Care
Pam


Monday, February 8, 2021

Love Train

 Hi To All My Crafty Friends!

I don't know if you all are old enough to remember the song Love Train By the O'Jays.  It was an R&B hit back in 1972!  Now I am really dating myself! Anyway it is now playing in my head and that was the inpiration for this fun Valentine card.


Design Steps:

1.  Using the Circus Train die cut out the pieces on silver, white and black card stock. The little window and headlight I cut in white then colored with an C1 copic marker.  Next use the Be My Valentine Puppy die and cut out the pink and red hearts several times.  Turn the cage car over and glue down the hearts, add hearts to the wheels and car tops as shown
2.  For the base use a white A2 card, heart DP 4 x 5 1/4 and cut a white retangle using the second from the largest Stitched Scallop Rectangle die
3.  Glue the heart paper to the white card base then center and glue down the rectangle
4.  Pop up the train using dimensional dots or tape
5.  Add the sentiment layered on red card stock and finally add the sequins

6.  I decided to decorate the inside with some leftover paper and a little pink heart and your card is complete

CottageCutz Products


I hope you enjoyed this little trip back in time and I will see you next Thursday!  Remember to check out all of the wonderful dies in our online store HERE!

Blessing and Take Care
Pam


Monday, January 25, 2021

Galloping By!

 Hello Scrapping Cottage Friends

I just love horses and so do many people especially little girls.  I could not resist making a card that showcased this beautiful Circus Pony.  I decided to use Valentine colors so that this could either be a February birthday, a Valentine or just a Hello.  


Design Steps:

1.  Use an A2 cream card base, silver card stock 4 1/8 x 5 3/8, and striped red DP 4 x 5 1/4.  Using the Stitched Scallop Rectangle die cut a silver rectangle using the second for the largest die and a cream colored rectangle using the third from the largest die
2.  Using a variety of card stock colors, as shown above,  and the Prancing Pony die cut out the Pony.  Shade the pony using a few different shades of ink then assemble the pony using a fine tip glue
3.  Prepare the base by adhereing the silver card stock to the card base, next add the striped DP.  Add pop dots to the back of the silver rectangle and stick to the striped DP.  Last add the cream colored rectangle to the center of the silver rectangle
4.  Use pop dots to place the pony and then stamp and layer the sentiment and glue flat.  You card is complete and ready for a number of different occasions 

CottageCutz Products
I want to thank you for stopping by today!  We have so many fantastic dies in the store make sure to check them out by clicking HERE!

Blessings and Take Care
Pam


Tuesday, December 10, 2019

Polar Bear Fishing!

Hi Everyone!

We are less then 2 weeks from Christmas and I am finishing up a few more cards.  I have mailed most of my cards out because they go cross country!!  As soon as I finish up a few things we pack up and head up to Ohio for Christmas.  We spend most of our Christmases there because my brother and sister still live in my home state.  I have one other sister who lives in New York and I am hoping she will make it down to Ohio for our celebration!

Today,  I am continuing to use our little critters from the Arctic Animals release.  They can be used in so many different ways.
Design Steps:

 1.  Cut all of the pieces out of white card stock using Polar Bear Fishing die
2.  Color the pieces using your favorite markers.  I used my Copics
3.  Assemble the pieces using a fine tip quick dry glue such as Combo
4.  Place dimension square on the back or you can use dimension tape also
5.  Using the Nested Stitched Scallop Rectangle die (the largest one) cut out a piece of glitter blue card stock and a piece of water DP 3 x 4

6.  Glue the water DP to the glitter rectangle and then pop on the fishing polar bear
7.  For the base use a white A2 piece of heavy card stock and cut a piece of snowy DP just slightly smaller then the base.  Add the scalloped rectangle with the polar bear plus your sentiment and your card is complete
CottageCutz Products


I hope you are enjoying the days before Christmas and not letting it get to stressful.  Remember crafting is a wonderful way to relax!!

Blessings
Pam