Showing posts with label Circle Set. Show all posts

Saturday, June 1, 2024

By the Sea

 Hello Friends

As summer approaches I really enjoy making cards for the season.  Although it is pretty hot in Arizona the humidity is low.  The card I made for today reminds me of the time we lived in South Carolina close to Hilton Head Island.  It was beautiful but the humidity in the summer was killer!!  I thought this would make a great Father's Day, retirement or birthday card for anyone who loves the ocean.  I am featuring the Lighthouse and Happy Dolphin dies today.

                        Background Photo by FreePiks

Designer Steps:

1.  White A2 card base, 5 3/8 x 4 1/8 white wood DP, 5 1/4 x 4 blue wood DP, Circle cut with the largest Circle die set .  Ink all the edges with TH Vintage Photo ink except the circle
2.  Glue the white wood DP to the card base and then glue the blue wood DP onto the white wood as shown above


3.  Using the largest Pierced Wide Circle Frame die cut out 3 in dark gray then glue together.  Use VersaMark ink in random areas then sprinkle with a cooper embossing powder
4.  Heat set the embossing powder.  Use a small hole punch or piercing tool and punch 8 small holes. Add small pewter brads as shown above
5.  Use the following dies Lighthouse, Happy Dolphin, Scallop Shell, and Aloha & Ukulele: Cut the following colors of card stock dark gray (dolphin), red, wood DP, sand DP (lighthouse), rust and cream (starfish not pictured), light blue (Scalloped Shell not pictured)
6.  Glue the sand to the bottom of the circle and then glue to the port hole.  Add the lighthouse as shown
7.  Before gluing to the card base place a small piece of cheese cloth toward the top of the card.  (I dyed the cheese cloth with TH Vintage ink). Add the dolphins, the shell and starfish.  Stamp your sentiment and your card is complete


Thanks so much for stopping by! 

Blessings and Take Care


Sunday, October 9, 2022

Halloween Treat Box

 Hello Scrapping Cottage Friends

We have a brand new release just in time for all of those amazing Halloween cards everyone makes!! The collection has 22 fabulous dies that are going to make those scrapbook layouts and cards look SPOOKTACULAR!!!  The dies are currently on sale so make sure you get them while they last at this special introductory offer!!

Today, I am using the Witchy Ghost.  It sits perfectly on top of the tiny treat box.  I also used the Web and a spider from the Jack-O-Lanter Witch.  I think this cute little box will be perfect for a teacher's gift or some special Trick or Treaters!

Design Steps:

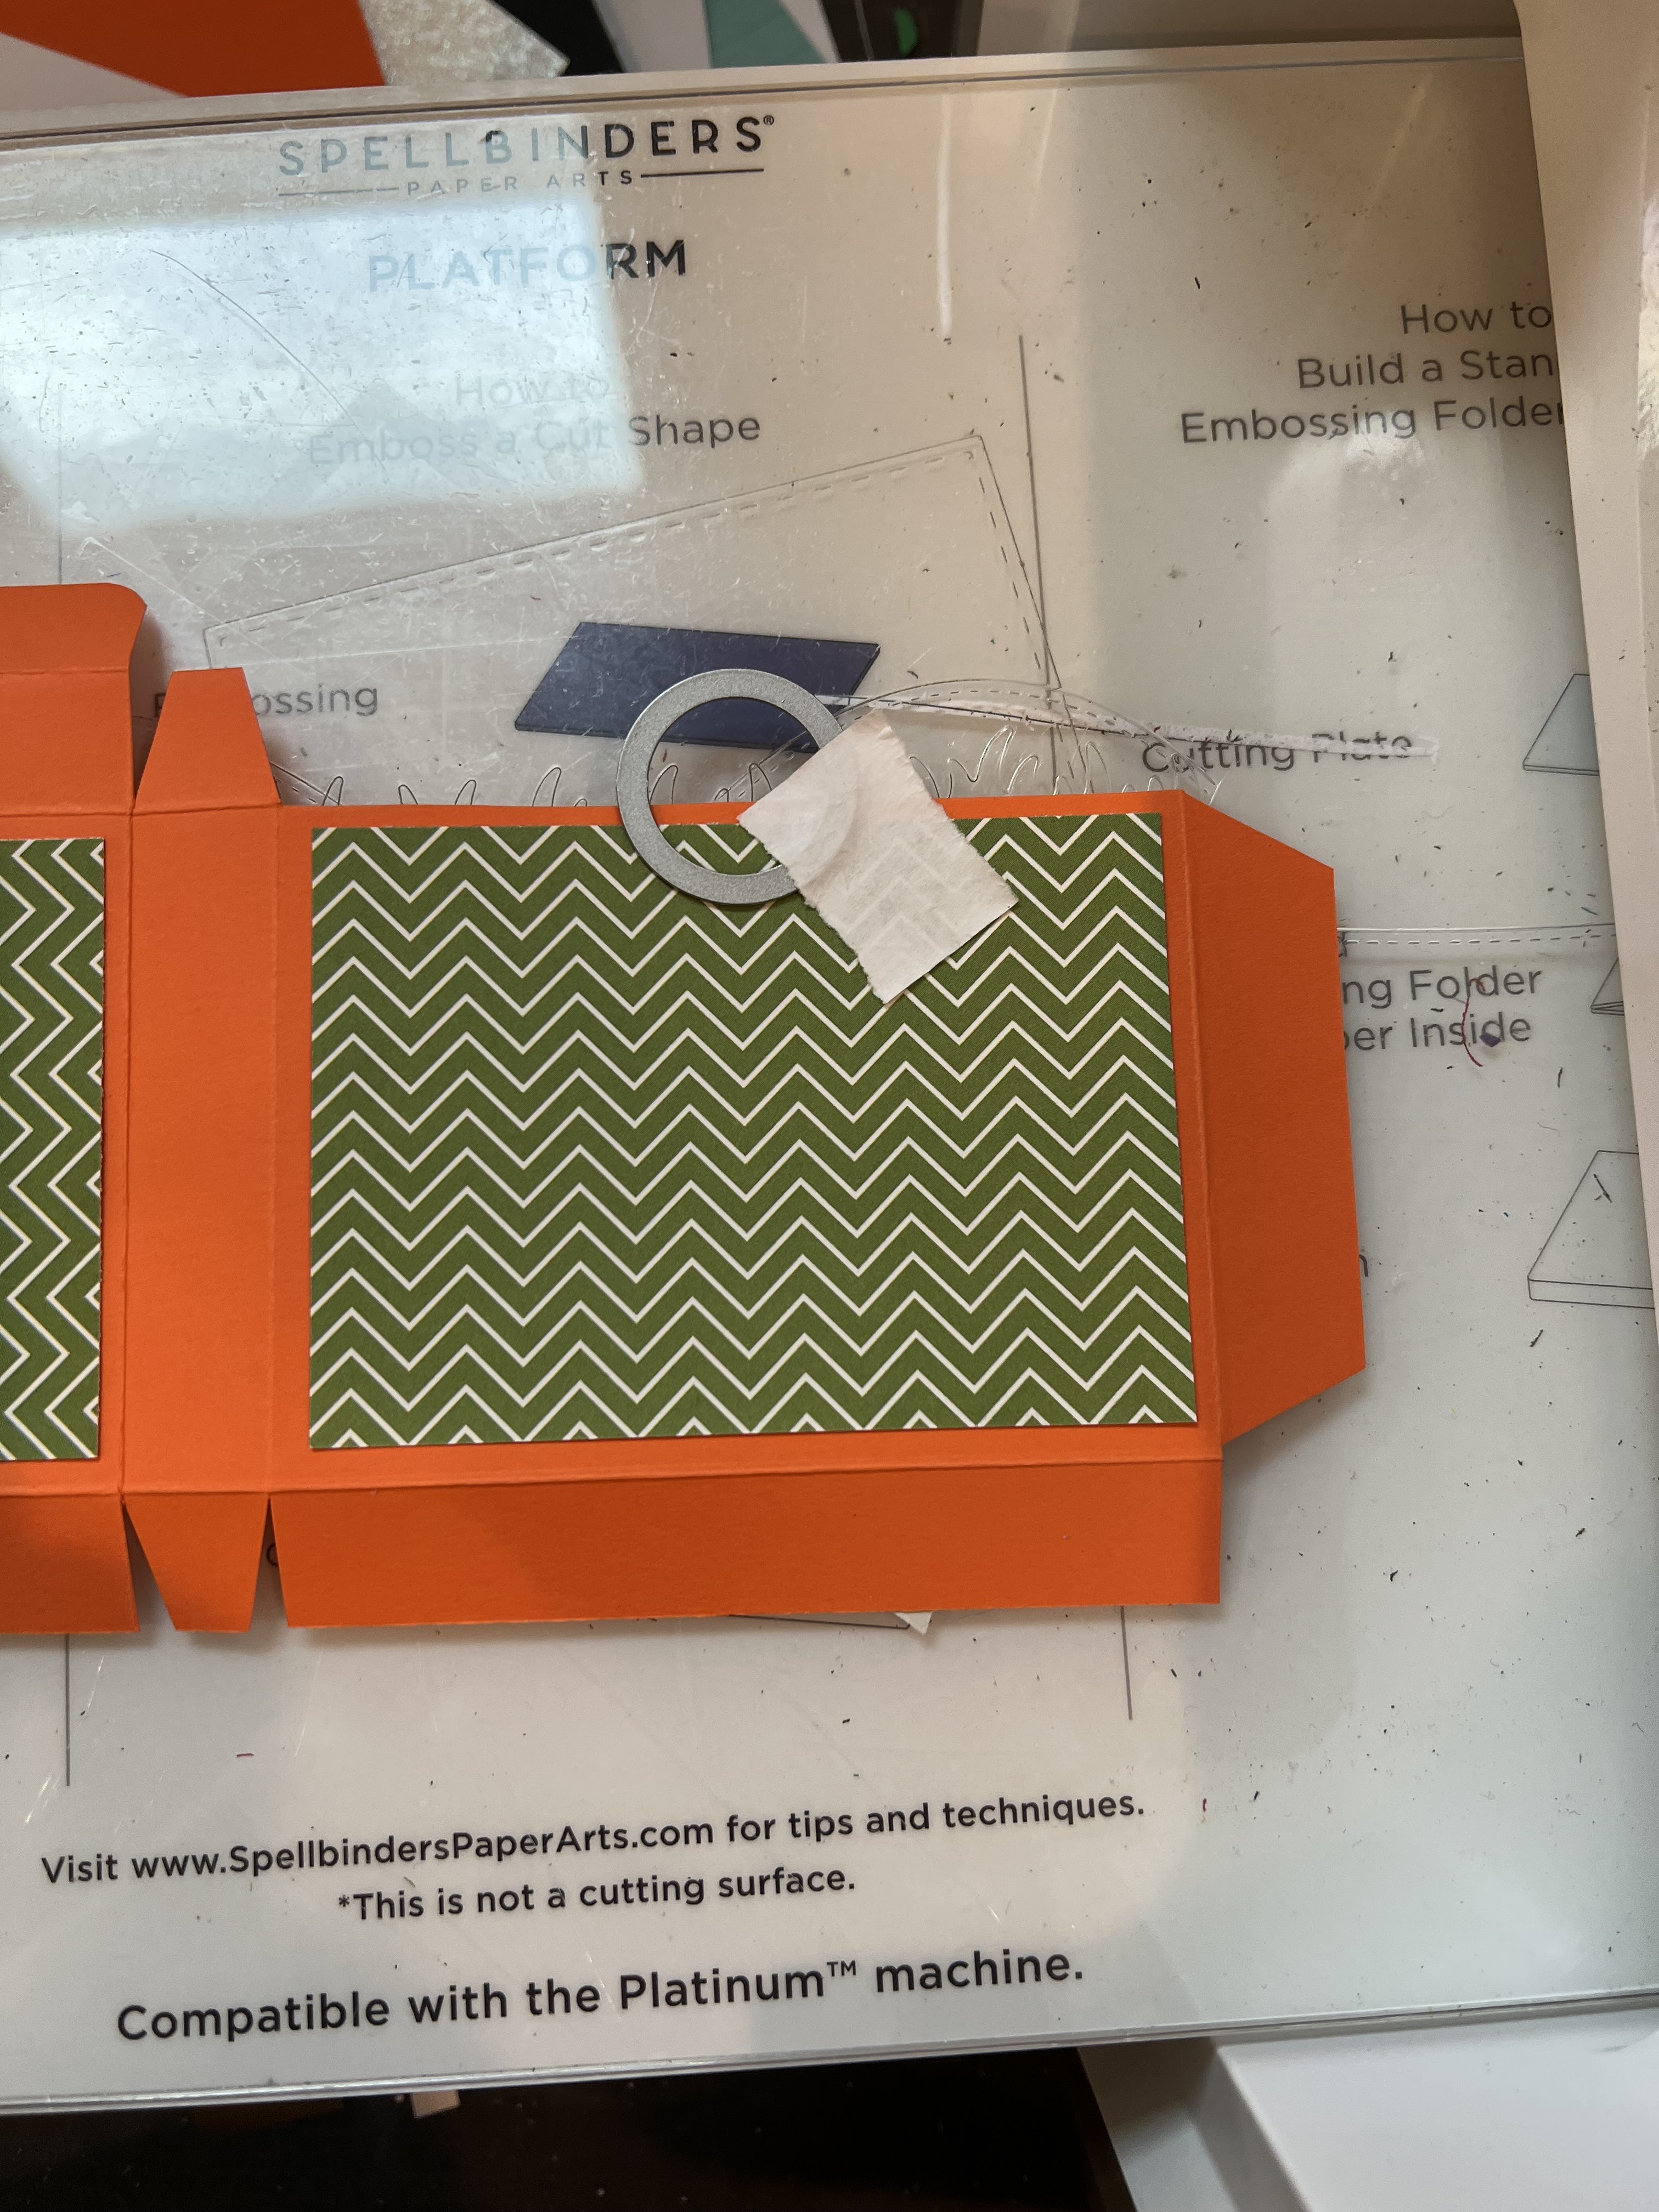
1.  Cut a piece of orange card stock 9 1/4 x 4 1/2 and then score

2.  Horizontal 5/8, 4 3/8,  5,  8 3/4
3.  Vertically 5/8, 3 3/8, 4
4.  Use a bone folder and burnish the score lines then open flat with the two score lines horizontally on the top of your work area
5.  Cut the tabs on the bottom of the orange card stock as shown above
6. Then flip the orange card stock so that the 2 horizontal score lines are now at the bottom of your work area as shown above  

7.  Cut the bottom of the orange card stock to match the picture above 
8. Flip the box over so the double scored longest flap is now at the top of the work space.  The longest flap is the part that will close the box so round those corners
9.  Glue two pieces of DP each measuring 2 1/2 x 3 1/2 to the box as shown above
10.  Cut a notch on the side that does not have the flap that closes the box.  I used the second to the smallest from the Circle dies.  As shown above
11.  On the opposite side of the notch cut you will cut the window of the candy box with the 3rd from the smallest Pierced Retangle dies.  As shown above
12.  Flip the orange piece over and tape the acetate to the back of the window
13.  Assemble the box using glue or a strong double sided tape making sure you do not glue the flap that opens and closes the box

14.  Place the candy in the box.  You can use any kind of candy you wish
15.  Use the Witchy Ghost die, the Web die and the Jack-O-Lantern Witch die (for the spider) to cut out the pieces in the following colors of card stock: white, yellow, orange, purple,  green, gray and black.  Assemble the pieces with a fine tip quick drying glue.  Glue the pieces to the front of the box as shown below then add the sentiment and your little treat box is finished

 CottageCutz Products


Please make sure to check out this amazing Halloween release right HERE!


We have more inspiration on our YouTube Channel check it out HERE

Thanks so much for stopping by!  And I will see you next Thursday.

Blessings and Take Care


Tuesday, November 5, 2019

Winter Village

Good Morning Scrapping Cottage Friends!

The Design Team is continuing to show samples from the Part 2 Christmas release.  Today I selected the Winter Village die to create with.  This die is just loaded with trees and little buildings super fun to work with.
Design steps

 1.  Using the Winter Village die cut out all of the pieces in white card stock
 2.  Using the second to the largest Circle die and a piece of blue card stock cut to 5 1/4 x 4 1/8. Cut out the center of the card stock. Next cut out a slightly smaller piece of purple DP and use the largest circle die to cut out the center of the DP.  Glue the two pieces together
3.  On the circle that was cut out from the DP arrange the snow banks then glue to the back of the opening
4.  Start to arrange the village scene by tucking in the pieces behind the snow banks.  I lined the backs of the houses and church with light yellow card stock to give them a warm glow
5.  After your have finished arrange your pieces glue them down to the card.  Then glue the whole panel to a A2 white card base and your card is complete


CottageCutz Products


I hope you are well under way in creating your special Christmas card.  These new dies sure make creating them so easy!
Blessings
Pam