Tuesday, June 11, 2019

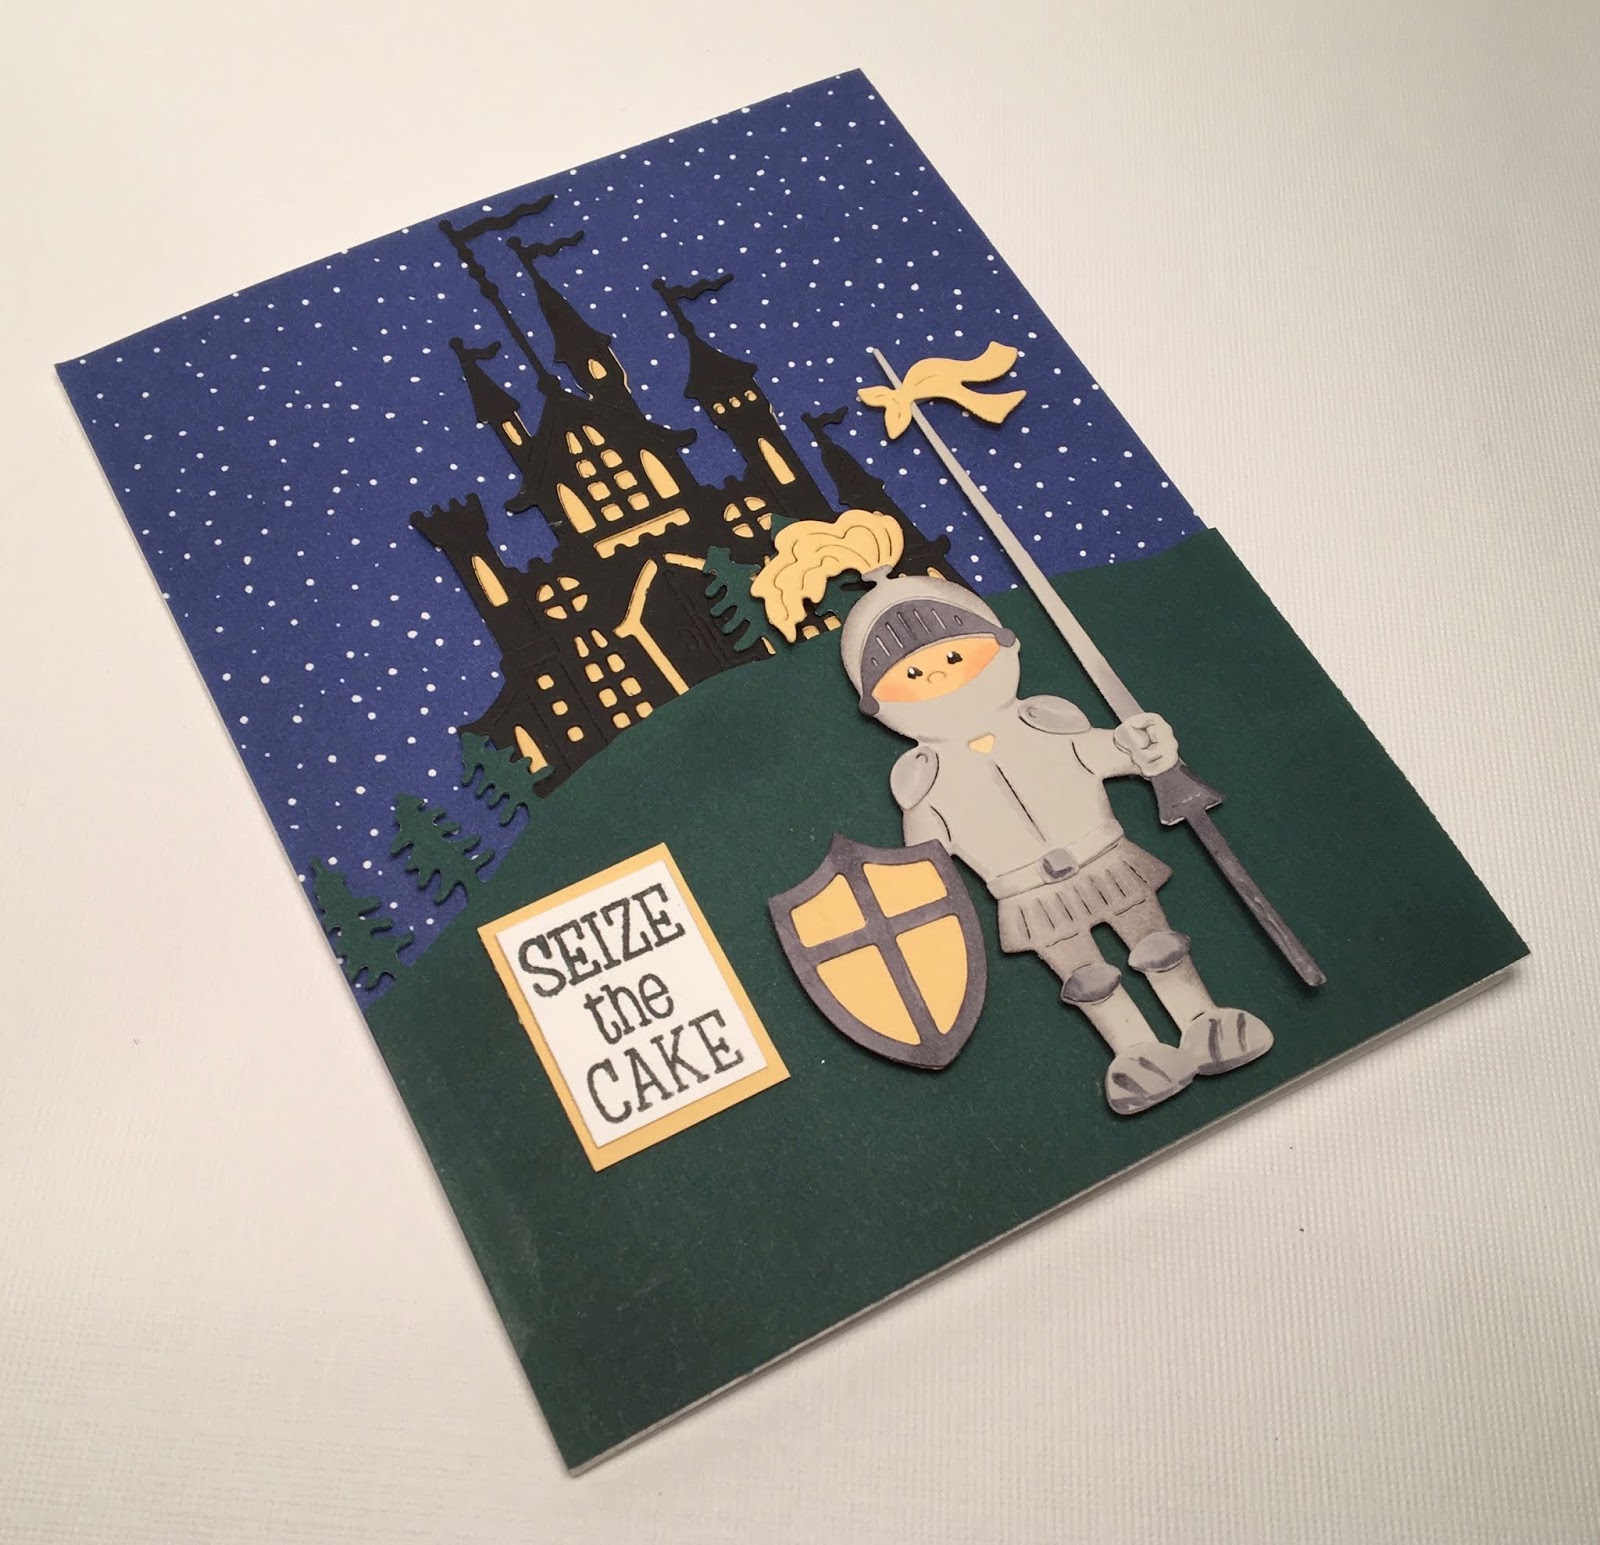
Knight on Guard!

Hi Everyone,

I have two of the cutest little great nephews. They both just love any kind of action movie that has to do with super heroes! I thought I would take them back a few centuries and give them a super hero from the past.  A knight in shining armor!  This fantastic knight is in our Magical Fantasy collection.  I think I am going to make 2 of these cards. One for each of them because it turned out so cute.


Designer Steps:
1.  Using the Knight die cut out all of the pieces.  I used light gray, flesh, and soft yellow card stock
2.  Before assembling the knight use your makers and ink to shade the knight. Add the blush to the cheeks and black for the eyes.  I used a white gel pen for the white on the eyes
 3. Cut out the Castle using the Fantasy Castle die and black card stock line the back of the castle with soft yellow card stock
 4.  Use an A2 white card base cut out a piece of blue dotted paper 4 1/4 x 4 1/2 and cut a piece of dark green card stock 4 1/4 by 3 for the hill
 5.  Glue the blue dotted paper to the front of the card and then using dimension tape add the green to the bottom
6.  Tuck the castle behind the hill as shown

7.  Pop the knight to the grass as shown above and add the sentiment

8.  For the inside I cut an additional lance and shield then glued them right under the sentiment

CottageCutz Products


Thanks so much for stopping by and please check our amazing new release call the Magical Garden.  It is now available at 25% off!
Blessings 
Pam


Tuesday, June 4, 2019

By the Sea!

Good Morning Everyone!

I live near the beach and in the summer that is the place to be here in South Carolina!  I was already to move cross country as some of you may have read in my earlier post a couple of months ago.  But our house sale fell through so we are still in SC.  It really is a nice place to live!  But the summers are pretty steamy!!  Anyway the beach is what inspired my card today.

Design Steps:

 1.  You will need a white A2 card base, a slightly smaller piece of navy, then a slightly smaller piece then the navy of blue, then a piece of sand card stock 3 3/4 x 5. You will also need a 3 1/4 x 3 1/4 blue square, 3 1/8 x 3 1/8 navy square and a 3 x 3 white square.
 2.  Stamp the sand color card stock with a bunch of splashes using Versa Mark ink
 3.  Glue the blue to the navy then add the sand card stock on top of the blue.  Add the strip of striped navy ribbon using double sided tape

4.  Attach the panel to the front of the card and set aside
 5.  Round the corners of all of the squares.  And on the white square use blue ink spray to create a watery look
6.  Stamp the sentiment with black ink.  I used a positioning took to stamp it twice to get a nice dark black
 7.  Cut out the shells on tan card stock using the Sand Dollar and Trumpet Shell die.  Cut the sea grass using the Spring Meadow die and green card stock.  Use TH vintage ink for the shells and grass then add a little coral ink to the Trumpet Shell
 8.  I then sprayed the shells with some Walnut ink
9.  Glue the layers of square together and add the sea grass first then the shells
 10.  Pop the shell panel to the front of the card
11.  For the inside I added a Scallop Shell which I inked in the corner.  Next layered the sentiment on blue and glued it to the card.  Glue the panel to the inside of the card
CottageCutz Products


Thanks for stopping by and make sure to check out our new release call Magical Garden you won't be disappointed and happy summer!!

Blessings
Pam


Monday, June 3, 2019

On the Beach

Good Morning!

This card is for the House Mouse challenge with is use Pattern Paper or Anything Goes!  Come and join the fun!!  I used Designer cloud paper for the background! Added some waves, clouds and a sun.  Perfect summer card for someone you love!!
Thanks for stopping by!

Blessings
Pam

Monday, May 27, 2019

Farm Scene

Good Morning Friends!

I know so many girls and boys love horses.  So I thought it would be fun to create a farm scene using the horse from our Magical Fantasy release.  I have to admit I love horses too!  This card also combines some dies from other releases.  I love mixing the old and new dies!!


Designer Steps:
 1.  Using the Royal Horse die cut out the body in dark brown card stock.  Then cut out the mane and hooves in tan.  Color the tan hooves black with your favorite markers.  Then use TH ink to shade the mane and add a little pink to the inner ear.  Assemble the horse
 2.  Using the Barn and Windmill die cut out the barn in white.  Color the barn pieces using a black and red marker
 3.  Assemble the barn
 4.  Cut a piece of designer cloud paper 4 x 5 1/4 and add the barn and grass
 5.  Using the Picket Fence Border die cut out a white fence.  Using the Spring Grass die cut out to rows of grass in the same green and as the background grass.  Glue down the fence and then the 2 layers of grass as shown.  Then add the horse
6.  Use a white A2 card base cut a slightly smaller piece of red and glue it to the front.  Then add the panel with the horse and barn and your card is complete
CottageCutz Products


Thanks so much for stopping by and be sure to check out the sales in our store!
Blessings
Pam


Wednesday, May 22, 2019

Mousy Beach

Good Morning!


This card is for House Mouse Monday Challenge anything but square or anything goes! I thought this would be a fun card to do since so many people will be headed to the beach this Memorial Day weekend here on Hilton Head Island.

Hope you have a very blessed day!  
Pam

Hero Arts

Congratulations to Hero Arts who are celebrating their 45th Birthday for making fabulous stamps!

Here are just 2 of my Hero Arts stamps from my stash!

Chirstmas Horn 1989 and Snowy Trees 1992

Happy Birthday HERO ARTS

Friday, May 17, 2019

Princess Cake


Happy Saturday!

I have another birthday card for you today.  I am using one of the dies from our new whimsical release called Princess Cake!

Designer Steps:

 1.  Cut out all of the pieces in white card stock using the Princess Cake die
 2.  Use your favorite makers to color the cake pieces.  I used my Copic Markers

 3.  Assemble the card
 4.  Cut out the oval shape using white card stock and the Nested Stitched Eyelet Oval die.  Pop the cake to the oval
 5.  Using silver glitter card stock and the Princess Cake die cut out the crown and the little circle embellishment.  Glue them to the card as shown
6.  Cut out the Happy Birthday using pink and purple DP and the Happy Birthday die
7.  You can cut out the large scallop easel card using your Circuit or a large 5 inch scallop die.  I used 2 different types of coordinating DP for the background both inside and out.


CottageCutz Products


We appreciate you stopping by!  Make sure to take some time out of your day to get crafty!
Blessings
Pam