Showing posts with label Pierced Oval. Show all posts

Saturday, August 26, 2023

Frankie's Night Out

Hello Friends,

I am doing another Halloween card for today's crafty share.  This card is featuring the Trick or Treat Frankie die.  Frankie's balloon puts a smile on my face! I like Halloween cards with bright colors and fun sentiments.


Design Steps:  

1.  Using the Trick or Treat Frankie die cut out the pieces in the following colors of card stock: yellow, orange, green, black, white, dark gray, and purple (I colored his nose with a Copic marker to make it stand out a little more)
2.  Assemble Frankie using a fine tip fast drying glue
3.  The card base is a gate fold.  Cut a piece of black card stock 8 1/2 x 5 1/2.  Score at 2 1/8 then fllip the card over and score at 2 1/8 again
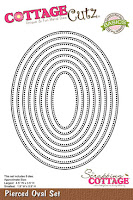
4.  Using the Double Stitched Oval die (Second from the largest) cut out a piece of spider DP.  Using the Pierced Oval die (Second from the largest) cut out a piece of black card stock.  Cut out 2 purple panels 2 x 5 3/8.  Cut out 2 DP panels 1 7/8 x 5 1/4
5.  Glue the purple panels to the front of the black card base and then add the DP panels

6.  Glue the Spider DP oval to the black oval. Glue Frankie to the lower half of the oval as shown above

7.  Place glue on the left side of the Frankie oval making sure you are only getting glue on the left front panel.  Use the Stitched Alphabet die and cut out EEK in black.  Then glue to the top of the oval again making sure you don't put glue on the part of the K that is hanging over the right panel

8. I used a piece of purple on the inside measuring 4 1/8 x 5 3/8 and glued a piece of white on top measuring 4 x 5 1/4.  I then added the Happy Halloween sentiment and your card is complete


We have more inspiration on our YouTube Channel check it out HERE

Thanks so much for stopping by!  And I will see you next Thursday.

Blessings and Take Care


Sunday, December 18, 2022

Frosty Friends

 Hello Crafty Friends!

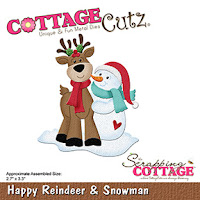
Well only 4 days left until the big day of celebration!! And of course I am getting a last minute gift ready.  And what is a gift without a handmade card!  So this is the last card of the season.  I used the Happy Reindeer and Snowman.


Design Steps:


1.  Using the Happy Reindeer and Snowman die cut out the following pieces of card stock:  brown, red dotted DP, green, black, orange, dark brown, and white.  Shade the edges with coordinating inks and a small applicator.  Assemble the pieces with a fine tip glue

2.  Use a white A2 card base, cut red dotted DP 4 18, 5 3/8, cut a piece of reindeer DP 4 3/4 x 3 1/2 (using the 3rd from the largest Pierced Oval die cut the oval in the center of this reindeer DP) and finally cut a piece of white 4 1/2 x 3 1/4 and sponge or brush with blue ink
3.  Glue the red dotted DP to the white card base, next glue down the blue inked card stock to the center of the red dotted paper.  On the back of the reindeer paper add dimension tape and then pop it over the blue inked paper
4.  Add the snow to the bottom of the oval and then glue down the reindeer and snowman.  Add the bow and your sentiment and your card is complete

CottageCutz Products


We have more inspiration on our YouTube Channel check it out HERE

Thanks so much for stopping by!  And I will see you next Thursday.

Blessings and Merry Christmas 


Monday, December 13, 2021

Christmas Tree Tractor

Hello Scrapping Cottage Friends

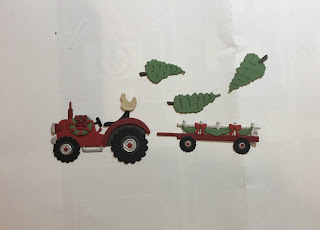
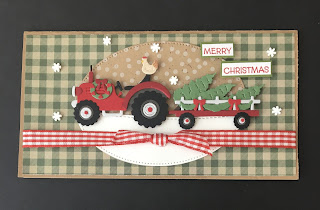
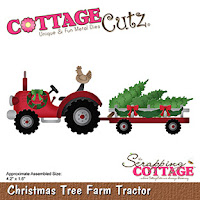
I have a few more Christmas cards to finish up so I thought I would try a farm themed mini slimline.  The adorable tractor is perfect for this theme and style of card.  The die I am using is called Christmas Tree Farm Tractor.


 Design Steps:

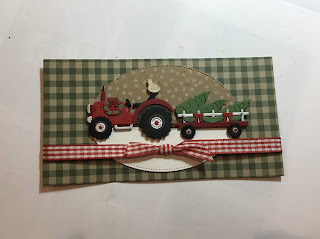
1.  Use the Christmas Tree Farm Tractor die and cut out the pieces using: green, red, dark red, silver black, brown, and tan.  Glue the pieces together using a fine tip clear drying glue
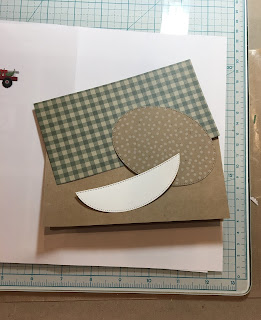
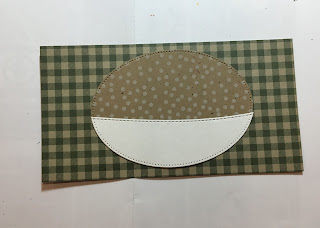
2.  For the mini slimline base use kraft card stock cut 6 1/2 x 6 folded in half measuring 3 1/4 x 6.  Piece of checked green DP 3 1/8 x 5 7/8.  Cut a Pierced Oval using the 3rd from the largest oval out of snow dotted kraft card stock, and a piece of white cut out with the same oval then cut in half with the Hills Slimline 
3.  Glue the kraft oval to the center of the green checked DP and then glue down the half white oval
4.  Pop up the tractor and then add the red checked ribbon.  Glue the checked piece to the kraft card base
5.  Stamp the sentiment and layer onto green card stock.  Pop the sentiment as shown above.  Add the tiny snowflakes and your card is complete

CottageCutz Products


Thanks so much for stopping by!  I hope you are well on the way to finishing your Christmas Cards!  

And just to remind you we have a wonderful YouTube Channel for more inspiration.  Check it out HERE

Blessings

Pam


Saturday, July 4, 2020

Lighthouse

Hello My Scrapping Cottage Friends!

Today,  I have a beautiful lighthouse scene to share!  This lighthouse looks exactly like the one on Hilton Head Island in South Carolina.  If you watch the Heritage Golf Tournament you will get a glimpse of it!

Background Photo by Philipp Deus on Unsplash
Designer Steps:
 1.  Use the Lighthouse die and cut out your pieces: Rust, red, white, brown, and teal blue card stock
2.  Shade your pieces using a variety of Tim Holtz inks and a small applicator.  Next assemble the pieces using a fine tip, fast drying glue

 3.  For the base use a piece of white A2 card stock.  Cut out a white frame using the largest Stitched Wide Rectangle Frame die.  Next use the largest Pierced Rectangle die and cut on white card stock.  Place the third from the largest Pierced Oval die in the center of the pierced rectangle piece cut out the oval. Using the same oval die cut out a piece of cloud DP

4.  Glue the white frame directly to the A2 white card front making sure to center it.  Next put dimensional tape on the back of the white pierced retangle piece with the oval cut out.  And tape it to the middle of the frame as shown.  Put glue on the back of the DP cloud piece and push it down into the middle of the oval
5.  Glue down the hill behind the oval frame and slide in the lighthouse behind the hill.  Pop up the little house and then glue down the water.  Next on black card stock cut out two Happys using the Expressions Happy die.  Glue together and then glue on card as shown.  Stamp birthday and layer on red then glue to card as shown 

CottageCutz Products


Thanks so much for stopping by today!  I really appreciate your visit!
Blessings
Pam

Tuesday, July 31, 2018

Sea Turtles - Scrapping Cottage

Good Morning Friends!

We are getting very close to our new release for Christmas!  And it will soon be time for us to share the new dies but until then we are showing you some new ideas for those favorite dies from the past!  I live near Hilton Head Island and the area is famous for sea turtles!  So with that in mind I used our turtle die combined with a few other dies to create my card for you today!


Design Steps:
1.  Cut out 2 Sea Turtles one in green and one in brown.  Place the shell panels from the green turtle into the brown and the brown into the green.  I just taped them into place
 2.  Add a little shading to the turtles using TH inks.  Use a fine black marker to make the eye standout
 3.  Use an A2 kraft card base, cut a slightly smaller piece of white 4 x 5 1/4.  Cut a 4 x 5 1/4 piece of wood grain DP and cut an oval in the center using the largest of the Wacky Stitched Oval dies.
 3.  Next cut a piece of 3 3/4 x 5 kraft card stock and cut out the second to the largest Pierced Oval die in the center.  Glue it directly behind the wood grain DP as shown
 4.  On the white card stock create an inked background for the water.  Use TH inks and then splatter with shimmer water (water mixed with Perfect Pearls Powder)
 5.  Glue to the back of the wood grain DP. (Make sure not to glue to close to the oval opening so you can stick the sea grass behind the oval
 6.  Using the Botanical Garden 2 die cut out the foliage in 2 shades of green card stock
 7.  Tuck the foliage into the oval and glue down
 8.  Add the sea turtle to the card front
 9.  Take a piece of white cheese cloth and spray with a walnut stain and let dry
10.  Add the cheese cloth to the card front and then add the pearls
CottageCutz Products


I hope you are having a good time looking a new ideas for all of those older favorite dies!  I am sure having fun using them again!  Stay tuned for those new Christmas dies coming very soon!

Blessing

Pam