Showing posts with label Spring Potted Flowers w/Bird. Show all posts

Monday, April 6, 2026

Thankful for Mom

Hello Friends

ANNIVERSARY SALE!! DON'T MISS OUT!! SAVE 50% - SALE ENDS APRIL 17TH!

I am making a few Mother's Day cards for our church craft sale.  I decided to use the Spring Potted Flowers with Bird.  I didn't use the bird for this card.  I am saving it for a future project!


Designer Steps:


1.  Use the Spring Potted Flower die and cut out the following colors of card stock: gray, light pink, medium pink, dark pink, light green and a dark green


2.  Cut a white square using the second from the largest Pierced Scallop Square die.  Arrange the flowers onto the square and glue down


3.  Cut a light green retangle using the largest Pierced Scallop Rectangle die.  Glue the white square to the green retangle as shown on the first picture


4.  Use an A2 white card base, cut a piece of pink card stock 4 1/8 x 5 3/8, cut a piece of polka dot DP 4 x 5 1/4.  Glue the pink to the polka dot DP.  Set the card base aside


5.  Glue the green rectangle to the polka dot DP as shown.  Stamp the sentiment to the lower right hand corner on the scalloped green retangle.  Add your ribbon just below the white scalloped square.  Your card is complete


Thanks so much for stopping by! 

Blessings and Take Care


Saturday, May 27, 2023

4th of July Bouquet

 Hello Friends,

I am working on another card for July!!  And I especially like how this die worked with the pattern paper I chose.  I used one of the dies from the recently released Easter Collection.  The die is Spring Potted Flower w/Bird.  I also decided to do a fancy fold that I have never done before.


Design Steps:

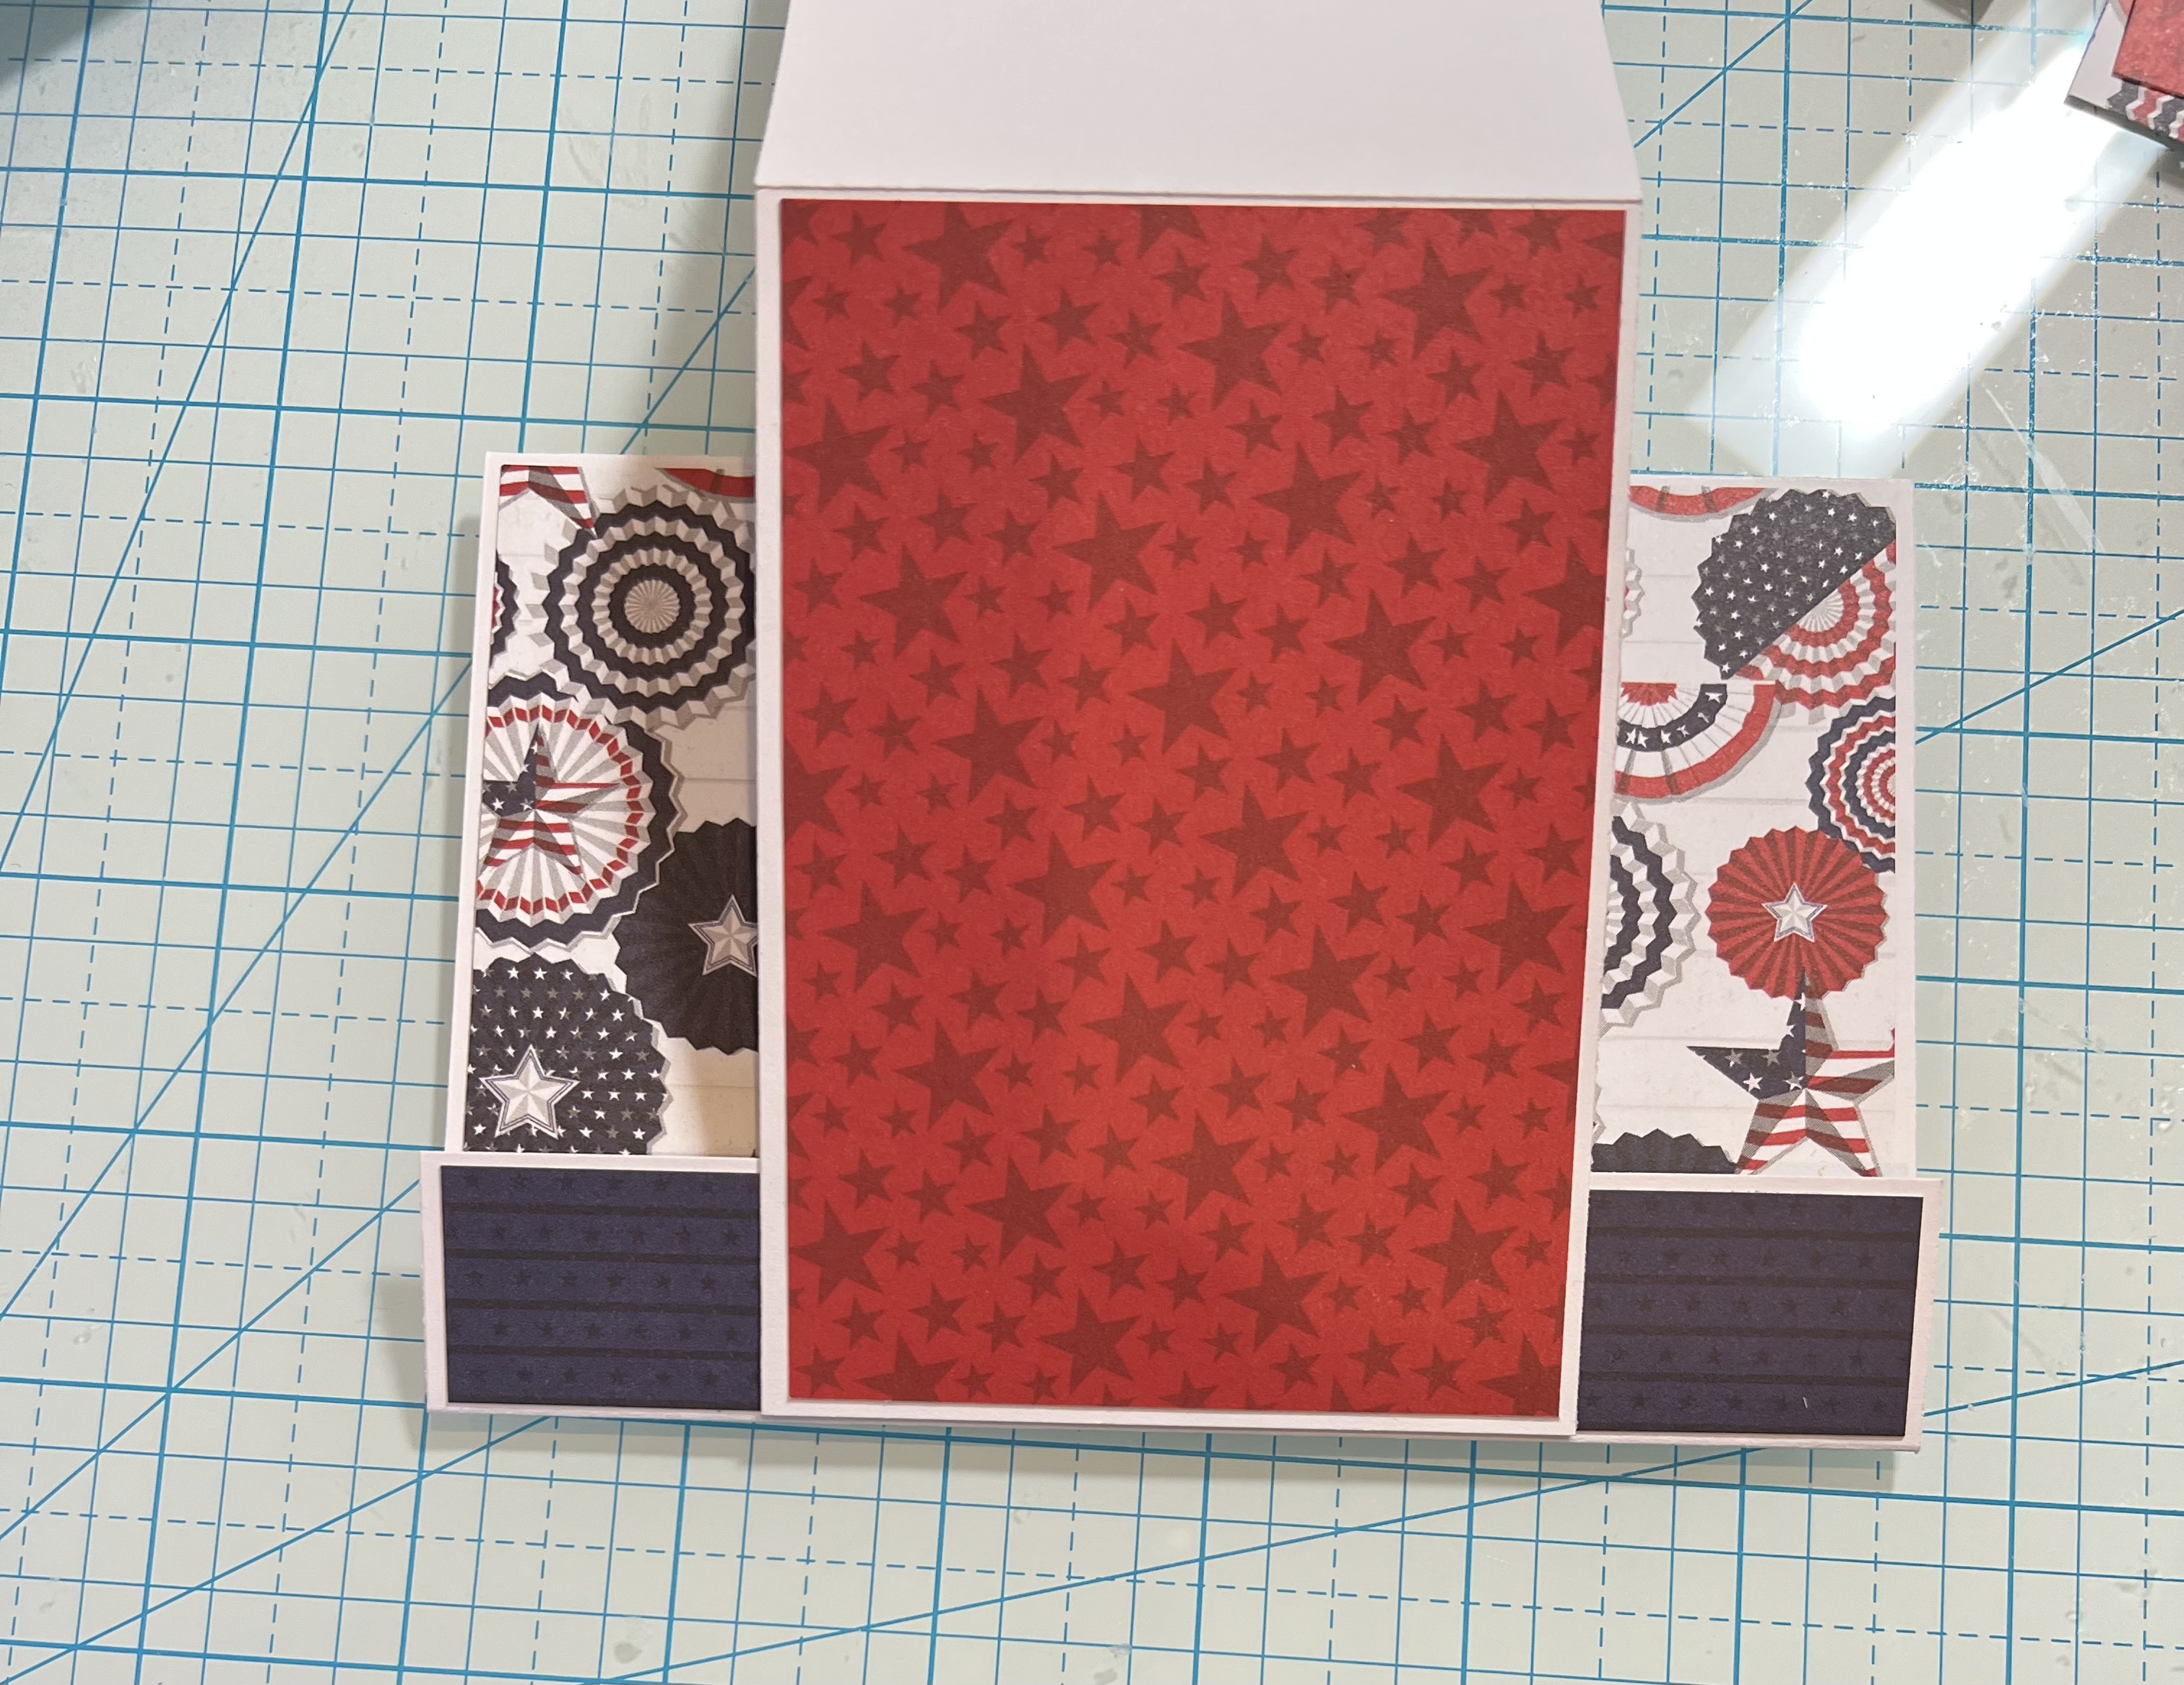
1.  Use a piece of white card stock 8 1/2 x 5 1/2 and score it on the horizontal side at 1 and then at 4 3/4
2.  Fold the card on the 4 3/4 score mountain style and on the 1 inch score the valley style as show above
3.  Next cut a piece of white card stock 3 x 8 1/2 and then fold in half

4.  Cut some designer paper to cover the card: For the front cut a piece 3 5/8 x 5 3/8 (this is the rosette DP)  For the front strip cut a piece 5 3/8 x 7/8 (this is the navy DP).  Last for the separate little card front cut a piece 4 1/8 x 2 7/8 (red star DP)
5.  Glue the navy DP on the front flap and then glue the rosette DP on the card front
6.  On the small card glue the red star paper to the front
7.  Put glue only on the bottom of the small red card and glue it to the navy front flap
8.  Turn the card over and place glue only on the bottom of the small card and glue it to the bottom of the larger white card
9.  Using the Spring Potted Flower w/Bird cut out 5 white flowers, 5 red centers, 2 leaf stems and 4 single leaves in green.  Cut out the pot in the navy DP.  Arrange your potted flowers and glue together
10.  Place dimension dots on the back of the flower pot and stamp your sentiment.  Pop the flowers to the front of the card as shown below.  And then glue your sentiment above the flowers and your card is complete

CottageCutz Products


We have more inspiration on our YouTube Channel check it out HERE

Thanks so much for stopping by!  And I will see you next Thursday.

Blessings and Take Care


Sunday, April 30, 2023

A Little Birdie Told Me

 Hello Friends,

It is Pam creating with you today!   We have a giant Anniversary Sale going on in the store.  Some of the items are up to 75% off!!  Check it out HERE.  The sale ends May 5th so don't miss out!

The Birds in this Easter collection are so versatile and beautiful.  They would be perfect for a mother's day card, thank you, sympathy or just about anything! I am using the Spring Potted Flower w/Bird for my Birthday card.

Design Steps:

1.  Using the Spring Potted Flower w/Bird cut out all the pieces in white card stock
2.  Using a variety of ink colors shade in all the pieces
3.  To create the frame I used the largest Double Stitched Rectangle and taped the second largest Rectangle  die in the center.  Run it through your machine twice for two frames.  Glue the frames together and also glue the inside of the frame pieces together.  Use a blue ink and blend the frames and the inside of the frames
4.  The card base is white A2 card stock.  Cut a piece of white 4 1/8 x 5 3/8 and then run through an embossing folder.  Glue the embossed piece to the card front.  Place dimension tape around the frame and place it just slightly above center
5.  Pop in the blue inside of the frame and then assemble your bird as shown.  I did use dimension dots on the pot and bird.  Add the sentiment and your card is complete

CottageCutz Products


We have more inspiration on our YouTube Channel check it out HERE

Thanks so much for stopping by!  And I will see you next Thursday.

Blessings and Take Care