Showing posts with label Expressions Thanks. Show all posts

Tuesday, April 18, 2023

Thank You Tulips

 Hello Friends,

It is Pam creating with you today!   

The flowers in this Easter collection are so versatile and gorgeous.  They would be perfect for a mother's day card, thank you, sympathy or just about anything! I am using the Spring Tulips for my Thank You card.


  Design Steps:

1.  Use a cream A2 size base, cut a piece of cream 4 x 5 1/4 you can use a cover plate or embosing folder for the background.  Use the Spring Tulips die and cut the tulips and leaves out of white card stock
2.  Use 2 shades of orange and yellow to ink up the tulips.  Use two shades of green to ink up the leaves and stems.  Assemble the flowers with a fine tip glue
3.  Use the Slimline Picket Fence die and cut it out of white.  Then glue it to the textured piece of cream.  Next use the Spring Grass die and cut it out of white twice.  Ink the grass with the same inks as the leaves.  Glue down the grass and then add the flowers
4.  Use the Expressions Thanks and cut it twice out of white and then ink with orange.  Glue the thanks to the upper right side of the card as shown and your card is complete

CottageCutz Products


We have more inspiration on our YouTube Channel check it out HERE

Thanks so much for stopping by!  And I will see you next Thursday.

Blessings and Take Care


Friday, February 10, 2023

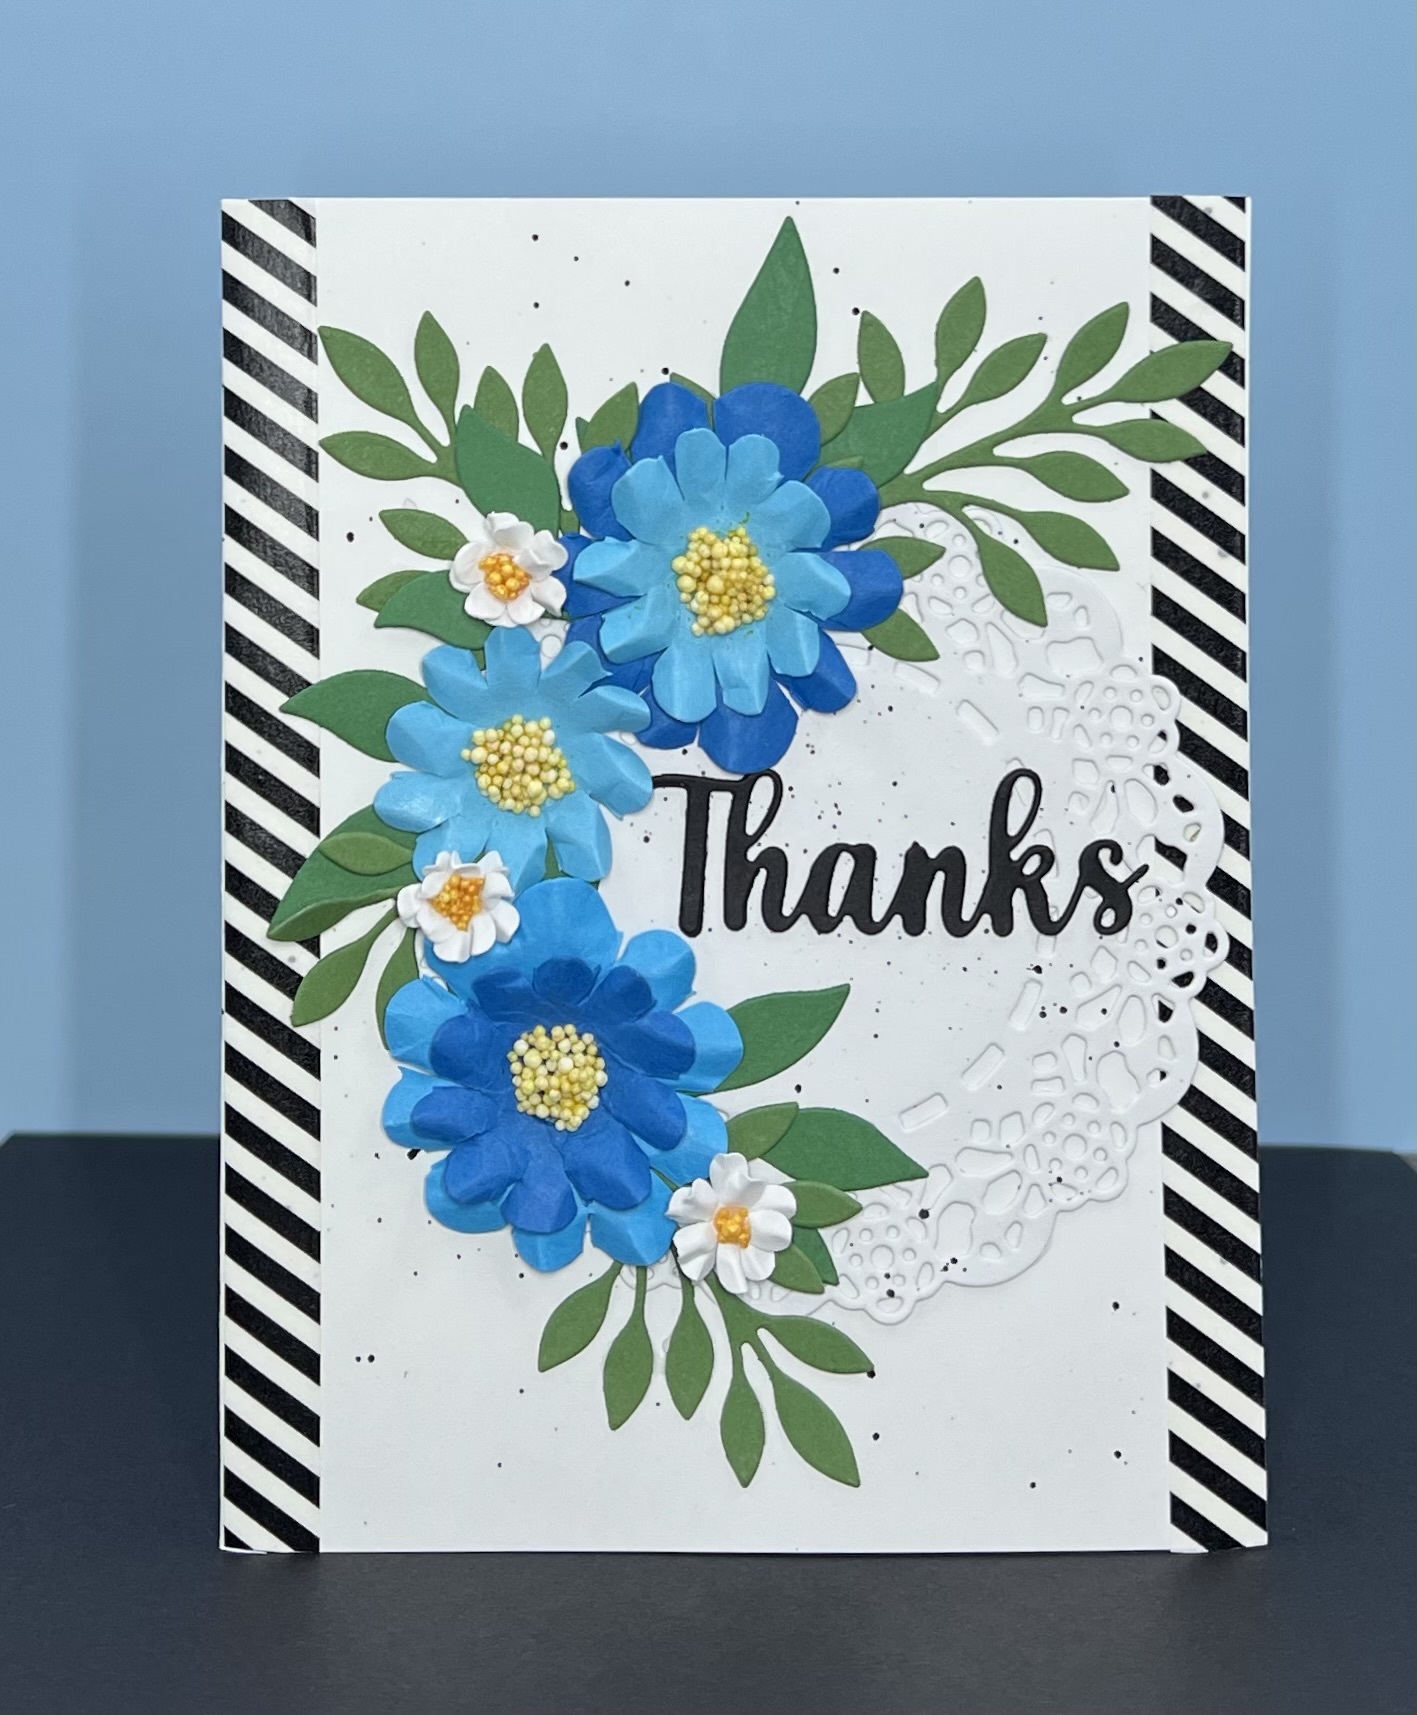
Thank You Flowers

 Hello Friends

IT'S NEW RELEASE TIME!  The collection is called Flowers and More.   The unique thing about this release is that there are fewer pieces in each of the dies.  So they go together really quickly and easily! 

I noticed I was getting low on Thank you cards. So I decided the flowers in this release are so pretty they would make a beautiful thank you! I used Flower 5 and Leafy Branches 1, 2 and 3.  My inspiration for this card was one by Barbara Anders that I found on Pinterest.

Designer Steps:

1.  Using an A2 white card base splatter the card with black.  I used a watered down black acrylic paint
2.  Cut out a white doily with the Tea Time Doily then splatter it with the same black mixture as the card base


3.  Use a black striped washi tape to line each side of the card

4.   Using the following dies Leafy Branch 1, 2, and 3 cut out the leaves in 2 different shades of green card stock.  Using the Flower 5 cut out the large and small flower in 3 shades of blue card stock.  Using the Garden Wheelbarrow cut out 6 of the small white flowers
5.  I cut a slit in the blue flowers between the petals and then cupped then with a stylus.  After I cupped them I pinched the petals to give them a little shape.  I also did this with the white flowers only on the small white flowers I glued 2 together for a little more strength
6.  For the centers I used white Prills which I dyed yellow with some distress ink

7.  Cut two Thanks in black using the Thanks Expression die.  Glue the two Thanks toghether.  Glue the doily slightly to the right of center as shown above and then glue down the Thanks as shown

8.  Arrange the blue flowers and glue dot then down.  Tuck the leaves in and around the flowers.  Then add the small white flowers and your card is complete

CottageCutz Supplies


We have more inspiration on our YouTube Channel check it out HERE

Thanks so much for stopping by!  And I will see you next Thursday.

Blessings and Take Care


Tuesday, February 5, 2019

Spring Bouquet! Scrapping Cottage

Good Morning Friends!

I am so excited to give you a peek at our new Spring Release!  And not only do we have a new release it is at 25% off right now.  There is also a fantastic Early Spring Sale going on in the store too!  What more could you ask for check out the great savings!

Now on to today's project.  I love teacups and flowers so naturally this die was just calling my name!!  It is called Spring Teacup Bouquet.  I can already tell it will be so versatile with uses for so many occasions.

Design Steps:
 1.  Using the Spring Teacup Bouquet die cut out the flowers and cup in colors of your choice.  I did a little shading on the flowers and cup before the assembly
 2.  Use an A2 card base cut a piece of black 4 x 5 1/4, dotted DP 3 3/4 x 5 and then using the Nested Stitched Scallop Square die cut out a black square.  I used the second from the largest.  Run the square through a dotted embossing folder
 3.  Begin assembling the flower arrangement on the black square.  I put a foam dot under the teacup and then began my flower placement
 4.  Glue the black card stock and the DP to the front of the card and then pop up the black square slightly above center
5.  Using the Expressions Thanks cut it out of black card stock.  Glue the Thanks to the lower right of the card under the arrangement and your card is complete

CottageCutz Products


Again I just want to remind you we have some awesome sale going on in the store!


Thanks so much for stopping by!
Blessings
Pam