Saturday, November 28, 2015

Birthday Girl - Pink and Main

Good Morning!
Today I am using the sweet set called Birthday Girl!  It is perfect for those fun loving little girls in our lives!


Here are my design steps and supplies:
  1. Use an A2 white card base.
  2. Cut a slightly smaller piece of dotted embossed purple card stock (Recollections) and glue to the front of the white card.
  3. After cutting the purple cut a slightly smaller piece of designer paper (Recollections) and glue it to the purple card stock
  4. Cut a 1 1/2 x 4 inch strip of the purple card stock and use a (MS) border punch and glue it to the front of the card just a little lower then center as shown
  5. Use your Cricut or dies to cut a 3 inch white scalloped circle (Bazzil)
  6. Stamp and the image and sentiment (Pink and Main and Memento Black Tuxedo)
  7. Color the image with copics: V01, 04, 06, 09 - RV10, 32, 34 - R20, 29, 59 - E00, 02, 04, 43, 47, 49 - C02 - YG03, 63, 67 - G99 - Y17, 21 - BG 11, 15, 75, 78. Cut her out using coordinating dies and pop dot her to the front of the card
  8. Cut out the little banner and pop dot to the top of the card as shown
  9. Layer the sentiment on purple card stock and pop dot to the top of the banner
  10. Add the rhinestones
Thanks for stopping by and have a blessed day!
DT Member Pam M.

Saturday, November 21, 2015

Christmas Bird - Pink and Main

Good Morning!
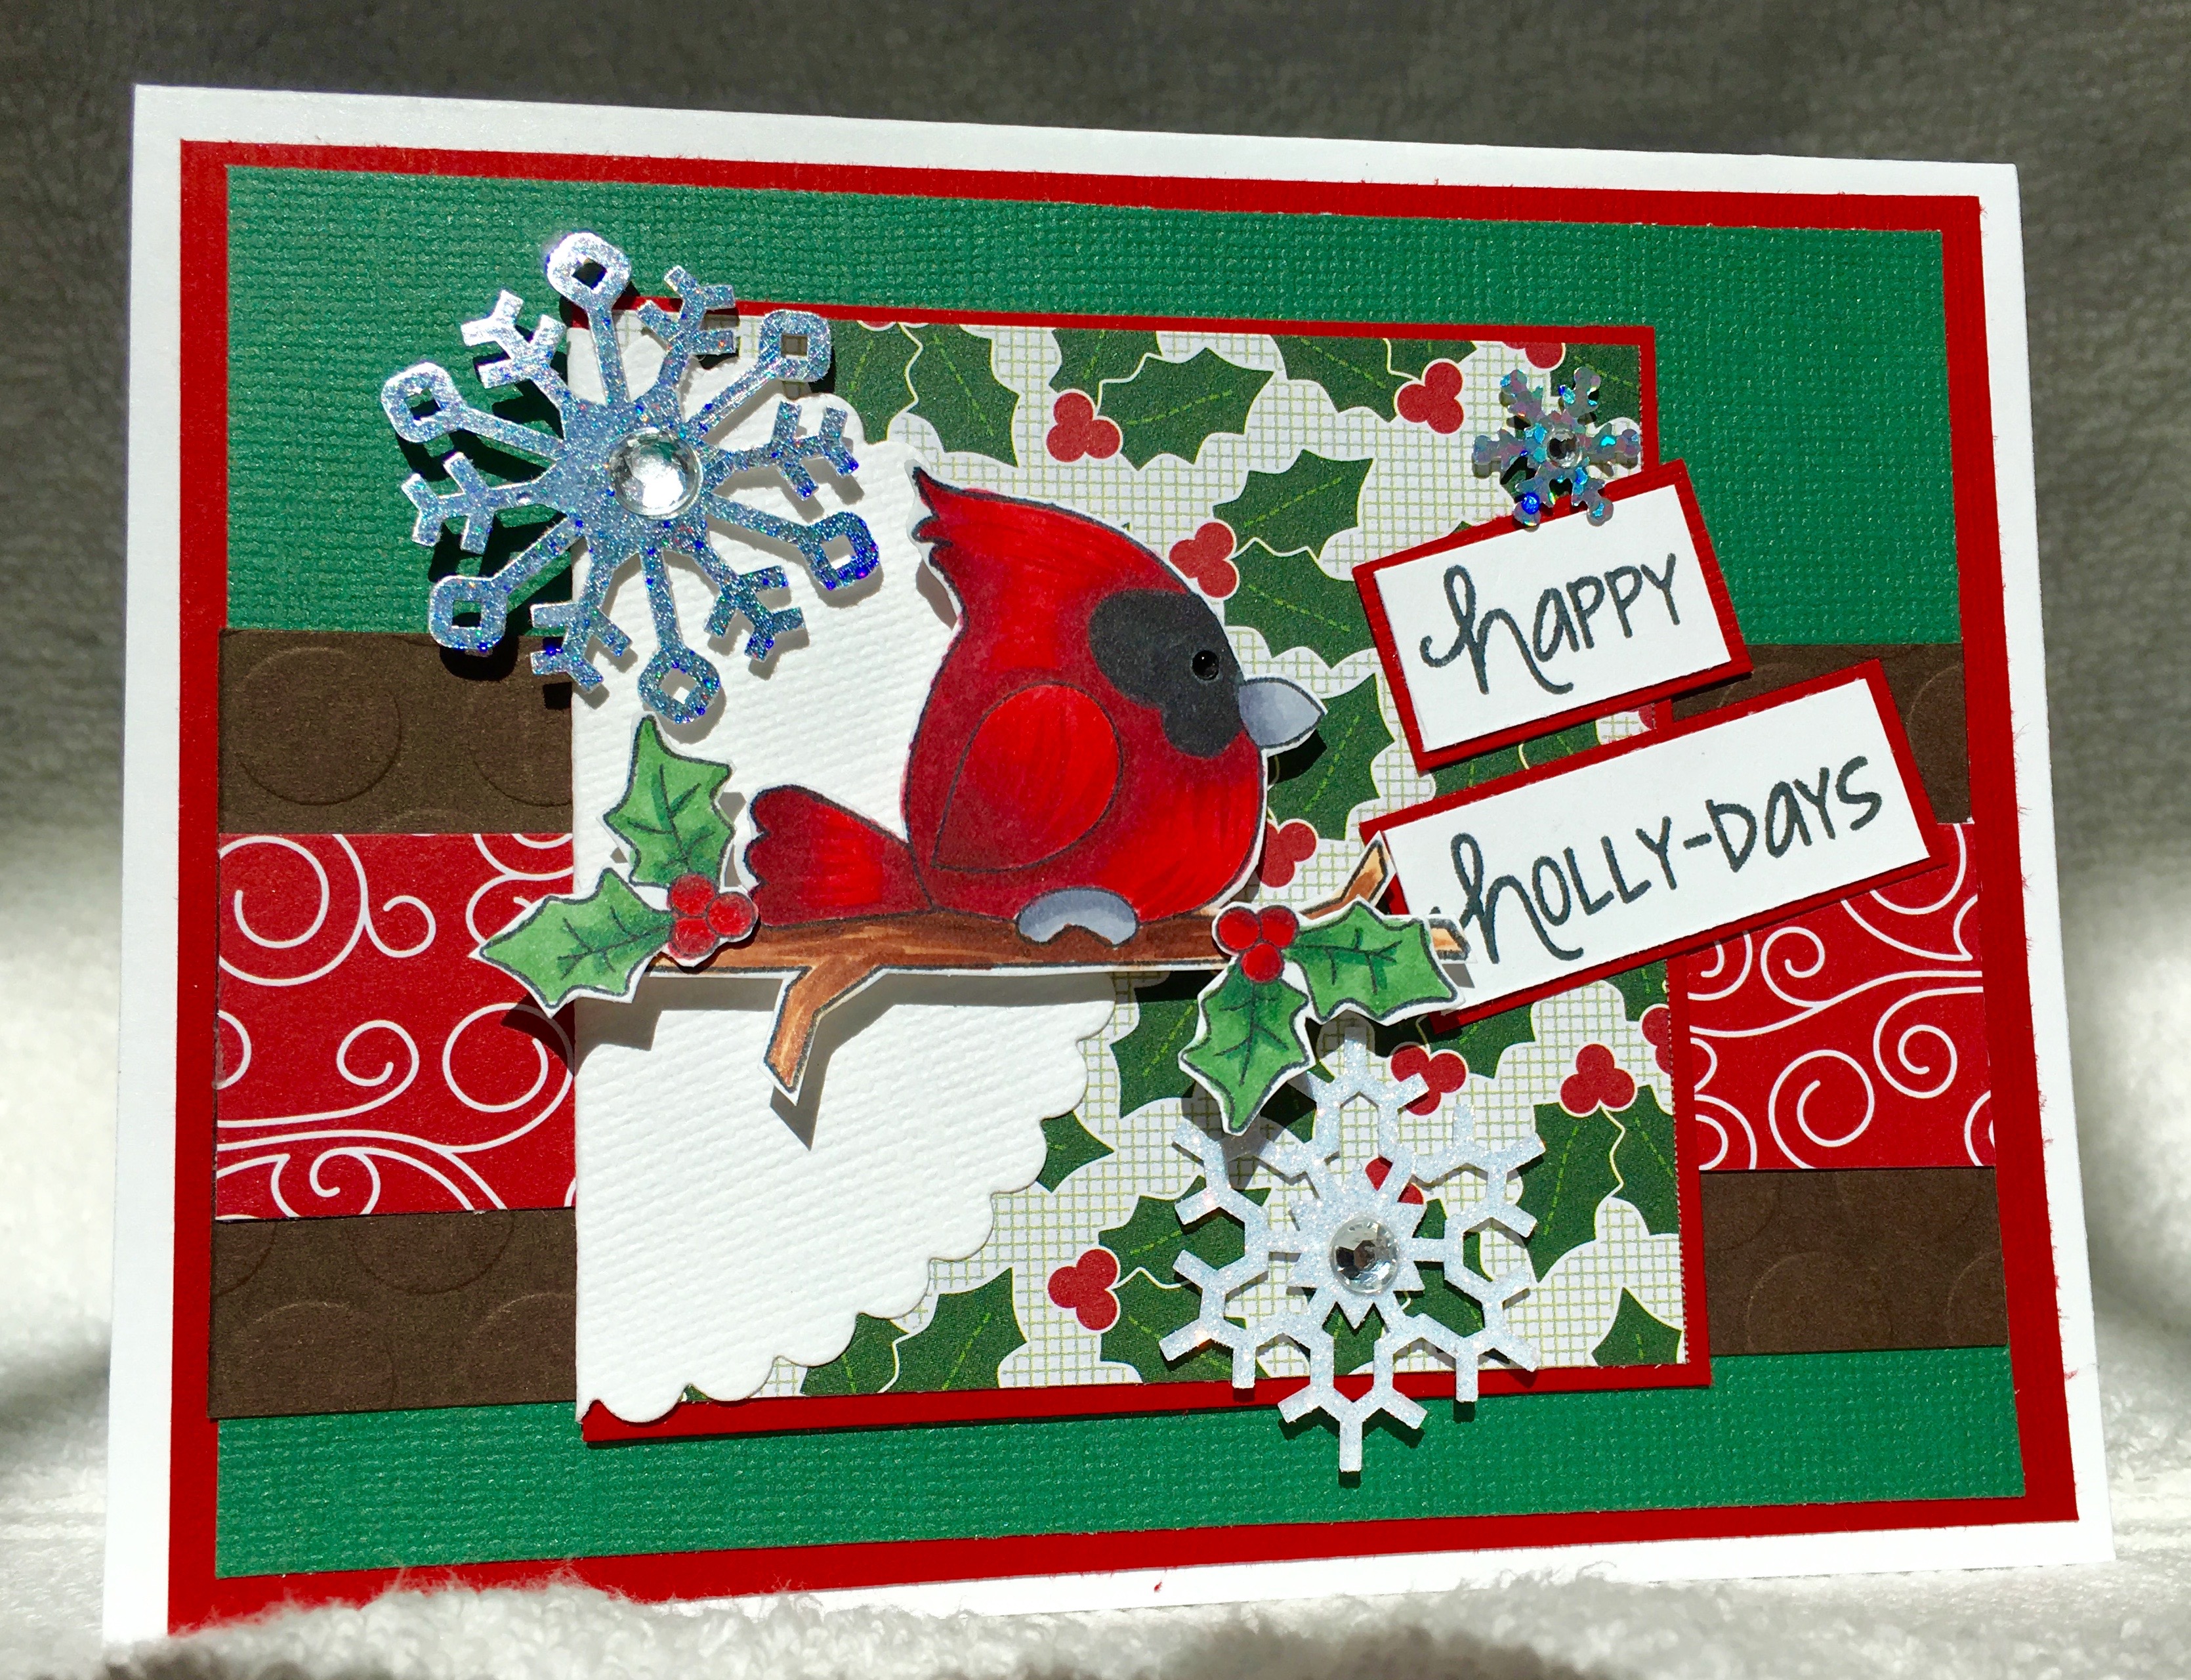
Today I am using the Holly Days stamp set.  I just love the little bird that comes in this set.  And all the sentiments are just perfect for Christmas!
IMG_0288
Here are my design steps:
  1. Use an A2 white card base
  2. Cut the red card stock slightly smaller then the front of the white card base (Bazzill Paper)
  3. Cut the green card stock slighly smaller then the red card stock and glue on top of the red and attach to the front of the white card (Bazzill Paper)
  4. Cut a 2 1/2 x 4 inch piece of embossed brown card stock and glue to the green card stock on the front of the card as shown (Recollections Paper)
  5. Then cut a designer piece of red  swirl paper 1 x 4 inches and glue it to the middle of the embossed brown card stock (Designer paper Welcome Christmas by Pebbles)
  6. Cut a 3 x 3 piece of designer holly paper and layer it onto red card stock. (Designer paper Welcome Christmas by Pebbles)
  7. Cut a 3 inch scalloped circle (I used my Cricut) and fold in half and attach it to the holly paper square as shown and glue to the front of the card in the center
  8. Stamp the bird and holly leaves (Memento Black Ink) color. Copics used: G29, 46 - E21, 25, 29 - R35, 37, 39, 59 - C03, 05
  9. Cut out the bird and holly leaves using coordinating dies and pop to the front of the card
  10. Stamp the sentiment and layer on red card stock
  11. Add the snowflakes (Jolee) and black rhinestone for the eye (Recollections)
Thanks for stopping by and have a Happy Thanksgiving!
Blessings
Pam

Saturday, November 14, 2015

Big Hugs - Pink and Main

Happy Sunday Morning to All!
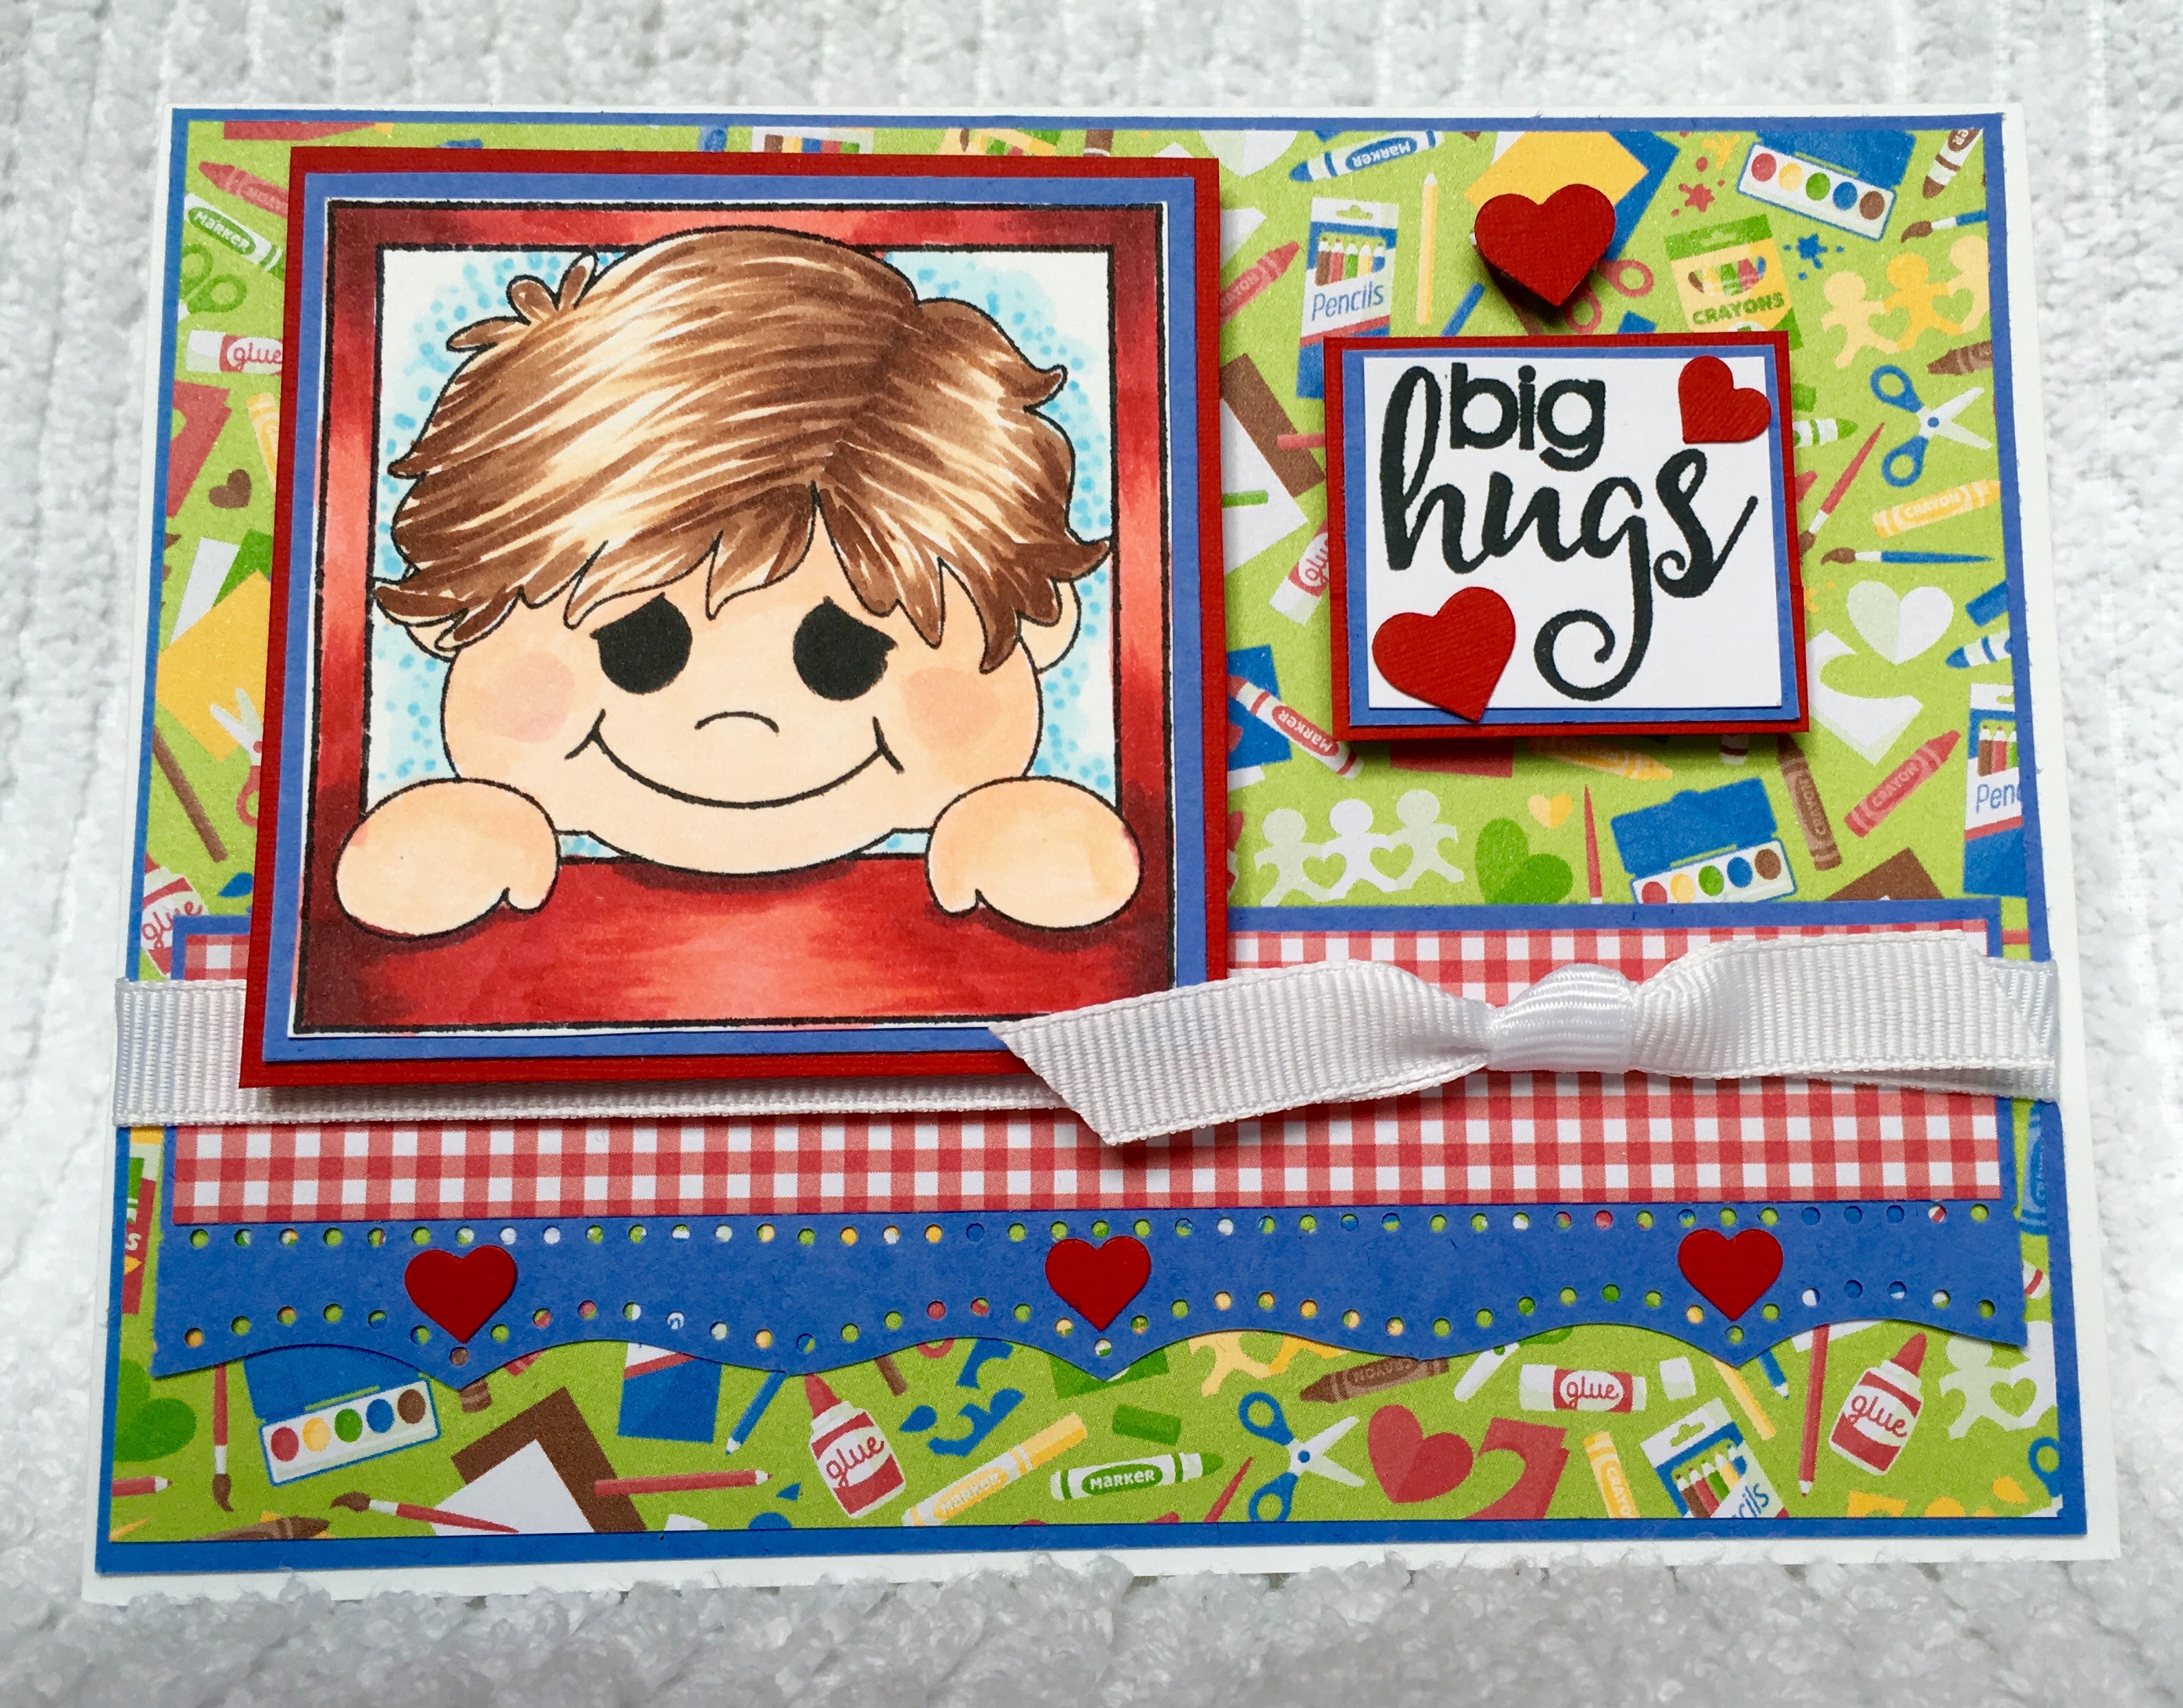
I have made a Happy card to go along with this beautiful morning! The two sets I am featuring today are Add a Smile and Sweet Faces Set 2.
IMG_0269
Here are my design steps:
  1. Use an A2 white card stock base
  2. Cut a slightly smaller piece of blue card stock and then a piece of designer paper slightly smaller then the blue paper. (Recollections and Family Fun American Crafts) Glue the pattern paper to the blue card stock
  3. Cut a 2 x 4 inch strip of blue card stock and punch the bottom (MS punch).  Then cut a 1 x 3 3/4 inch piece of checked designer paper (Family Fun American Crafts) and adhere to the blue strip. Glue to the layered strip to the front of the pattern designer paper as shown about a 1/2 inch from the bottom
  4. Add the ribbon and glue the layered piece of blue, designer paper and border to the front of the white card
  5. Stamp the little boy and sentiment  (Memento Black ink)(Stamps: Pink and Main Add a Smile and Sweet Faces Set 2)
  6. Color the little boy using copics (E00, 02, 21, 25, 29 - B000, 00, 01, 02 - C5 - R20, 22, 29, 46, 59)
  7. Layer the little boy and sentiment using red and blue card stock pop dot to card front
  8. Punch out red hearts (MS punch) and glue to the card
Have a fabulous crafty day!
Blessings
DT Pam 

Saturday, November 7, 2015

Cookies - Pink and Main

Good Sunday Morning!
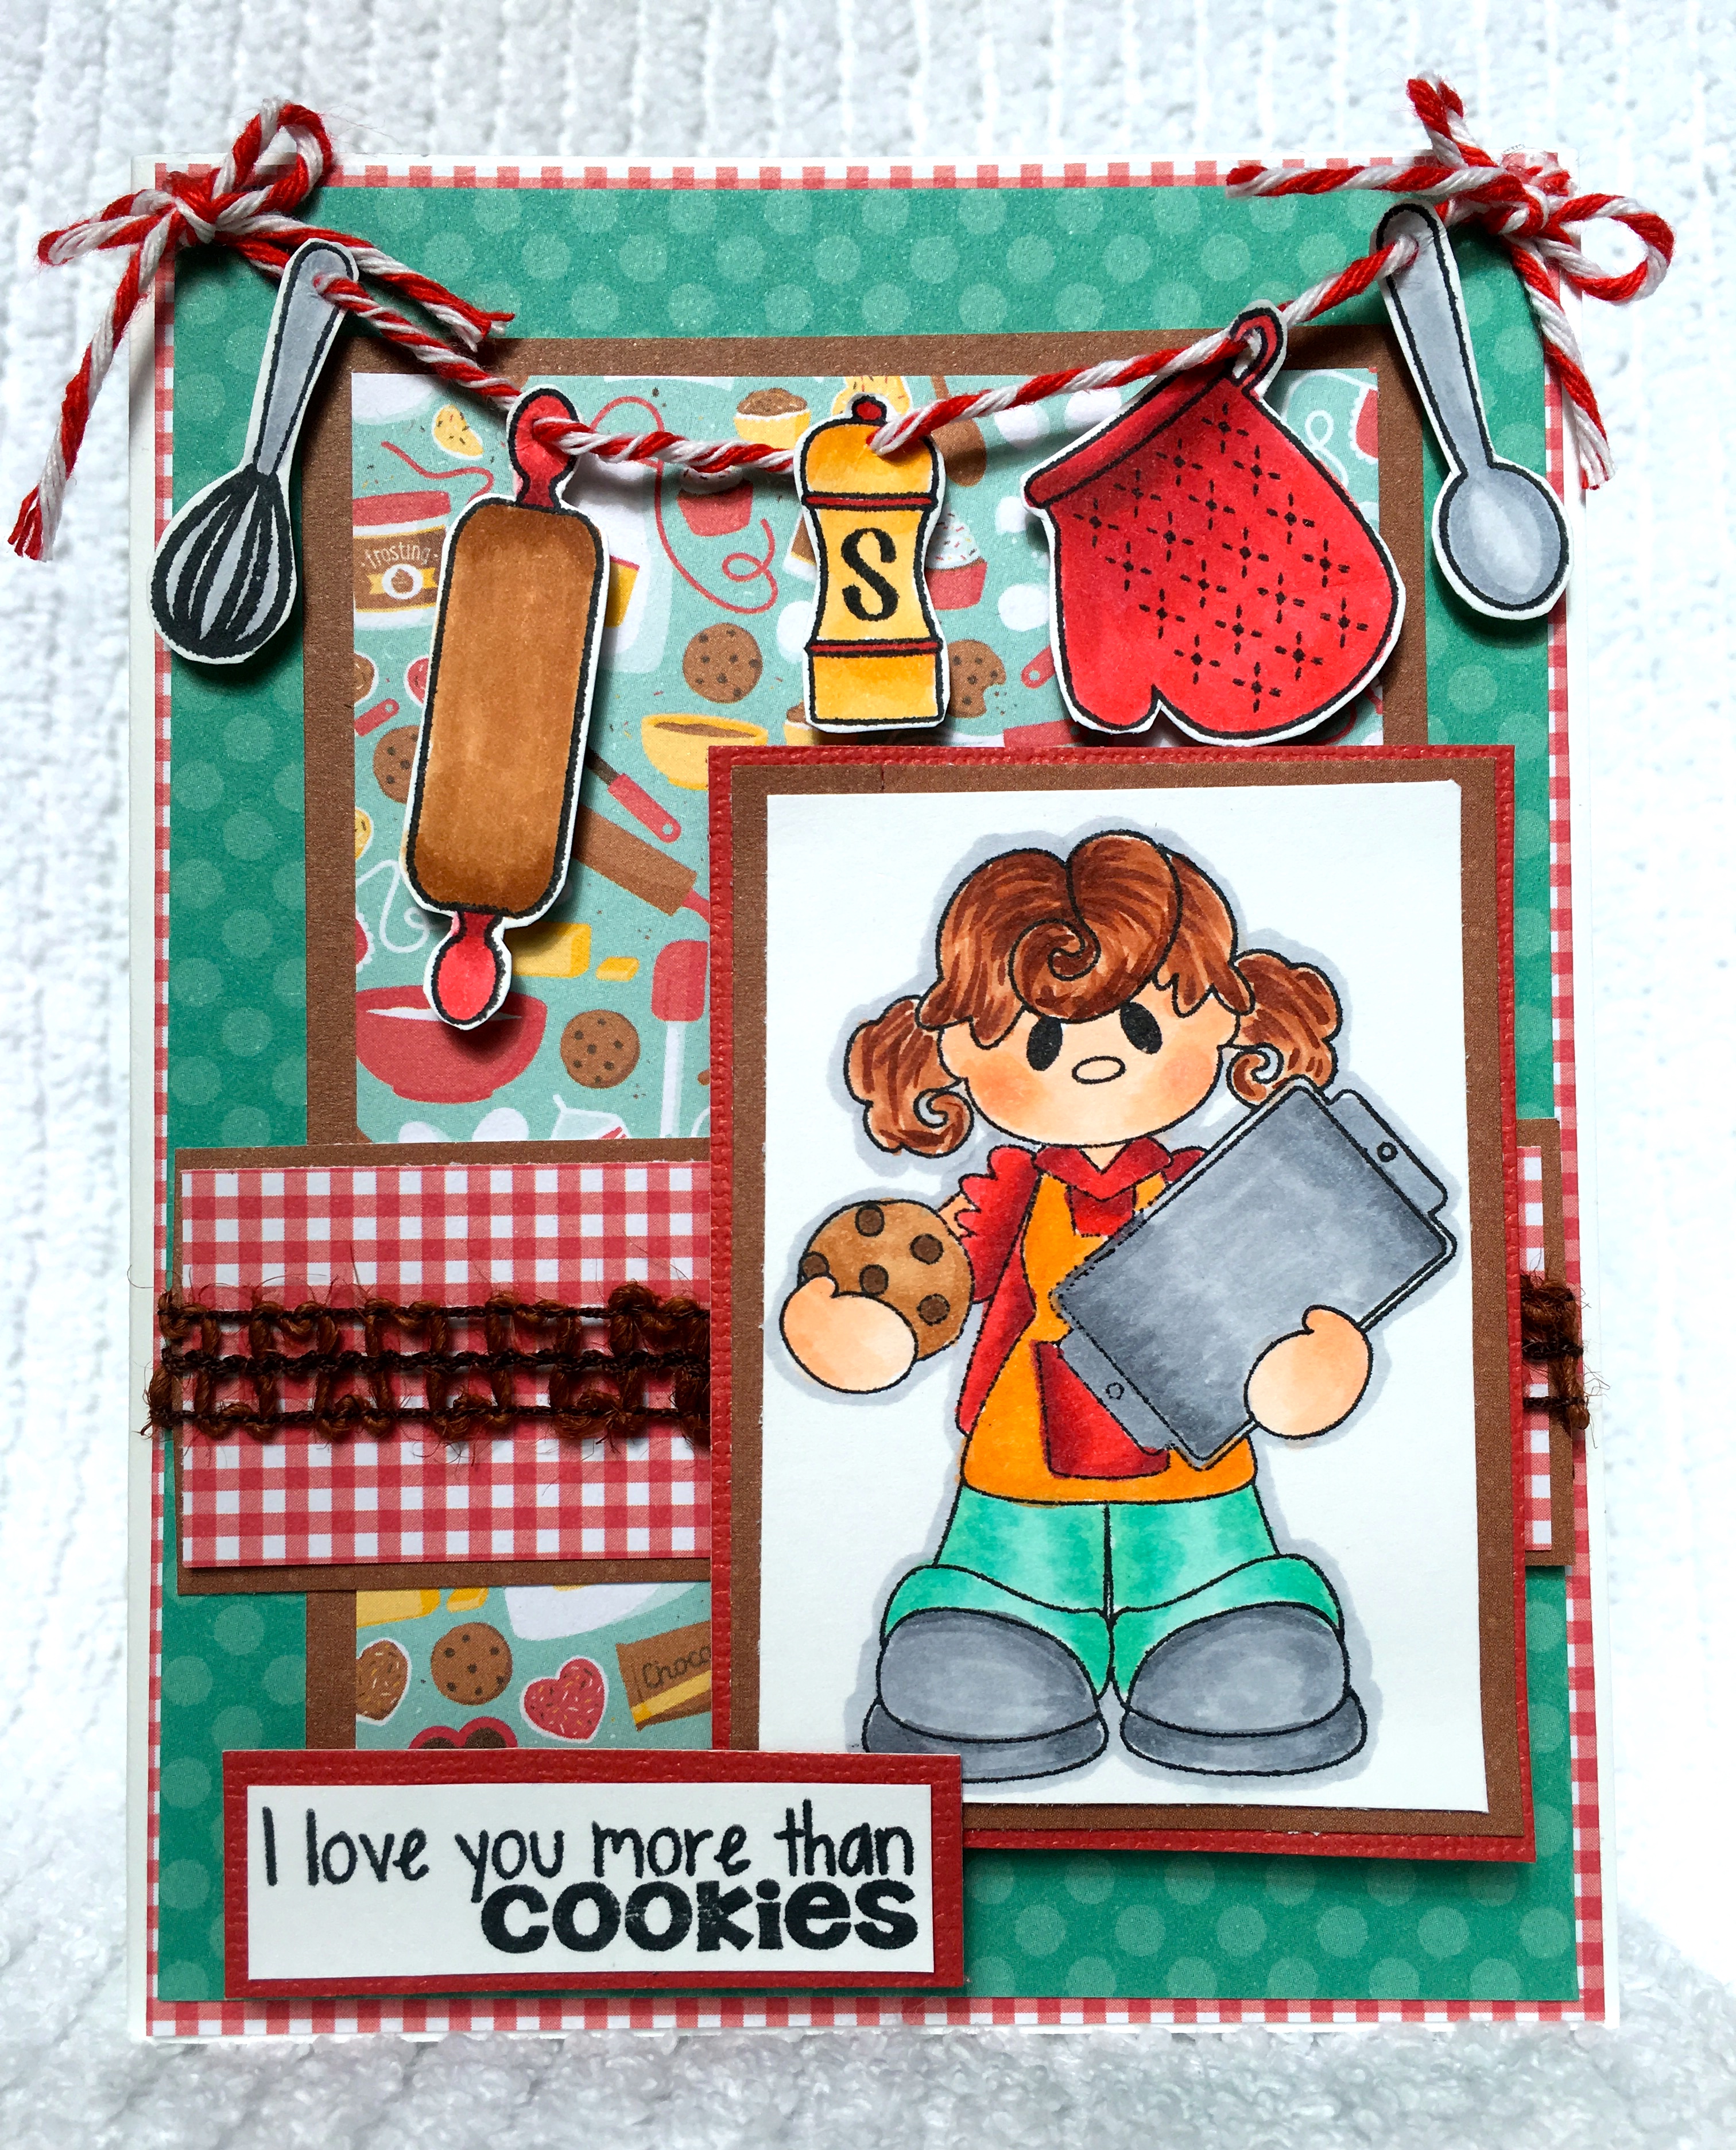
I have a very special sneak peek at two of the new November stamp release sets!  And boy are they stinkin cute! The two sets I am featuring are Cookies and Baker.
IMG_0258
Here are my design steps:
  1.  Use a white A2 card as the base (Recollections)
  2. Cut a slightly smaller red checked piece of designer paper (Family Fun American Crafts)
  3. Cut an even slightly smaller piece of teal dotted paper and glue to the checked paper. (Family Fun American Crafts)
  4. Cut a 3 x 4 inch piece of bakers pattern design paper and layer it on chocolate brown card stock.  Glue to the center of the teal dotted paper (Family Fun American Crafts and Recollections)
  5. Cute and 1 inch x 4 inch piece of red checked paper and layer it on chocolate brown card stock.  Add the brown twine trim (Recollections) and glue it about 2 inches up from the bottom.  Then glue all the layered pieces to the front of the white card
  6. Stamp the large image using Memento black ink (Pink and Main Cookies Set)
  7. Stamp all the utensils using Memento black ink (Pink and Main Baker Set)
  8. Color with copics: E00,02, 11, 13, 15, 18, 33, 34, 37, 47 - YR12, 14, 21 - C02, 3, 4, 6 - R20, 35, 37, 59
  9. Cut the large image out and layer it on chocolate brown and red card stock.  Pop dot to the card as shown
  10. Cut all the utensils out and use a piercing tool to thread them through the red bakers twine.  Attach to the top of the card as shown.  Add the twine (Recollections) bows using glue dots
  11. Stamp the sentiment (Pink and Main Cookies Set) in Memento black in cut then layer it on red card stock.  Pop dot to the bottom of the card
Thanks for stopping by!
Have a Blessed Day!
Pam

Saturday, October 31, 2015

Cute Package - Pink and Main

Happy Sunday Pink & Main fans!
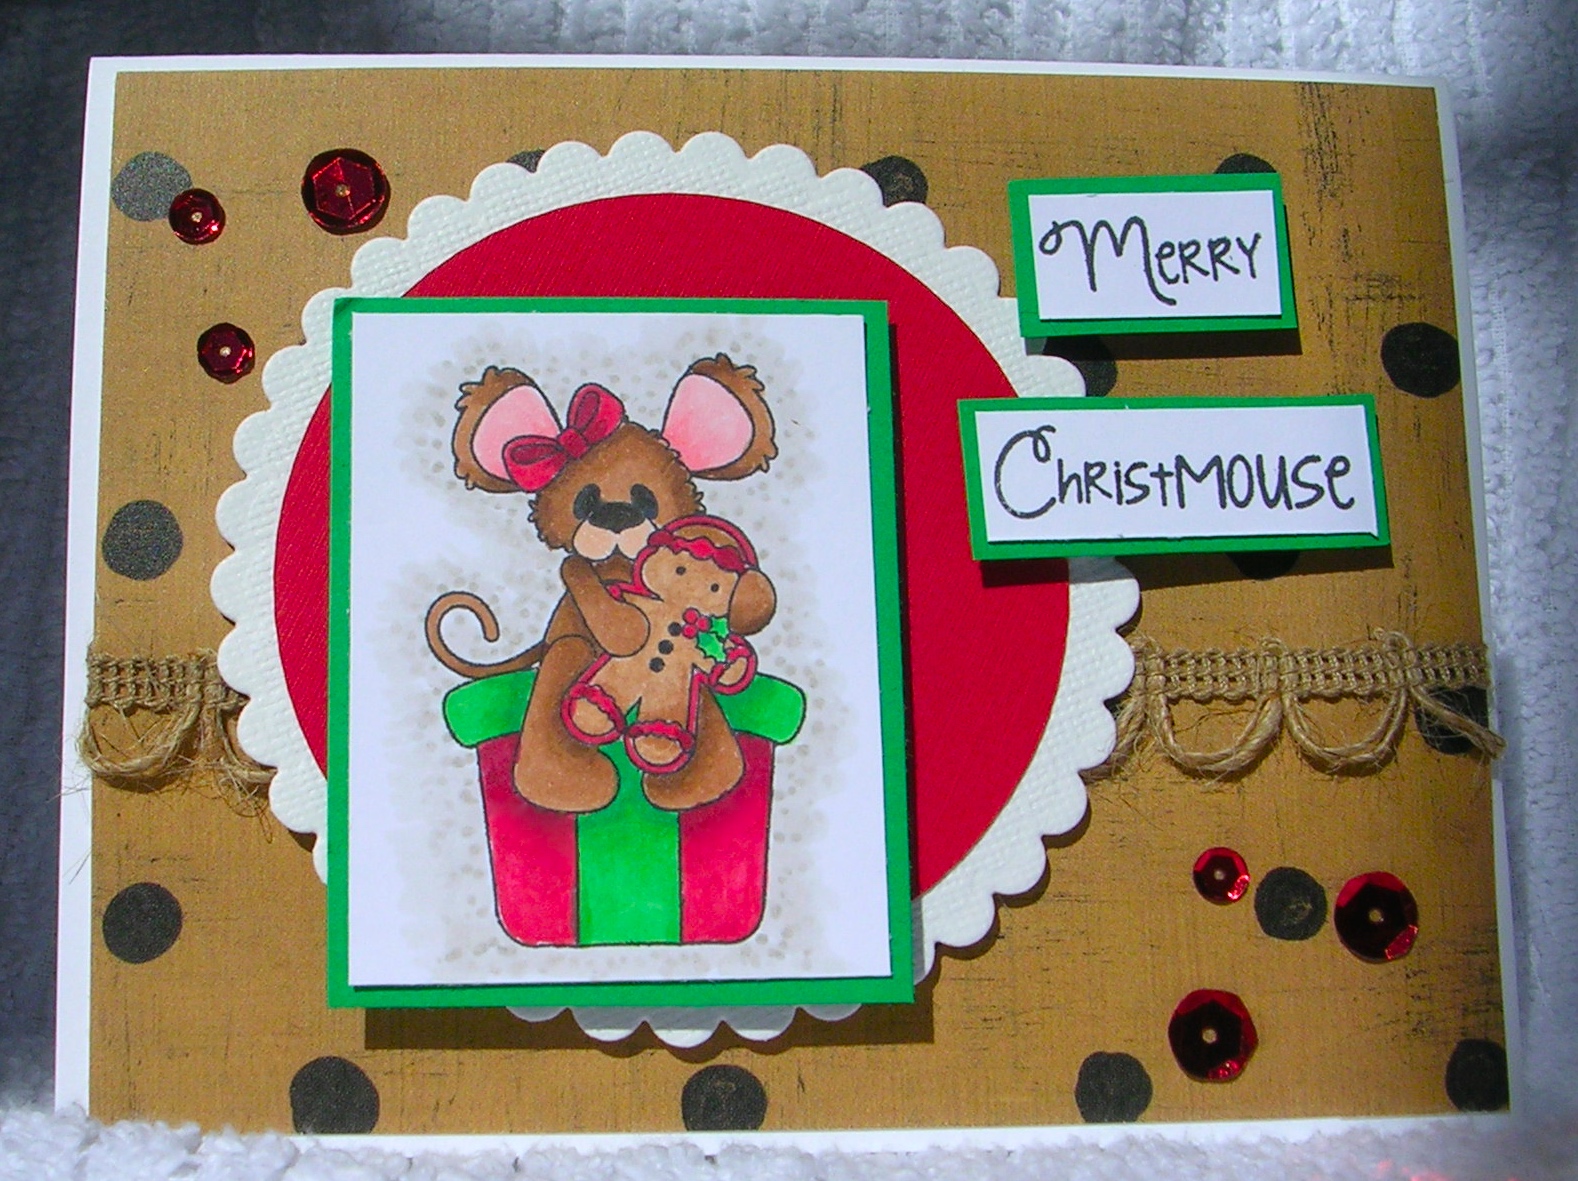
I hope you will have a great week starting with this fantastic Sunday! I am here to share with you a card that uses the cute little mouse from the freebie (with a $30 purchase) stamp set called Christmouse.
DSCN5461

Here are my design steps:
  1. Start with an A2 size white card base
  2. Cut the polka dot paper slightly smaller than the card front (Lasting Impressions Paper)
  3. Wrap the decorative twine around the polka dot paper then attach it to the card front (Twine Recollections)
  4. Cut the red circle and scalloped white circle using your cricut or a die cut adhere to the card front
  5. Stamp and color the little mouse with copics: W1, 2, 3, 4 - E11, 21, 23, 57, 59 - G5, 9, 17 - R20, 22, 46, 59 (Pink and Main Christmouse)
  6. Cut out image and layer on green cardstock pop to the front of the card as shown
  7. Stamp sentiment and layer on green yardstick.  Pop to the front of the card (Pink and Main Christmouse)
  8. Add red sequin
Thanks for taking a peek!
Blessings
Pam M.

Friday, October 23, 2015

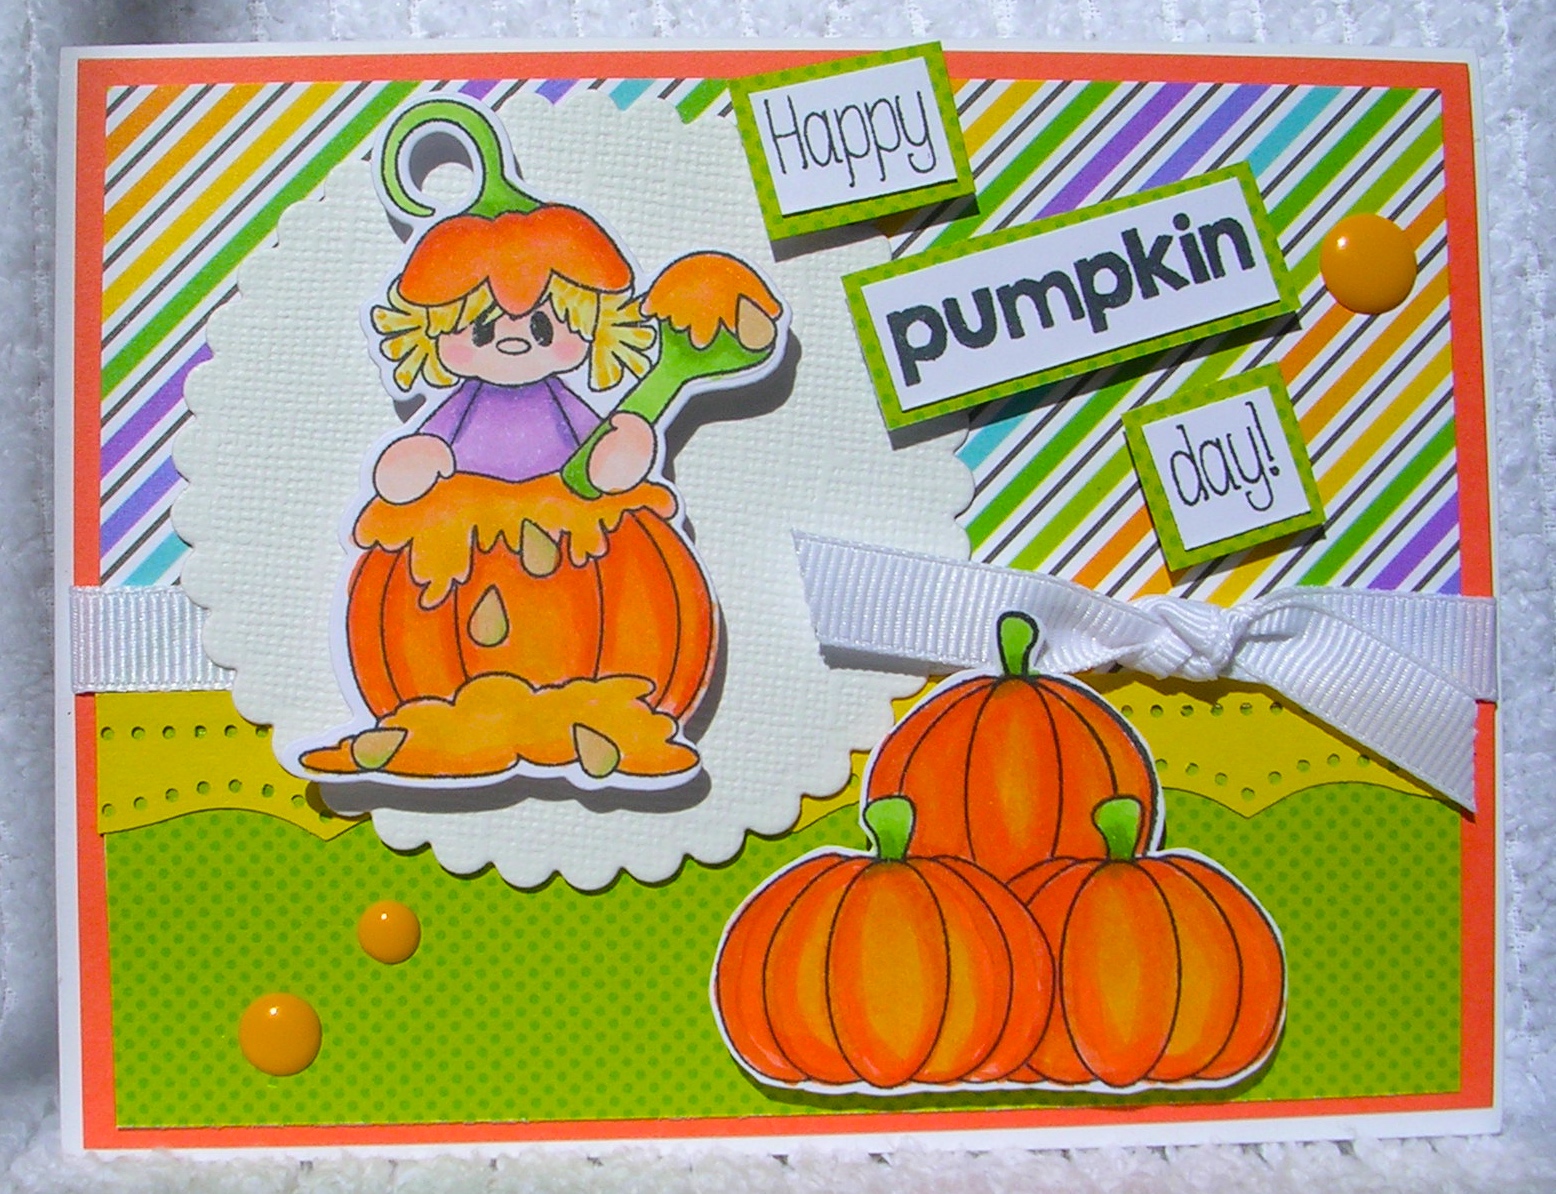
Hey Pumpkin - Pink and Main

Happy Sunday Pink & Main Fans!
I hope you had an awesome week and are ready to start a brand new one!  I needed one more Halloween card for a niece so I decided to use this adorable set.  It is called Hey Pumpkin!
DSCN5456
My Design steps:
  1. Use an A2 white card base
  2. Cut a slightly smaller piece of orange cardstock for the front
  3. Then cut a striped piece of designer paper 3 x 5  glue to the top of the orange cardstock (Doodlebug paper)
  4. Also cut a green polka dot piece of designer paper 2 x 5  and glue to the bottom of the orange cardstock (Doodlebug paper)
  5. Then add the border piece of yellow cardstock cut with a punch (MS punch)
  6. Add the ribbon to the orange cardstock and attach to the white card base.
  7. Add the scalloped circle (cut with a cricut)
  8. Stamp pumpkins using masking to create the pumpkin stack (Hey Pumpkin Set, Memento Tuxedo Black Ink)
  9. Stamp little girl and color the images with copics ( Y11, 17 - YR02, 04, 18, 21, 65, 68 - YG13, 17 - V12, 15, 17)
  10. Use matching dies for cutting little girl, hand cut the pumpkin stack
  11. Stamp sentiment and mat on green polka dot designer paper
  12. Use pop dots for mounting girl, pumpkin stamp and sentiment
  13. Add enamel dots (Doodlebug)
Thanks for stopping by and many Blessings!
Pam

Saturday, October 17, 2015

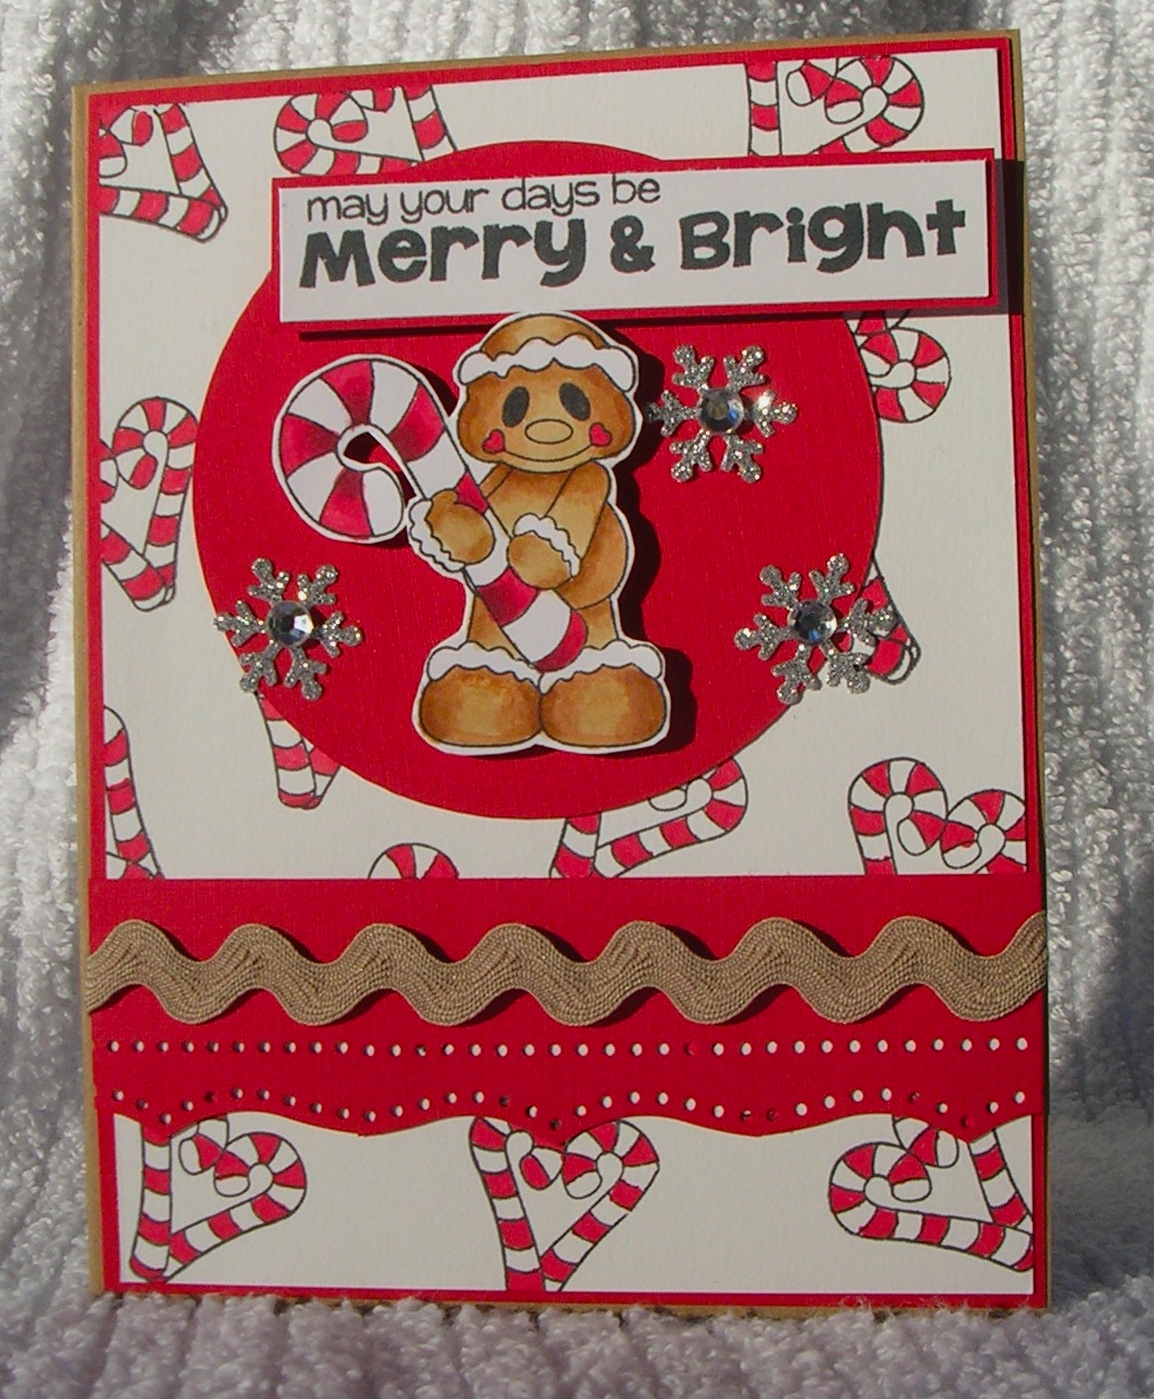
Gingerbread - Pink and Main

Hi Pink and Main Fans!
It is a beautiful Sunday morning!  I am sharing with you a card made with a two new release sets called: Gingerbread and Hollydays!
DSCN5449
My design steps:
  1.  Made an A2 size card using Craft colored cardstock
  2. Layered a slightly smaller piece of red to the front
  3. Cut a slightly smaller piece of white for my candy cane heart layer
  4. Stamp the background with the heart candy cane stamp (Gingerbread Stamp Set) colored with copics.  (Cool way to create your own background paper and it saves money on designer paper!)
  5. Cut border strip (MS punch)
  6. Added rik rak for a little texture. (Recollection rik rak)
  7. Cut a background circle (I used my Cricut)
  8. Stamped Gingerbread man using Memento Tuxedo Black Ink (Gingerbread Stamp Set)
  9. Colored with copics: E32, 33, 35, 37, R39, 46, 59
  10. Use coordinating die cuts to cut out gingerbread man
  11. Add snowflakes (Jolee)
  12. Stamped sentiment using Memento Tuxedo Black Ink (Hollydays Stamp Set)
  13. Layered the sentiment with Red Card stock
Thanks for stopping by!
Have a Blessed and Crafty Day!
Pam M.