Sunday, April 7, 2024

Just Bee-cause

Hello Friends

My supply of cards is running a little low so I thought I would make one that could be used for multiple occasions such as thinking of you, miss you, just because and so on.  I did a fancy fold that I have done in the past that I just love.  I am featuring two dies: Bee Gnome and Flowers.

Background photo by FreePiks
Design Steps: (Here is a link to a video that I used to make the base https://www.pinterest.com/pin/443534263317816376/ )
1.  Start with a piece of white card stock measuring 10 x 6 3/4.  Score at 3, 4 1/2, 6, 7 1/2
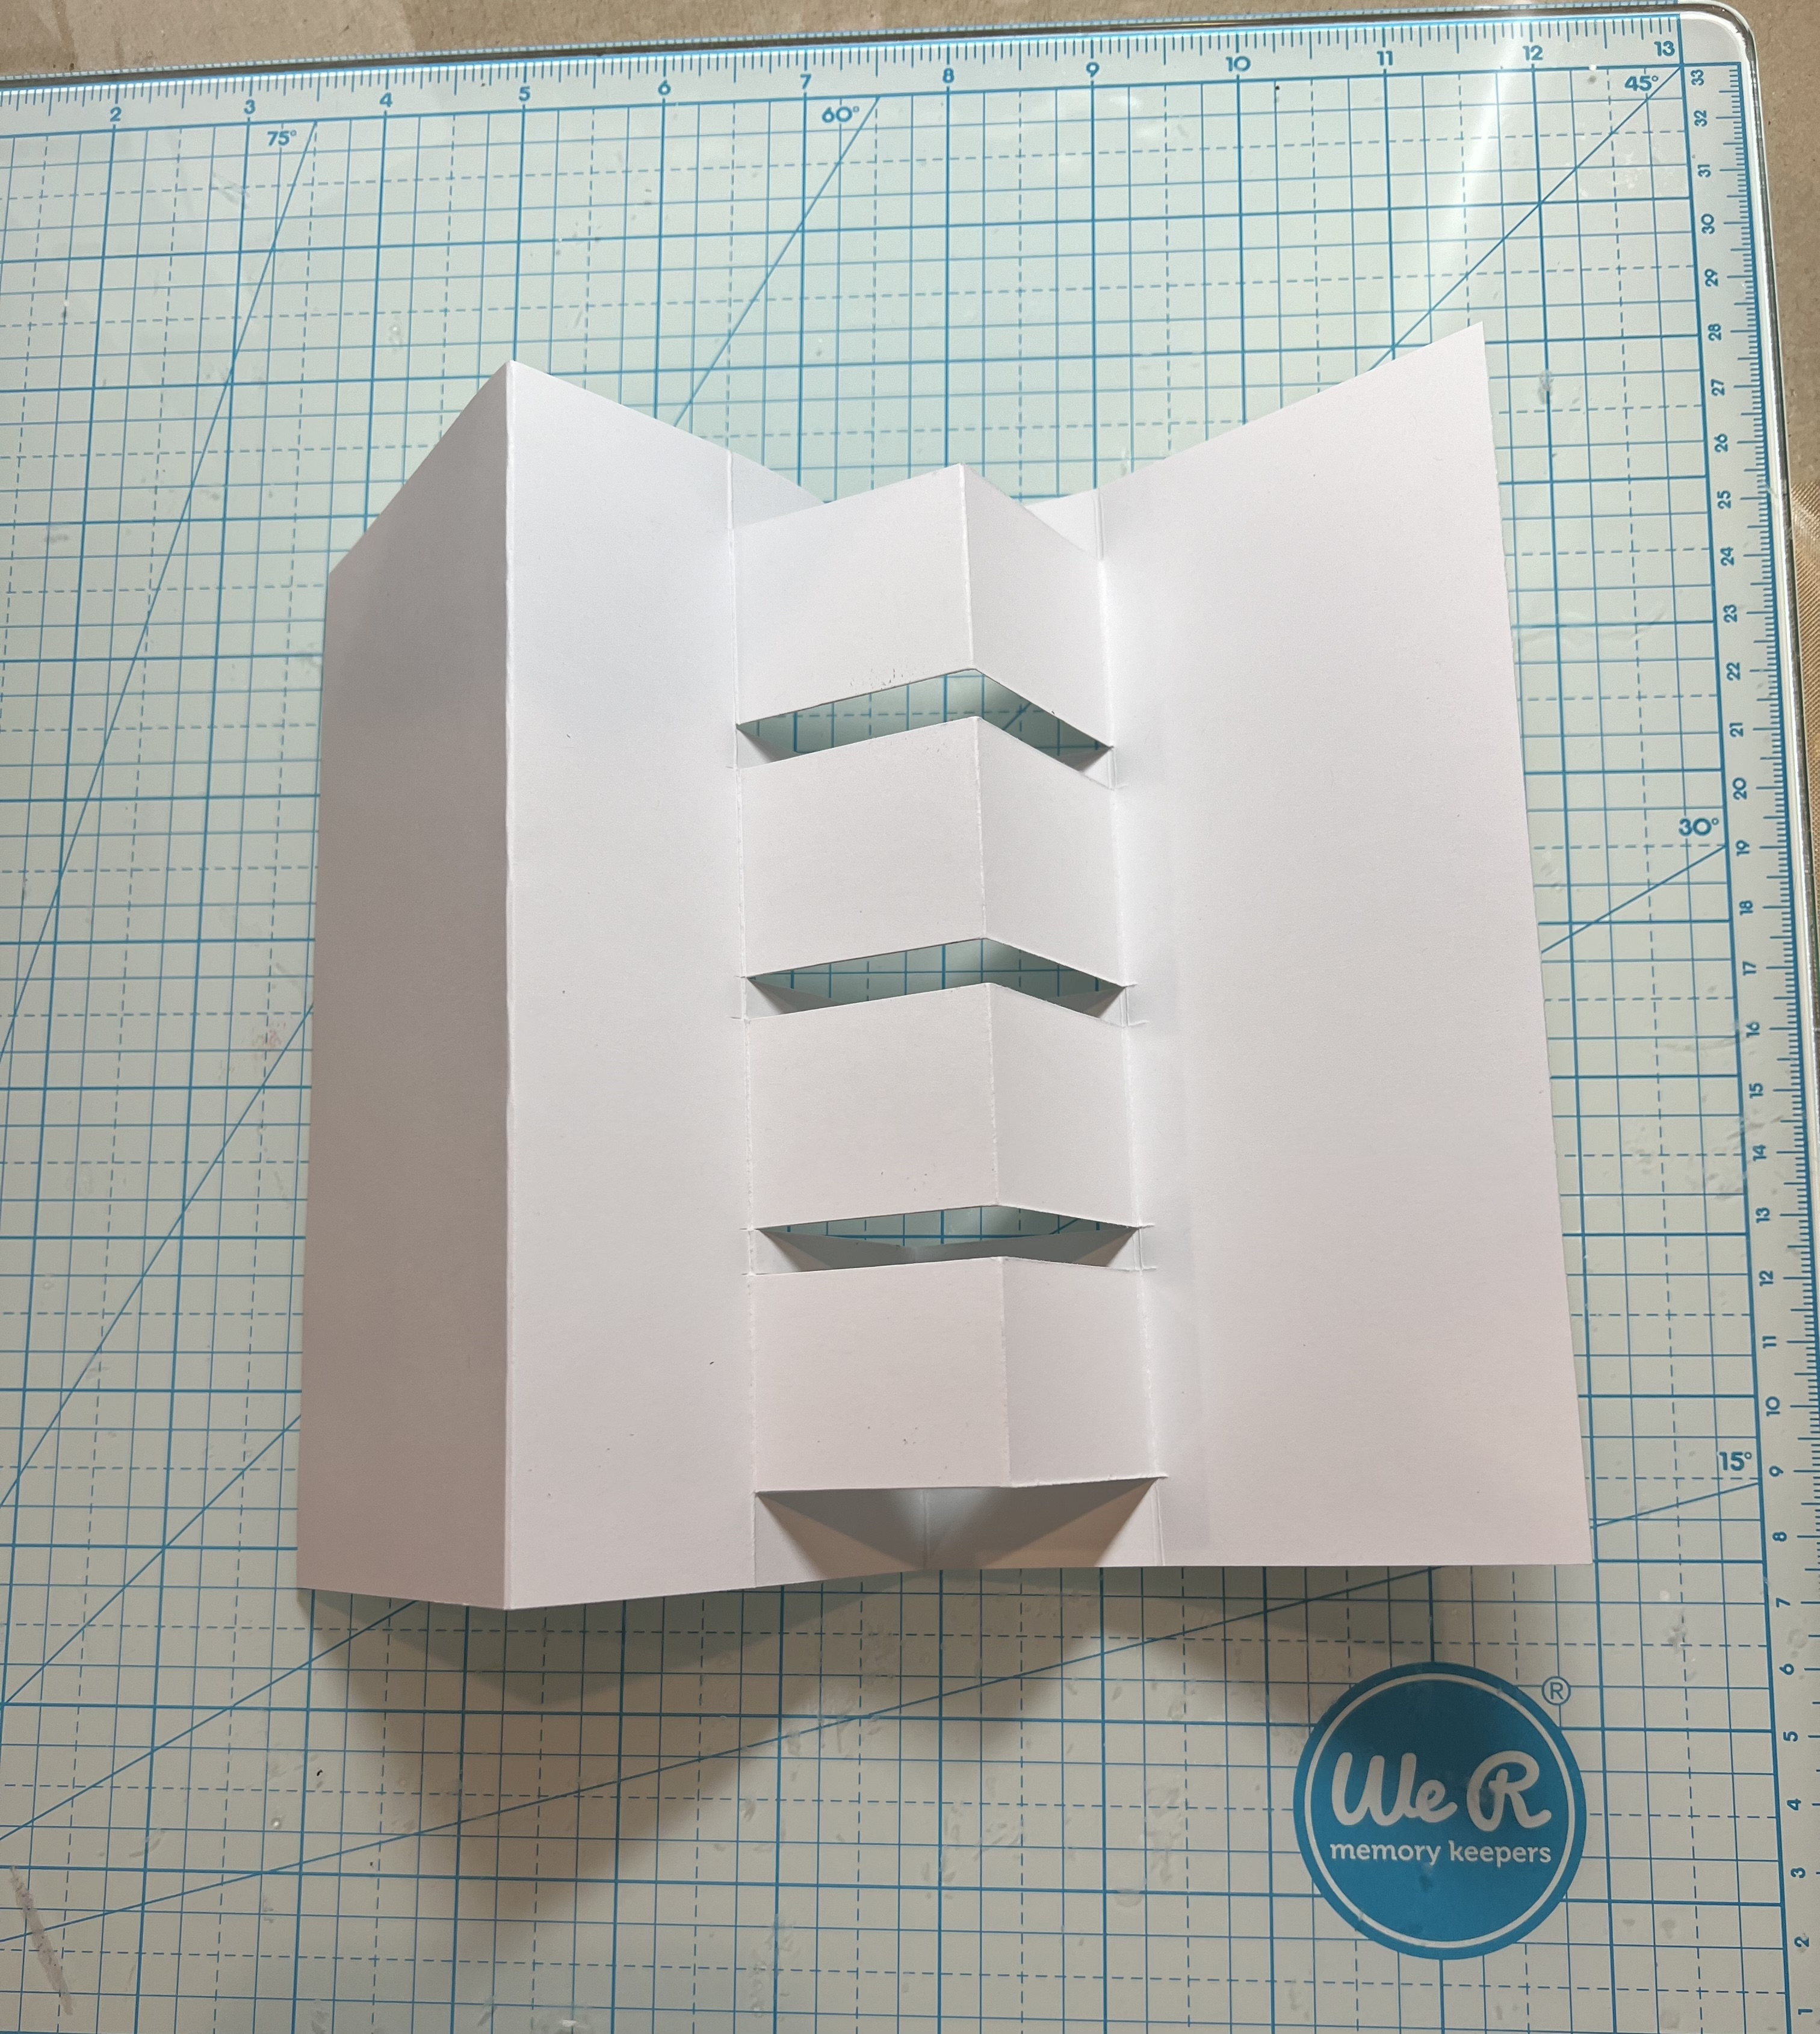
2.  Fold the flap back along the 6 inch score. Place a ruler at the bottom along the fold and use a pencil to mark small dots at 1/2, 1 3/4, 2, 3 1/4, 3 1/2, 4 3/4, 5, 6 1/2
3.  Place your card into a paper cutter and cut from the dots to the closest score line as shown above
4.  When you have completed the cuts fold as shown below


5.  To cover the panels cut 2 black pieces 6 3/8 x 2 3/4, 2 white pieces 6 1/4 x 2 1/2, 1 black piece 6 3/8 x 1 1/4 and 1 white piece 6 1/4 x 1 1/8
6.  I used a honeycomb stencil to decorate the white panels and 2 colors of yellow ink
7.  I then splattered the panels with the darker yellow ink
8.  Glue the panels together and then add to the white card base
9.  Glue down the 8 black rectangles as shown above
10.  Use the Flowers and the Bee Gnome dies and cut out the pieces
11.  Shade the pieces and then assemble
12.  Stamp the sentiment and layer onto black card stock.  Decorate with front as shown above.  Cut out the letters in yellow and shade then add to the card.  Finish adding the flowers and bees and your card is complete


We have more inspiration on our YouTube Channel check it out HERE

Thanks so much for stopping by!  And I will see you next Thursday.

Blessings and Take Care


Thursday, March 28, 2024

Spring Time

 Hello Friends,

I thought I would make a few spring cards for my family who have had a rough winter back in Ohio and New York.  I must say I love Arizona winters!  No snow to shovel and no winter coats for me!  I guess our extremely hot summers are our winters.  We stay inside during the summer and play during our winter!!

This card was inspired by a beautiful card by Wanda Guess.  The design and dies are a little different but I really love how it turned out.  I used a larger card to accomodate the dies I chose.  It is a 5 x 7 card.  The dies I am featuring are Nest with Eggs, Spring Bunnies, Spring Daffodils & Eggs,  Hello Spring Bloom, Garden Butterflies and Bees and Bird Trio.

                                                                                                                      Background Photo Freepiks 

Design Steps:
1.  White base card is 5 x 7 when folded, kraft card stock 4 7/8 x 6 7/8 and white card stock 4 3/4 x 6 3/4
2.  Using the Pierced Square Set the 6th, 7th and 8th from the largest square cut out the squares in white.  Using the Pierced Rectangle Set the 4th and 5th from the largest rectangle cut out the retangles in white
3.  Use a blending brushe and blue ink to cover the top half of the rectangles and squares as shown above
4.  Take the white piece of card stock measuring 4 3/4 x 6 3/4 and lay out the retangles and squares as shown above.  When you have them as you like place dimension tape on the back of the retangles and squares then pop them to the white panel

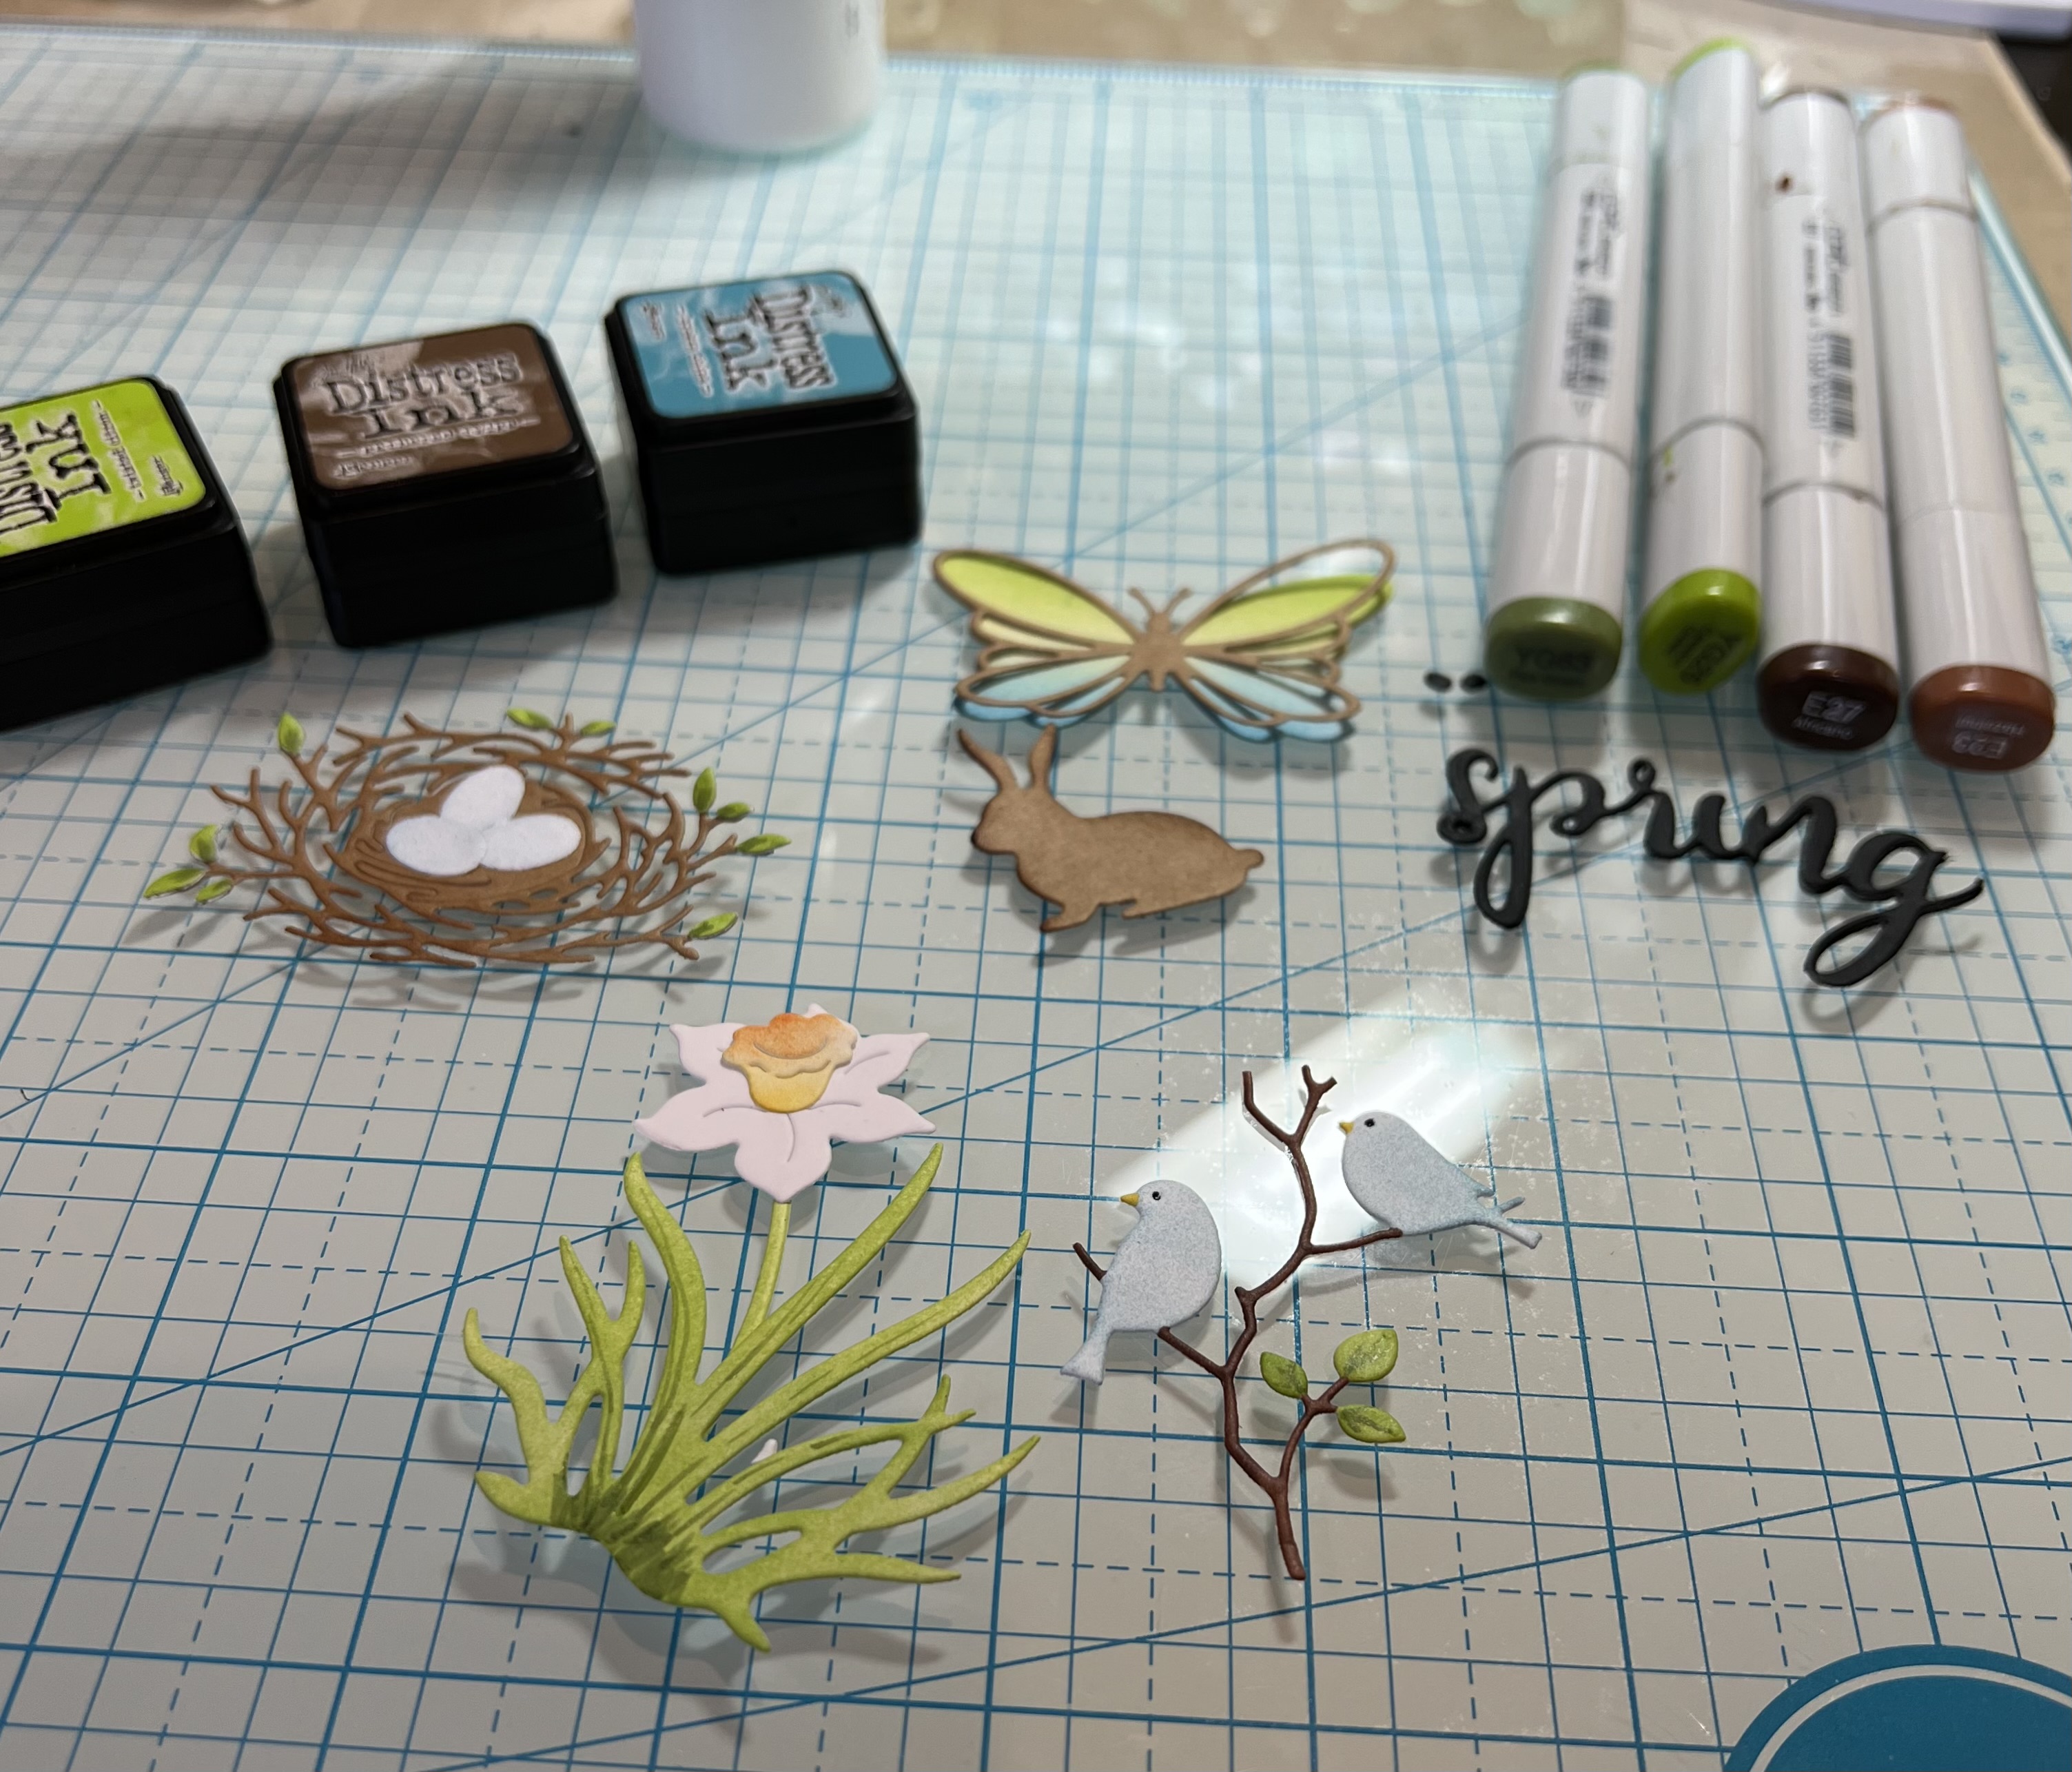
5.  Using the Nest with Eggs die cut out the nest in kraft and the eggs in white.  Using the Spring Bunnies cut out the sitting bunny in Kraft.  Using the Bird Trio cut it out in white.  Using the Spring Daffodils & Eggs die cut it out in white.  Using the Hello Spring Bloom cut the word spring out twice in black and glue together.  Using the Garden Butterflies and Bees cut the butterfly out in kraft and white
6.  Use Copics and inks to color the dies and then glue together as shown above
7.  Glue the dies to the retangles and squares as shown above.  Splatter the card with white and blue ink. Add a little stamp sentiment that says time.  Glue the panel to the 4 7/8 x 6 7/8 kraft card stock and then onto the card base.  Your card is complete


We have more inspiration on our YouTube Channel check it out HERE

Thanks so much for stopping by!  And I will see you next Thursday.

Blessings and Take Care


Tuesday, March 19, 2024

Do You Smell Carrots?

 Hello Friends

Today's post is for the House-Mouse Monday Challenge!  The challenge is Anything Goes or Stitching.  I decided to do stitching and make a spring card.  The stamp is called Carrot Friend.  Check out the challenge HERE.

Background Photo by FreePik

This is such a perfect challenge for using those cute little House-Mouse and Happy Hopper Stamps!  Come and join the fun!


Thanks for taking a peek!

Blessings
Pam

Thursday, March 14, 2024

Do You Smell Carrots?

 Hi Crafty Friends,

I am still finishing up my Easter/Spring cards.   I learned a fun fold from Stacey.  She is a wonderfully creative fellow paper crafter.  So I decided to use it on this card today.  I am also featuring two different dies Bottoms Up Bunny Baker and Spring Bunny w/Giant Carrot.

Background photo by Freepiks

Design Steps:


1.  Cut 2 pieces of white card stock 8 1/4 x 4 1/4 (Score both pieces at 2 1/4, 4, 6 1/4) Cut one piece of white card stock 4 1/4 x 4 1/4

2.  Starting with the widest panel make a mountain fold and then the next 2 valley.  Set the two pieces next to each other as shown above in opposite directions.  Tuck the mountain fold into the valley fold and place close together as shown below

3.  I used a piece of tape to anchor them together then applied glue to the two panels as shown below
4.  After spreading the glue I lined up the 4 1/4 x 4 1/4 square on top of the flaps

5.  This is what it looks like after the panel is glued in place
6.  To open the panel pull on the two side flaps and it will look like this from the top view
7.  This is what the card looks like from the front view 
8.  Cut 2 pieces of plaid DP 2 1/8 x 4 1/8 and 2 piece of Easter Egg DP 1 5/8 x 4 1/8 (I decided to make a spring card rather then an Easter card so I switched out the pattern)
9.  Glue the DP in place as shown above


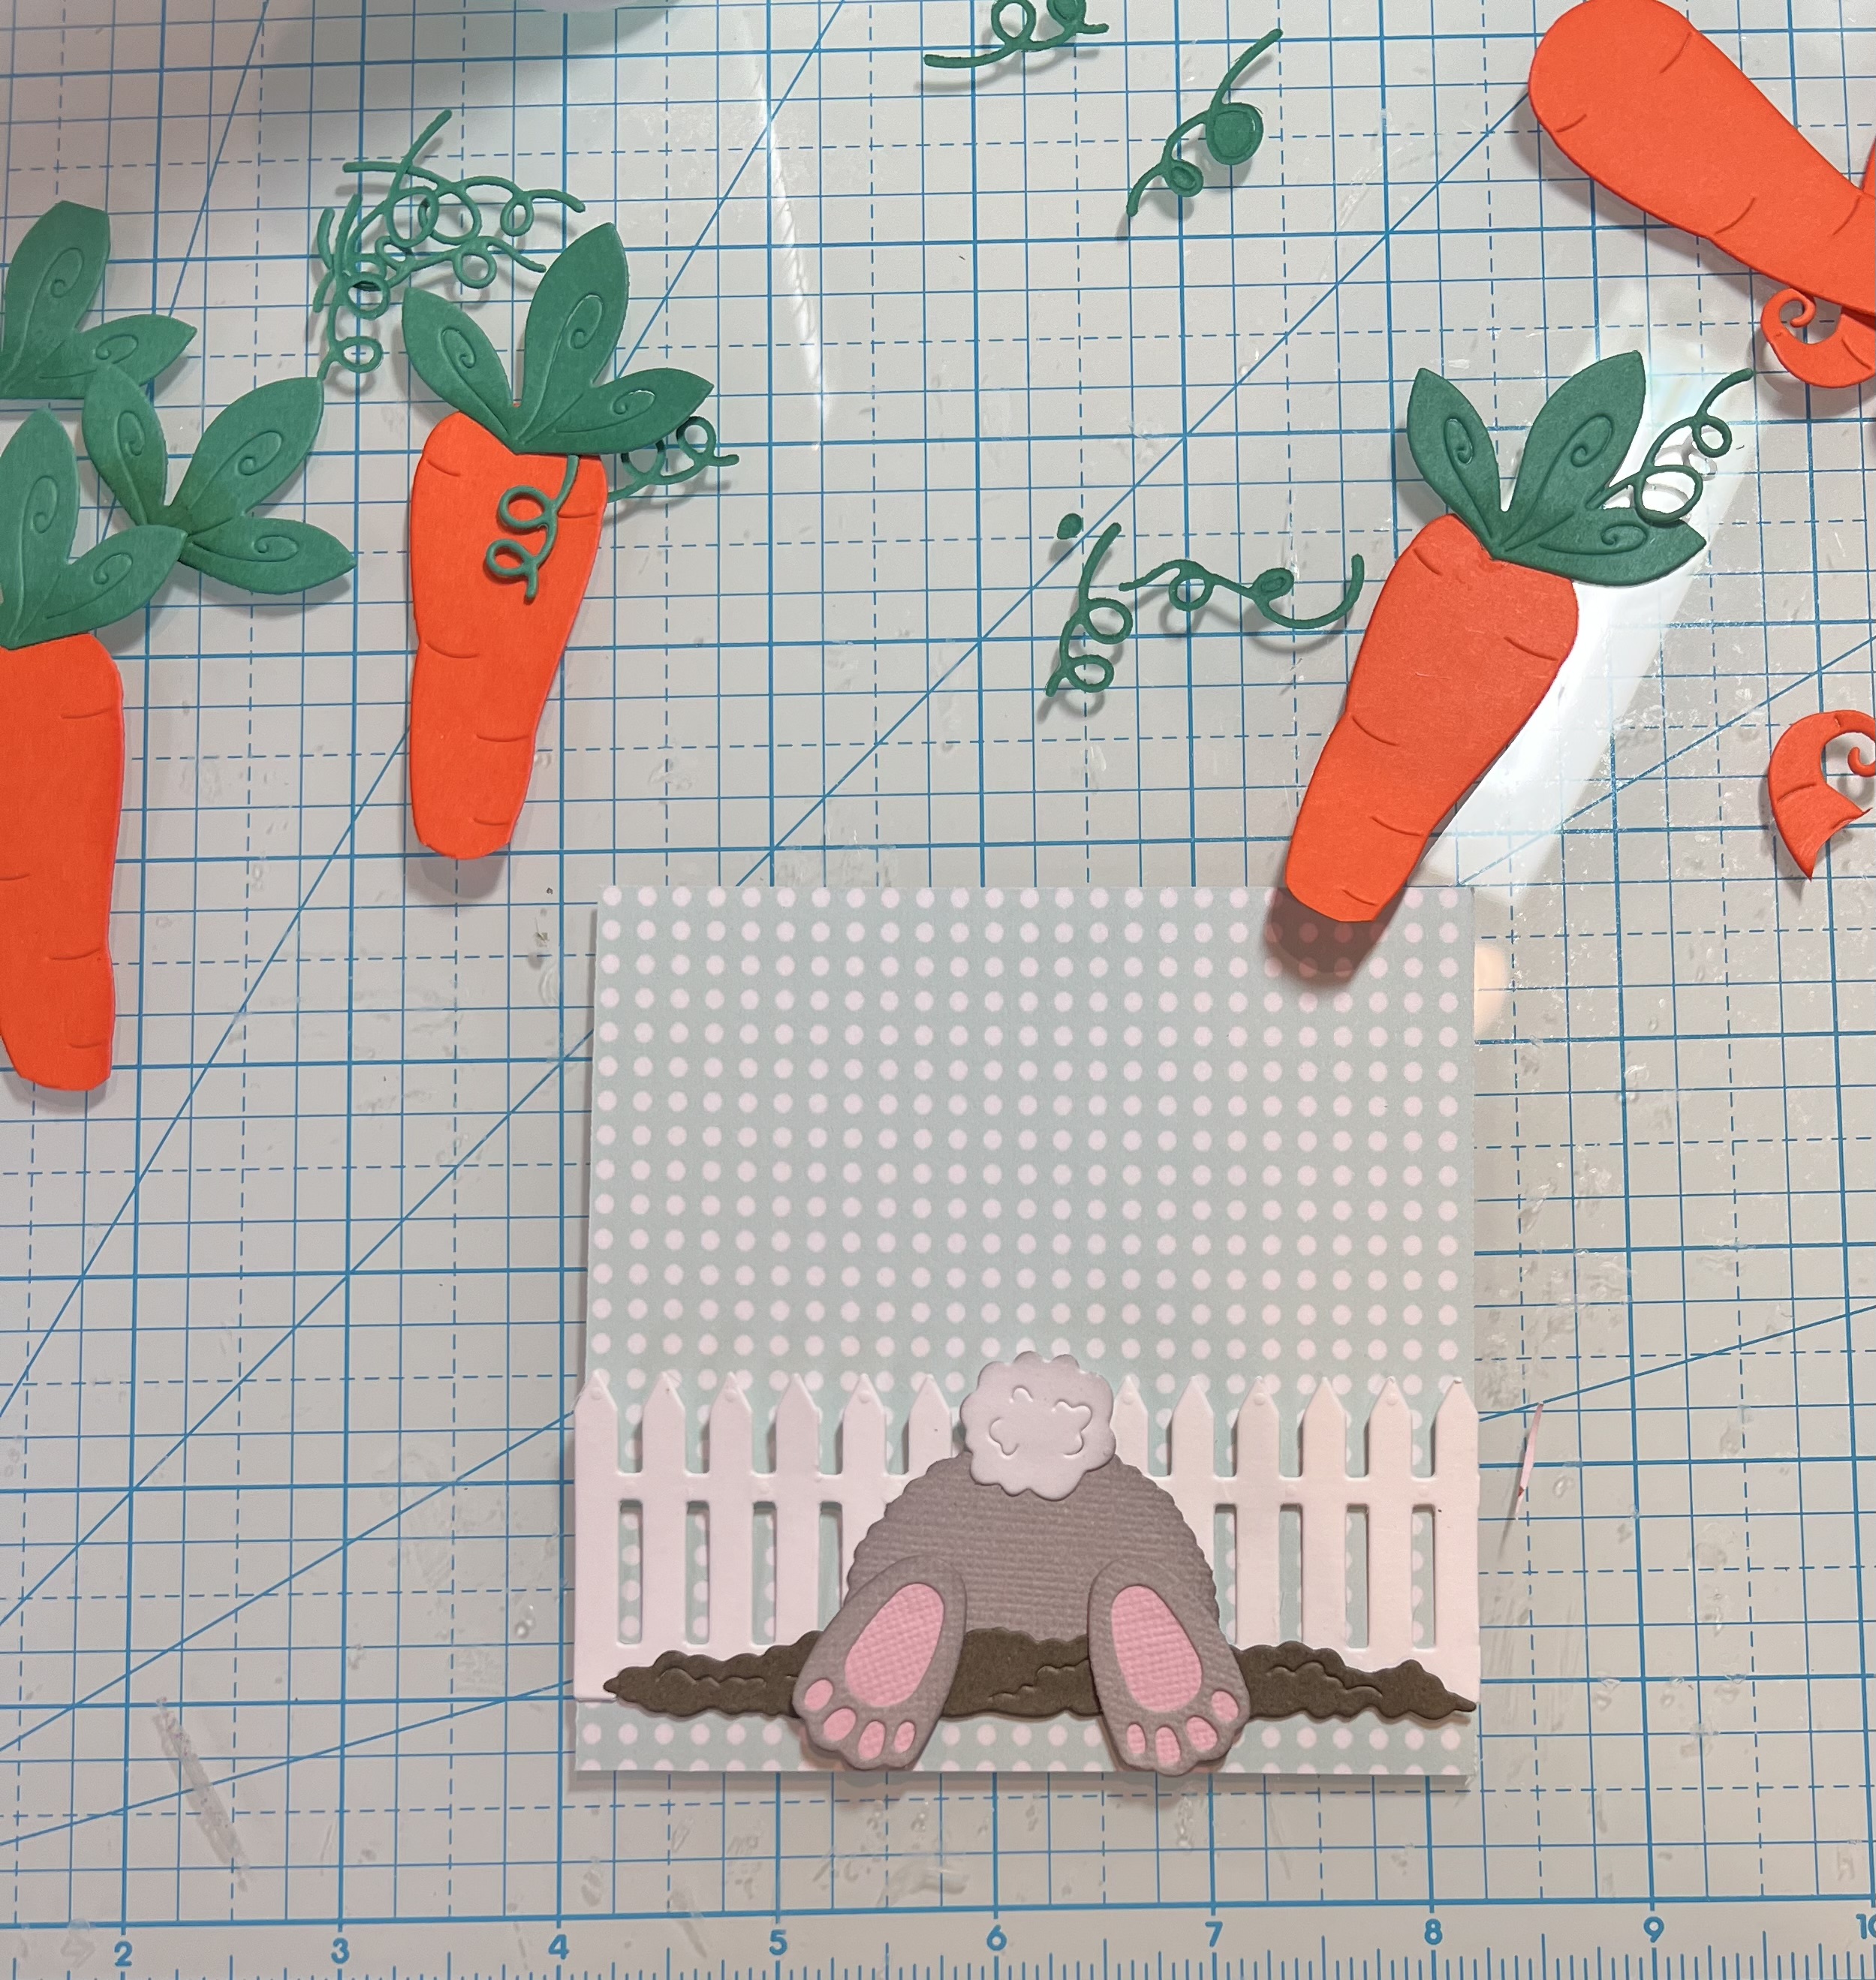
10.  Use the following dies and card stock colors:  Picket Fence Slimline White - Bottoms Up Bunny Baker pink, white, gray - Spring Bunny w/Giant Carrot orange, green (cut off the little curl at the bottom of the carrots).  Cut a piece of polka dot DP 4 1/8 x 4 1/8
11.  Working on the polka dot square DP glue down the fence (do not put glue on the top of the fence so you can tuck in the carrots), dirt and then the bunny as shown above
12.  Tuck in the 3 carrots behind the fence.  Glue the polka dot panel to the white panel on the card base.  Add your sentiment

13.  This card will fold down to fit inside an A2 envelope 


We have more inspiration on our YouTube Channel check it out HERE

Thanks so much for stopping by!  And I will see you next Thursday.

Blessings and Take Care