Showing posts with label Double Stitched Rectangle. Show all posts

Monday, June 7, 2021

Udderly Adorable!

 Hello Scrapping Cottage Friends 

IT IS NEW RELEASE TIME! The collection is called COUNTRY FARM! It has the most delightful dies.  Everything from Tractors to Cowboy Chicks!  Each die is just full of awesome details and can be used for so many different occasions.  Today, I am using the Country Farm Cows. 


Design Steps:

1.  Cut out all of the pieces using the Country Farm Cows die.  I used dark brown, white, tan, green gray, black and gold.  Shade the pieces and assemble them using a fine tip glue
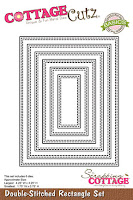
2.  For the base card I used a kraft A2 card.  The DP is milk bottles cut at 4 x 4 with a red layer an 1/8 inch larger.  The red gingham is cut at 2 x 5 1/8 with a red layer an 1/8 inch bigger.  A rectangle cut on kraft card stock with the third from the largest Double Stitched Rectangle die
3.  Glue the DP to it's coordinating red layer.  Glue the gingham layer to the center of the card as shown.  Then on top of the gingham layer glue the milk bottles layer slightly to the left of center as shown.  Glue the double stitched rectangle slightly to the right as shown below
4.  Working on the kraft retangle glue down the fence and little clumps of grass first.  Add the milk bottles to the top of the fence.  Pop up the cow and the bucket.  Cut out a few flowers and leaves then glue them on top of the bucket as shown.  Add the sentiment and bow and your card is complete


5.  I decided to decorate the inside with left over scraps of the DP and an addition piece of fence

CottageCutz Products


I am so glad you were able to stop by today!  And I hope you can check out the new release in our online store.  Just click HERE!
Take Care and Blessings
Pam


Sunday, May 31, 2020

Tulips

Hello Scrapping Cottage Friends,

I love tulips!  They are usually one of the first flowers to pop up in the spring! Signaling that the cold winter months are coming to an end.  My favorite tulips are yellow but the red come in a close second!


Background Photo by Wynand van Poortvliet on Unsplash

Design Steps:
1.  I used a black A2 card base, red card stock 4 x 5 1/4, and polka dot DP  3 3/4 x 5.  Glue the red card stock to the polka dot DP and set aside 

2.  Next cut out a piece of green card stock using the Spring Grass die.  Cut out a white rectangle using the Double Stitched Rectangle die 3rd from the largest.  Use a cloud stencil and blue ink to create the background.  Glue the cloud stitched rectangle onto a red rectangle layer

 3.  Using the Garden Wheelbarrow die cut out the pieces in red, black, silver, dark and light green, red and yellow

4.  Shade the pieces and then assemble them using a fine tip glue
5.  Next pop the cloud panel onto the polka dot DP add the grass then the wheelbarrow.  Then carefully arrange the tulips and glue them into the wheelbarrow.  Add the sentiment and glue to the black card base and your card is complete
 CottageCutz Products


Thanks so much for stopping by today.  I appreciate it so much.

Blessings and See You Soon!
Pam