Saturday, August 26, 2023

Frankie's Night Out

Hello Friends,

I am doing another Halloween card for today's crafty share.  This card is featuring the Trick or Treat Frankie die.  Frankie's balloon puts a smile on my face! I like Halloween cards with bright colors and fun sentiments.


Design Steps:  

1.  Using the Trick or Treat Frankie die cut out the pieces in the following colors of card stock: yellow, orange, green, black, white, dark gray, and purple (I colored his nose with a Copic marker to make it stand out a little more)
2.  Assemble Frankie using a fine tip fast drying glue
3.  The card base is a gate fold.  Cut a piece of black card stock 8 1/2 x 5 1/2.  Score at 2 1/8 then fllip the card over and score at 2 1/8 again
4.  Using the Double Stitched Oval die (Second from the largest) cut out a piece of spider DP.  Using the Pierced Oval die (Second from the largest) cut out a piece of black card stock.  Cut out 2 purple panels 2 x 5 3/8.  Cut out 2 DP panels 1 7/8 x 5 1/4
5.  Glue the purple panels to the front of the black card base and then add the DP panels

6.  Glue the Spider DP oval to the black oval. Glue Frankie to the lower half of the oval as shown above

7.  Place glue on the left side of the Frankie oval making sure you are only getting glue on the left front panel.  Use the Stitched Alphabet die and cut out EEK in black.  Then glue to the top of the oval again making sure you don't put glue on the part of the K that is hanging over the right panel

8. I used a piece of purple on the inside measuring 4 1/8 x 5 3/8 and glued a piece of white on top measuring 4 x 5 1/4.  I then added the Happy Halloween sentiment and your card is complete


We have more inspiration on our YouTube Channel check it out HERE

Thanks so much for stopping by!  And I will see you next Thursday.

Blessings and Take Care


Thursday, August 24, 2023

Razzle Dazzle

 Hello Friends

Today's post is for the House-Mouse Monday Challenge!  The challenge is Anything Goes or Fruit.  You can find this challenge HERE!  I decided to go with fruit. The stamp I used is Razzle Dazzle (Amanda).


This is such a perfect challenge for using those wonderful House-Mouse Stamps!   Come and join the fun!


Thanks for taking a peek!

Blessings
Pam


Saturday, August 19, 2023

Fall Color

Hello Friend

I am making a few more fall cards.  I just love working with the color palette and it is my favorite time of year! I am so ready for the crisp air, football and beautiful colors!

Design steps:

1.  Use a brown A2 card base, 5 3/8 x 4 1/8 piece of cooper card stock, 5 1/4 x 4 piece of green cards stock, 5 1/8 x 3 7/8 piece of checked DP and a piece of cooper cut with the Wide Piereced Rectangle Frame die.  Glue the Cooper to the brown base, next comes the green and then the DP
2.  Use the Stitched Leaves die and cut out the following card stock colors: rust, plum, mustard, green, and kraft. Cut out the basket in dark brown using the Basket of Vegetables die.  Ink the pieces with complimentary colors
3.  Put a dot of glue in the center of the basket to hold in place then add the leaves

4.  Add the frame and then tuck in a few more leaves and acorns to the bottom of the basket.  You can now glue the basket edges down

5.  Layer your sentiment on green and add a twine ribbon

6.  I had a few scraps left over so I added them to the inside of the card


We have more inspiration on our YouTube Channel check it out HERE

Thanks so much for stopping by!  And I will see you next Thursday.

Blessings and Take Care


Saturday, August 12, 2023

Happy Haunting

Hello Scrapping Cottage Friends

 I have a lot of fun sending out Halloween cards.  So I am getting a head start on one today.  I am using several of our older release dies featuring the Graveyard die.


Design Steps:

1.  Using the following dies Graveyard, Old Farm Fence, and Halloween Ghost cut out the following colors of card stock: white, black, gray, and brown
2.  Shade the pieces using a black ink and then assemble with a fine tip glue
3.  The card base is white A2, cut a piece of black 4 1/8 x 5 3/8, cut a piece of bat DP 4 x 5 1/4.  Glue the DP to the black
4.  Build your scene by adding a black 3/4 x 5 1/4 inch strip (which I cut slight hills on) then glued to the bottom of the card.  Next add the fence and then the graves with the mounds
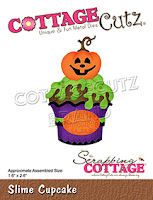
5.  Glue down the ghost, crow and the black grass to the mounds.  I thought I needed a pop of color so I used the Halloween Ghost die which has a pumpkin and the Slime Cupcake which also has a pumpkin.  I cut out two pumpkins and added them as shown above.  Glue the panel to the white card base add the sentiment and your card is complete
6.  I had some left over pieces so I decided to decorate the inside of the card for an extra surprise!


We have more inspiration on our YouTube Channel check it out HERE

Thanks so much for stopping by!  And I will see you next Thursday.

Blessings and Take Care


Wednesday, August 9, 2023

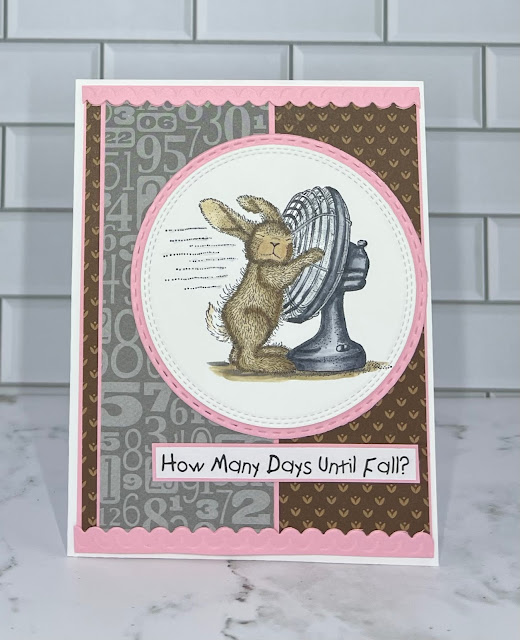
How Many Days Until Fall?

  Hello Friends

Today's post is for the House-Mouse Monday Challenge!  The challenge is Anything Goes or Funny.  You can find this challenge HERE!  I decided to go with funny.  I am from Arizona and it has been an extremely hot summer.  I am counting down the days until fall! I am certainly ready!


This is such a perfect challenge for using those wonderful House-Mouse Stamps!   Come and join the fun!


Thanks for taking a peek!

Blessings
Pam


Sunday, August 6, 2023

Happy Fall

Hello Friend

I am in Arizona where the temperature has been soaring.  It has been over 100 degrees for a month!  So needless to say I am ready for fall!   I am trying to wish autumn here a little quicker with this cute little fall card.  I made this card with a variety of older dies.  The focal point is the Sweet Fox die which is available in the store now!  

I saw a card by Ann Chuang on Pinterest that I loved.  So I used her card as my inspiration.


Design Steps:

1.  Start by cutting all the pieces using the following dies, Sweet Fox, Mushroom Fairy Garden, Pumpkin Pie & Latte (leaves), and Rustic Sign & Trees (log) and these colors of card stock: red, yellow, rust, orange, tan, green gray, black, white and brown


2.  Ink all of the pieces with coordinating inks.  I used TH inks and a small applicator.  After you ink assemble the pieces with a fine tip glue

3.  The card base is a gray A2 size.  I cut a piece of DP 4 1/8 x 5 3/8.  The birch trees I cut out of gray using the Merry Christmas w/Deer Family die.  I inked them before I glued them to the DP. Then I glued the DP to the card front

4.  Cut the grass from a 4 1/8 x 2 piece of green using the Grass Slimline die.  Glue the grass to the bottom of the card.  Add the log and the fox to the center of the grass as shown above

5.  Continue to add the Mushrooms, little clumps of grass, foliage and fall leaves to the card as you like.  You can see by the finished card below I moved a few things around before glueing them down
6.  Add the sentiment stamped on gray and layered on rust and your card is finished
7.  I had a few pieces left so I decorated the inside for a little surprise!


We have more inspiration on our YouTube Channel check it out HERE
Thanks so much for stopping by!  And I will see you next Thursday.
Blessings and Take Care