Tuesday, January 29, 2019

Ladybug Love! - Scrapping Cottage

Good Morning Scrapping Cottage Friends!

 I am continuing to make my Valentine Cards and having so much fun with the new Valentine and St. Patrick's Day release dies.  They are still on sale for 25% off so don't miss your opportunity to check out this cuter then cute release!   Today I am using the Lovebug Bee & Ladybug die with the traditional Valentine's colors.


Design Steps:
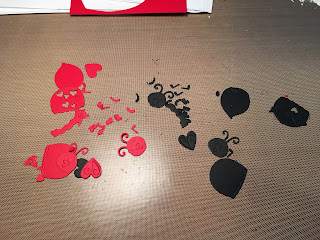
 1.  I used the Ladybug die and cut it out three times in red, black and pink
 2.  I did a little shading on the red and pink then assembled the Ladybug.  I also made the other bug a little Manbug using the black shell and red under layer plus I used the bow for a bowtie!  You can see it below
 3.  Use an A2 white card base, cut a piece of red slightly smaller then the base and then a piece of black polka dot DP slightly smaller then the red.  Also cut a 1 1/4 x 4 inch red polka dot band.  Then using the Fancy Floral Lace Border cut out to lacy strips and then cut them down to 4 inches long
 4.  Glue the Lace border to the top and bottom of the red polka dot strip
 5.  Using the Pierced Rectangle die third from the largest cut out a white rectangle
6.  Wrap your ribbon around the rectangle and tie a square knot.  Pop up you two bugs just about the ribbon.  Stamp your sentiment just below the ribbon

7.  Pop the rectangle panel to the center of the card and add some small red hearts

CottageCutz Products


Please stop by and visit us in the store we have some wonderful items on Sale!
Blessings
Pam


Friday, January 25, 2019

Mousey Valentine!

Hello Blogger Friends

I am doing this card for the House Mouse Challenge.  It has a big red bow and some adorable little mice I thought it was perfect for Valentine's Day!
I used some great DP for the background cut out the circles with a CottageCutz die set and the heart from a Pink and Main heart die set.  The mice are colored with copic markers and I added the rhinestones for some bling.  

Thanks for stopping by and taking a peek!
Blessings
Pam

Monday, January 21, 2019

Good Luck Cupcake! - Scrapping Cottage

Hi Friends!

I have some great news for you!! We are have a 25% off sale on our new Valentine's and St. Patrick's Day dies.  I can't wait for you to see them.  They are just so adorable you are going to want the whole collection.

Today, I am using the St. Patrick's Day Cupcake.  We also have a cupcake for Valentine's Day.  Both of them make fantastic cards or fun embellishments for a baked gift.


Design Steps:


1.  Use an A2 size white card base.  Score at 2 1/8 then flip the card over and score at 2 1/8 again.  This will give you a gate fold card
2.  Cut 2 strips of green card stock at 2 x 5 1/4 and 2 DP strips at 1 3/4 x 5.  Glue them together
3.  Glue the panels to the front of the card

4.  Open the card and cut a piece of light green card stock 5 1/4 x 4.  Glue to the center of the inside
5.  Using the St. Patrick's Day Phrase & More die cut out the sentiment.  Using the St. Patrick's Day Cupcake die cut out extra clovers and coins.  Glue them to the inside as shown and shadow with matching ink
6.  Using the St. Patrick's Day Cupcake die cut out the pieces for the cupcake.  I used green, yellow, black, and brown card stock
7.  Cut out a white circle using the 3rd from the largest Cross-Stitched Circle die.  Add shading to all of the pieces using coordinating ink colors
8.  Assemble the pieces after you have finished shading
9.  Use the 2nd from the smallest Cross-Stitched Circle die to cut the back layer for the sentiment
10.  Cut a 11 x 1 1/2 strip of green then layer a piece of embossed white card stock 4 1/4 x 1 on the middle section.  Wrap the strip around the card to form a band and tape or glue the back closed.  Glue the circle to the middle of the band and pop on the cupcake.  Add the sentiment as shown and your card is complete

CottageCutz Products


Thursday, January 17, 2019

CottageCutz New Release!

Hello CottageCutz Fans!

Today,  I am sharing 2 new release dies from CottageCutz.  Just in time for Valentine's Day! Please visit the online store soon because we have a 25% off sale on all of these new release dies.  This release also includes St. Patrick's Day!

This is the die for the Monkey!


Below you will find the die for this sweet card!


Thanks so much for stopping by we are really excited about this release!

Blessings
Pam

Monday, January 14, 2019

Scent with Love! - Dare 2B Artzy

Dear Dare 2B Artzy Friends,

Today is a bitter sweet day for me!  It is my last post as a Dare 2B Artzy team designer.  I have been with Cindi and Kendra since August 2017.  I have loved working with both of these ladies and my design team members.  The Dare 2B Artzy products are fabulous and always so unique.  I will continue to follow my friends at Dare 2B Artzy and of course look forward to seeing all of the new release products!

Today I am using the fun stamp set Stinkin Happy for my card today.
 Design Steps:

1.  Use an A2 white card base then cut a slightly smaller piece of red card stock and run it through a heart embossing folder.  Glue the red to the with card base

2.  I had these small note cards and envelops so I added the DP to the note card front and glue dotted the ribbon to the little card

3.  Mount the envelope at an angle then slide in the little card half way inside the envelope

4.  Stamp the skunk with Stinkin Happy stamp set and color with your favorite markers.  Use the coordinating dies and cut out the skunk

5.  Pop the skunk to the card as shown and add the little heart

6.  Stamp the sentiment on white and layer onto red then glue to the card as shown

Dare 2B Artzy Products


Hope all of you have a wonderful 2019 and I will miss you!
Blessings
Pam

Saturday, January 12, 2019

Glittering Valentines! - House Mouse

Hello Blogger Friends

I am doing this card for the House Mouse Challenge.  It is a new stamp that I got for Christmas and I thought it was perfect for Valentines Day!

 I colored the little mice with Copic markers and add some shimmer to the hearts with my Gelly Roll Sakura pen. The dies I used are from Pink and Main.
Thanks for stopping by to take a look!

Blessings Pam

Wednesday, January 9, 2019

Sweet Mice! - Scrapping Cottage

Good Morning Scrapping Cottage Friends

I am continuing to make my Valentine cards.  I don't make as many Valentines as I do Christmas Cards and I usually make a lot of different ones verse the same card.  I used the Christmas Mice die for this darling card.  I love it when you can use our fantastic dies in multiple ways and for different occasion.


Design Steps:
 1.  Cut out all of the pieces using the Christmas Mice die. I used a variety of card stock and designer papers
 2.  Shade the mouse with TH inks and then assemble the boy mouse
 3.  Shade the girl mouse with TH inks and then assemble the girl mouse
 4.  Using gray inks to shade the bench
 5.  Glue the mice to the bench as shown
 6.  Use a white card base and cut red card stock slightly smaller then the base.  And then cut the DP 4 x 5 1/4
 7.  Glue the DP and the red card stock together and then glue down the mice

8.  Using the Hugs & Kisses die cut out of red card stock.  Glue the Hugs & Kisses to the card as shown
CottageCutz Products
Christmas Mice
Hugs & Kisses
We appreciate you stopping by today!  Hope you have a wonderful week of crafty fun and I will see you next Thursday on the blog!

Blessings
Pam

Wednesday, January 2, 2019

Penguin Love! Scrapping Cottage

Good Morning!

Happy 2019 to you! I hope your new year is filled with happiness, joy and lots of crafty fun!  And before I get to my project I wanted you to know we are having a fabulous sale in our store.  So make sure you check it out especially if you got some Christmas cash!  On to today's card I am continuing to make my Valentines.  I am using the Christmas release Hugging Penguins!

Designer Steps:
 1.  Cut out the penguin using the Hugging Penguins die.  I used black and white card stock for the penguin body and red for the heart which I cut out with Fancy Heart die
 2.  Color the feet and the beck with your favorite markers
 3.  Shade the white part of the bodies with grey markers.  Assemble the penguin and add a small black rhinestone for the eye
 4.  Use an A2 black card base cut a piece of DP slightly smaller then the card base.  Use the Pierced Rectangle Frame die to cut out the frame then edge with black
5.  Glue the frame to the DP add a ribbon and then glue to the card front.  Use the Mr. & Mrs. with Hearts die and cut out the small red hearts.  Stamp the large heart with I love you.  Pop up the penguins and heart then glue the smaller hearts to the corners of the frame
CottageCutz Products


Blessings
Pam