Tuesday, April 27, 2021

Foxy and Friend Thank You

Hello Scrapping Cottage Friends

We have a new release that are complete must haves for your basic die collection.  It is a Slimline group with 9 different designs.  They are 25% off right now so don't miss out on this great addition to your essential must have dies.

My card today is a thank you for a special friend!  She loves being outdoors so I thought this card was perfect for her!

Design Steps:

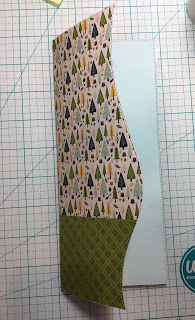
1.  Use a Kraft slimline card base cut the front flap of the card in half and set aside.  Cut another piece of Kraft card stock 3 1/2 by 8 1/2.  Cut a tree designer piece of paper 6 x 3 1/2 and a green checked piece 3 1/2 x 2 1/2.
Glue the tree paper to the top of the piece of kraft card stock and the green checked to the bottom of the kraft card stock.  Use your Hills Slimline die (the one with one hill) cut the kraft card stock with the designer paper glued to it
2.  Get out your card base and glue the cut design paper to the front of the cards small flap
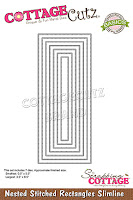
3.  Using the largest Stitched Rectangle Slimline die cut a piece of light blue card stock and glue it to the inside of the card
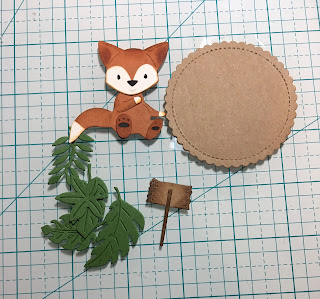
4.  Cut 2 Kraft circles using the Scalloped Stitched Circle die 3rd from the largest.  (one for the inside of the card and one for the front). Using the Spring Tea Party die cut out the fox using rust, black and cream card stock for the raccoon use black, grey and white card stock

5.  Using the Sloth die cut out the leaves using two shades of green.  Cut out the little sign using brown and the Bunny Gnome 3 die.  Before assembling the fox and raccoon shade with a variety of inks and then glue together
6.  For the front of the card glue down the circle leaving the edges without glue so you can tuck in the leaves.  Stamp the Thanks So Much onto the sign and edge with ink.  Pop up the fox and his sign with dimensional 
7.  For the inside glue a 1 x 6 inch strip of tree paper and right under it glue a 1 x 2 1/4 in strip of green checked.  Glue down your scalloped circle making sure it lines up with the front circle so it won't show when closed.  Stamp your sentiment and glue down the leaves and little raccoon
CottageCutz Products


Thanks so much for stopping by today!  I hope you find time to get crafty.  It is always so much fun to send a friend something made from the heart!
Blessings
Pam


Saturday, April 24, 2021

Aloha Summer

 Hello Scrapping Cottage Friends

We have a new release that are complete must haves for your basic die collection.  It is a Slimline group with 9 different designs.  They are 25% off right now so don't miss out on this great addition to your essential must have dies

Our design team will be doing a few weeks of Throwback Tuesdays!  We will be highlighting some of our favorite dies that are still available in the online store.  I am using a die from our Beach & Tropical release.  The dies are called Hibiscus Flowers and Aloha & Ukulele.  I mixed these two dies with our  Scalloped Stitched Rectangle Slimline.


Just a quick description, I used a white slimline card base. Cut a piece of kraft card stock with the largest Scalloped Stitched Rectangle Slimline twice.  Glue one to the front of the card and save the other.  Then I used a variety of colors and cut out the hibiscus using the Hibiscus Flowers die
Next I cut out 3 Aloha in white using the Aloha & Ukulele die.  I glued the Aloha words together.  I arranged the flowers and glued them down also tucking in the leaves.  The final step was to glue down the Aloha and add a few sequins
I had an extra flower and some leaves so I glued the kraft scalloped retangle to the inside and added the flower to the lower left of the card.  I stamped my sentiment and the card is complete

CottageCutz Products


Thanks for stopping by today!  I hope you enjoyed our Throwback Tuesday!  I love looking through my older dies and putting them to use again!

Blessings
Pam


Monday, April 19, 2021

Flowers for Mom

 Hello Scrapping Cottage Friends

Our design team is continuing to highlight the fantastic new Slimline die release.  There are 9 slimline designs in this release that I consider basic essentials!  I am using the Rounded Rectangle Slimlines today.  The card on the left is a Mother's day card for my mother-in-law and the one on the right is a hello card for just an everyday any occasion.  


Design Steps:

1.  I did two slimline card bases one in cream and one in kraft.  Next using the 2nd to the largest Rounded Rectangle Slimline die cut two white and two kraft.  Next using the 3rd from the largest rounded rectangle cut one kraft and one cream.  Finally using the 4th from the largest rounded rectangle die cut one white and one kraft 
2.  Using the 4th from the largest Pierced Circle die cut out 3 cream circles and 3 kraft circles.  Next using the Spring Flowers in a Jar 1, Spring Flowers in a Jar 2 and Spring Flowers in a Jar 3 cut out a set in white and kraft.  I also cut one extra white and kraft for the inside of the card
3.  Use the cream colored card base and glue down one of the largest kraft rounded rectangles to the front of the card.  Next glue down your cream circles (I did the top and bottom one first and then placed the center circle).  Last glue down your flowers add your bow and little tag
4.  For the next card use the kraft colored card base and glue down one of the largest white rounded rectangles to the front of the card.  Next glue down the three kraft circles.  Last glue down your flowers add your bow and little tag
5.  For the inside of the cream card glue down the last large kraft rectangle.  Next glue down the smaller cream colored rectangle and lastly glue down the smaller kraft rectangle.  Stamp Happy Mother's Day in brown ink and then glue down the remaining cream flower vase as shown
6.  For the inside of the kraft card glue down the last large white rectangle.  Next glue down the smaller kraft colored rectangle and lastly glue down the smaller white rectangle.  Then glue down the remaining kraft flower as shown

CottageCutz Products


Thanks so much for stopping by!  These two cards were quick, easy and fun to create!  

Blessings
Pam


Sunday, April 11, 2021

Friends are Like Sunshine!

 Hello Scrapping Cottage Friends!

We have a new release of Slimline dies and they are just a great addition to any card makers collection.  There are 9 designs and everyone of them can be used on ever single kind of card I can think of!!

Today,  I am using the Windows Slimline and the Scalloped Stitched Rectangle Slimline with a variety of additional dies.


Design Steps:

1.  Base card is a white slimline, using the largest Scalloped Stitched Rectangle die cut blue card stock,  use the Windows Slimline die and cut white card stock 
2.  Use the Bird with Bluebells cut out the leaves and the birds in green, blue, light blue, and purple.  Use the Rooster and Chick die and cut out the sun in yellow and light yellow.  Using Garden Accessories cut the white fence. Use Spring Meadow for the green grass and purple flowers 
3.  Assemble the birds and sun using a fine tip glue
4.  Glue the blue scalloped rectangle to the white base card.  Glue down the Window frame and then quickly tuck in the grass, fence and branches.  Add the sun to the top right corner of the card
5.  As I was working on the card I decided that I needed some butterflies so I used the Spring Meadow die again and yellow paper to create the butterflies.  I colored the butterflies bodies with a black Sukura Jelly Roll Pen.  I also used this pen on the eyes along with a white one
6.  Pop up the birds on the branches and stamp your sentiment.  I felt like the bottom of the card needed something more so I used the Mouse with Flower Cart die.  I cut the mouse out of gray card stock assembled him and then tucked him behind the fence.  Add your flowers onto the grass and butterflies and your card is complete

CottageCutz Products


Tuesday, April 6, 2021

Soaring High!

 Hello Scrapping Cottage Friends!

WE ARE CELEBRATING 19 YEARS IN BUSINESS!  SO WE ARE PASSING ALONG OUR THANKS TO YOU!  Save up to 60% on select CottageCutz dies.  DURING OUR BIRHTDAY CELEBRATIONS!

AND TO CONTINUE THE PARTY WE HAVE A NEW RELEASE OF SLIMLINE DIES!  THERE ARE 9 DIES WITH A SPECIAL BUNDLE PRICE OF 52% OFF!

Today,  I am excited to share with you one of the new slimline dies called Clouds Slimline.  I combined it with one of our Spring Release dies which are also still on sale.  The die is the Fox in Airplane.


Design Steps:

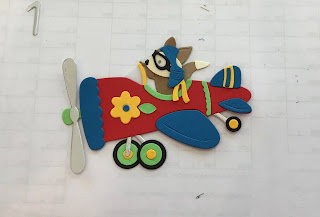
1.  I started with the Fox in Airplane die and cut out all the pieces with yellow, red, green, blue, silver, tan, brown and vellum
2.  I assembled the pieces using a fine tip glue and a small pair of tweezers
3.  My base is a slimline white card measuring 8 1/2 x 7 scored on the 7 side 3 1/2.  Using the Clouds Slimline dies I cut the clouds using all 3 different dies
4.  Glue the clouds to the card leaving the bottom of the cloud with no glue so you can tuck in the next cloud just below it
5.  Create your little banner, I just did it free hand.  Pop your plane to the front of the card and then add clear sequin and you card if complete

CottageCutz Products


We are so excited about our Birthday Celebration and we hope you will take advantage of all of the special savings!

Blessings and Take Care
Pam