Wednesday, November 29, 2017

Get Well - Scrapping Cottage

Good Morning Scrapping Cottage Friends!

A HUGE SALE IS GOING ON NOW!!! THIS SALE FEATURES OUR LATEST RELEASE DIES FOR THE ULTIMATE GET WELL CARD! HERE IS A PEEK of all the new release dies! Also make sure you check out our entire store there are many items on sale!! HERE IS THE LINK TO THE STORE!

Now on to today's card!

I am continuing to share our new release Get Well Dies.  They are just so perfect to cheer someone up who is not feeling well.  And we all know that this is the time of year for the nasty colds and flu.  As a matter of fact I think I will send this to myself because I have my first cold of the year!

Design Steps:

1.  Using the Bear Patient die cut the bear out of kraft card.  Then cut the soup can and tissue box out of white
 2.  Using TH Distress Oxides shade in the bear and add the rhinestones for his eyes
3.  Using Copic markers color in the soup can and the tissue box and assembly all of the pieces
 4. Using the Tea Time Doily die cut out a white doily.  Use the Expressions Get Well Phrase die cut get well out of red card stock

 5.  Us an A2 white card base cut a slightly smaller piece of red card stock and then a slightly smaller piece of DP and glue them all together
 6.  Glue the white doily to the top of the card
 7.  Pop dot the bear with the soup can and the tissue to the doily

8.  Glue the Get will to the bottom half of the card and your Get Well card is complete

Cottage Cutz Dies


I hope you will check out our massive sale and take a look at the new release Get Well Dies.  They are all so cute and perfect for a great Christmas Gift!
Blessings
Pam

Sunday, November 26, 2017

Deck the Halls Tag - Pink and Main


 Hello Pink and Main Friends!

I thought I would share my tag that I made for the 25 Days of Tags. 

Designer Steps:
  1. Use a regular sized mailing take and place a stencil over it which has a variety of different dots for snow
  2. Cover the stencil with white embossing paste and let dry
  3. Stamp 2 of the branches from the Deck the Halls stamp set and sponge on additional green ink.  Cut out with the coordinating dies
  4. Stamp the solid ornaments with Pink and Main inks.  Then stamp the matching ornament over the top of the solid one in Versa Mark ink and emboss with silver embossing powder.  Cut out with coordinating  dies
  5. Stamp the sentiment and layer onto gold
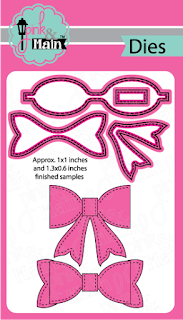
  6. Die cut out 3 small bows and glue together. Die cut out 1 middle sized bow and glue together.
  7. Place the bottom branch on the top of the card.  Next cut cord and tape it to the ornaments and then to the branch.  Pop dot the ornaments down and then pop dot the top branch over the cord 
  8. Add the bows

Pink and Main Products


Thanks for stopping by!
Blessings
Pam

Thursday, November 23, 2017

Oh No! - Scrapping Cottage

Hello Scrapping Cottage Friends!

Happy THANKSGIVING

A HUGE BLACK FRIDAY SALE IS GOING ON NOW!!! THIS SALE FEATURES OUR LATEST RELEASE DIES FOR THE ULTIMATE GET WELL CARD! HERE IS A PEEK of all the new release dies! Also make sure you check out our entire store there are many items on sale!! HERE IS THE LINK TO THE STORE!

Now on to my card for today!

Design Steps:
1.  Using the Oh No Kitty Die cut out all of the pieces in white card stock

 2.  Use your markers to color all of the pieces and glue them together.  What a cute Kitty!!

 3.  Use an A2 white card base cut a piece of black card stock slightly smaller then the base at
5 1/4 x 4

4.   Cut a DP 5 x 3 3/4  then glue it to the black card stock and before adhering it to the front of the card add the ribbon


5.  Using the Cottage Cutz Nested Stitched Scallop Rectangle cut 2 in black card stock.  Glue to card as shown with the sentiment at the top and the Kitty popped up just below it.  This card will make anyone who receives it feel better and bring a smile to their face!


Cottage Cutz Products


MAKE SURE YOU CHECK OUT THIS FANTASTIC SALE!

Blessings
Pam

Tuesday, November 21, 2017

Pink and Main 25 Days of Christmas Tags

Hi Everyone!

I am so excited to be participating with the Pink and Main Team in the 25 Days of Christmas Tags organized by Tracey McNeely. 25 Days of Christmas Tags has been going for 6 years!  There are lots of prized so please check out Tracey's Blog Here!

Here is the tag I designed with Pink and Main Products!


Pink and Main Products


Thanks for stopping by!
Blessings
Pam


Monday, November 20, 2017

Golden Ornaments - Dare 2B Artzy

Hello Dare 2B Artzy Friends

It is Pam crafting with you today!  This is one of my last cards that I made for Christmas this year and in fact I am going to make several of them because I really love how it turned out and there wasn't any copic coloring involved.


Design Steps:
  1. Use a cream colored A2 card base. Cut a piece of gold metallic card stock 4 1/8 x 5 1/4 and glue to the card front
  2. Cut a piece of cream card stock 4 x 5 1/8 and run it through an embossing folder but do not  glue to the front of the card yet
  3. Next use the Mini Ornament Die from Dare 2B Artzy and cut out 3 ornaments out of the gold metallic card stock.  Then using the top of the Christmas Bulb cut out 3 pieces out of silver card stock.
  4. Glue the ornaments together and attach the gold cord
  5. Place small dimension dots to the backs of the ornaments and pop to the card front.  Next tape the gold card behind the embossed cream colored piece of card stock then glue the cream card  stock to the card front
  6. Stamp the sentiment from the Ornament Tangle stamp set and layer it onto the gold card stock and then glue to card front as shown


Dare 2B Artzy Products


Thanks so much for stopping by and I hope you have a wonderful Thanksgiving Day!  We have so much to be thankful for!!

Blessings
Pam

Saturday, November 18, 2017

Merry Merry!! - Pink and Main

Hello Pink and Main Fans!

I just love Pink and Mains darling bow dies!  They make everything so festive!  I decided to make a pocket card with Pink and Main papers and dies!


Design Steps:

  1. Use an A2 green card base with the fold at the bottom.  Score the front top fold at 1 3/4 inches and then glue the flap down to the card base.  Next open the card and run a thin line of glue down both sides to form the pocket
  2. Using Pink and Mains Jolly Paper Pad cut the plaid paper for the bottom of the card 2 x 4 and glue it just under the flap. Next cut the checked green paper 1 1/2 x 4 and glue it to the flap

3.  To make the tag cut a 5 1/4 x 3 1/2 inch piece of white card stock and cut the top corners at a diagonal.   Punch a 3/4 inch circle out of the green checked paper and glue to the top of the tag then punch a 1/4 circle in the center of it

4.  Next cut 2 pieces 4 x 1/4 inch of shimmer red card stock, a 1/2 x 4 inch piece of checked paper, and a 2 x 3 1/4 piece of green checked paper.  Glue as shown below

5.  Using the red shimmer paper cut out the Pink and Main Large Bow and the Pink and Main Merry Christmas and glue down as shown

6.  Add the sticker snowflakes and ribbon and your card is ready to go

Pink and Main Products


I love all of these products so I hope you check them out!!  They much such fantastic Christmas cards!

Blessings
Pam

Friday, November 17, 2017

Dare 2B Artzy's Blog Hop!

Welcome to Dare 2B Artzy's 3D Holiday Blog Hop!!
Can you believe the Holidays are right around the corner once again?!
We at D2BA are so excited!!  We decided to have a fun holiday blog hop featuring 3D projects!!  We hope we inspire you to get artzy this holiday season!!

You should have arrived here from Vicki's blog!  If you haven't and would like to hop along with us, please go back to the Dare 2B Artzy Blog to start at the beginning!
Be sure to follow each blog and leave comments along the way for your chance at winning!  We will randomly choose a winner from one of the blogs, so the more you comment, the more chances you have to win!!
Winner will receive a stamp set and ink pad!!
Blog Hop will end Sunday, November 19th at 7:00pm Central.  
We will then post a winner!!
---------

Here is my project for the hop!


I used the Merry Christmas Dare 2B Artzy Die and the Penguin Fun Stamp set and matching dies!

Thanks for stopping by!  
Your next stop in the hop is Karen blog!  
We hope you are inspired all along the way!  
Check out all D2BA's products here!
Happy Hopping!
Blessings
Pam

Wednesday, November 15, 2017

Jesus is Born! - Scrapping Cottage

Good Morning Scrapping Cottage Friends!

I just love the nativity scene that Cottage Cutz has created.  It is so beautifully detailed and everything looks so precious!


 Designer Steps:

 1.  Cut an A2 Kraft card base, cut a piece of wood grain DP 4 x 5 1/4. Cut a piece of navy dotted paper 4 x 5 1/4 and back it with foam. Use the Pierced Rectangle die to cut through the paper and foam to create the window
 2.  Glue down the wood grain paper then the frame on top of the wood grain
 3.  Cut out all of the pieces using the Cottage Cutz Nativity - Joseph & Animals and Mary, Angel and Baby.  I cut all the pieces out of white
 4.  Color all of the pieces with Copic Markers
5.  After the pieces are colored assemble them on the card as shown.  Cut the word blessings with the Cottage Cutz Expressions Blessings die out of kraft card stock and glue to the top of the card

Cottage Cutz Products


I hope you love this set as much as I do! It is the true meaning of Christmas!

Blessings
Pam