Saturday, December 26, 2015

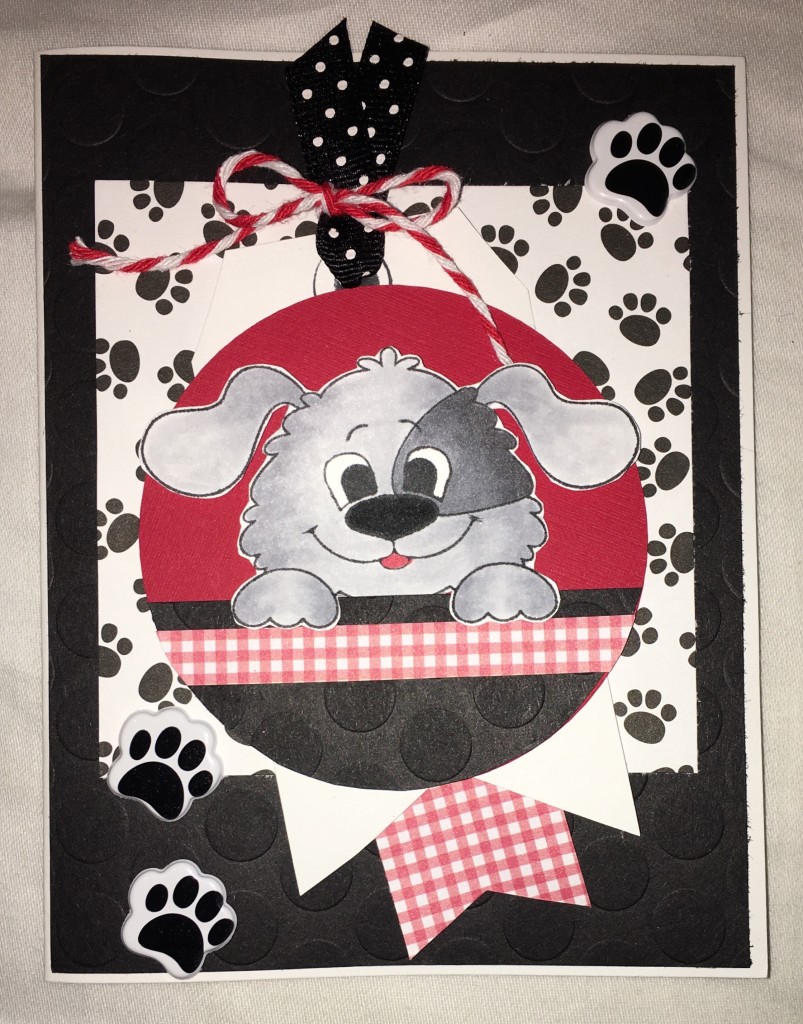
Little Puppy! - Pink and Main

Good Morning!
I hope all of you had a very Merry Christmas! And I wish you all a fantastic New Year!
I made this fun little card from the Pink and Main sets Animal Faces & Sweet Faces set 2.
IMG_0371
My design steps:
  1. Use an A2 size white card, cut a slightly smaller dotted embossed piece of black card stock and glue to the front (Recollections Paper)
  2. Cut a 3 1/2 x 3 1/2 piece of designer Paw paper (Recollections Paper) glue to the center of the card
  3. Make a 4 x 2 inch white tag add the ribbon and twine.  Cut a 2 x 1 1/2 banner from check paper and glue behind the white tag. Glue the white tag at an angle as shown to the front of the card
  4. Cut a 3 inch circle from red card stock then add the embossed black paper and checked 1/2 strip checked paper to the circle.  Glue to the Paw paper as shown
  5. Stamp the dog (Pink and Main Animal Faces and Sweet Faces set 2) and color with copics. Cut out the dog and pop dot to the circle as shown
  6. Add the Paw stickers (Recollections)
Thanks for stopping by!
Happy New Year!
Pam

Saturday, December 19, 2015

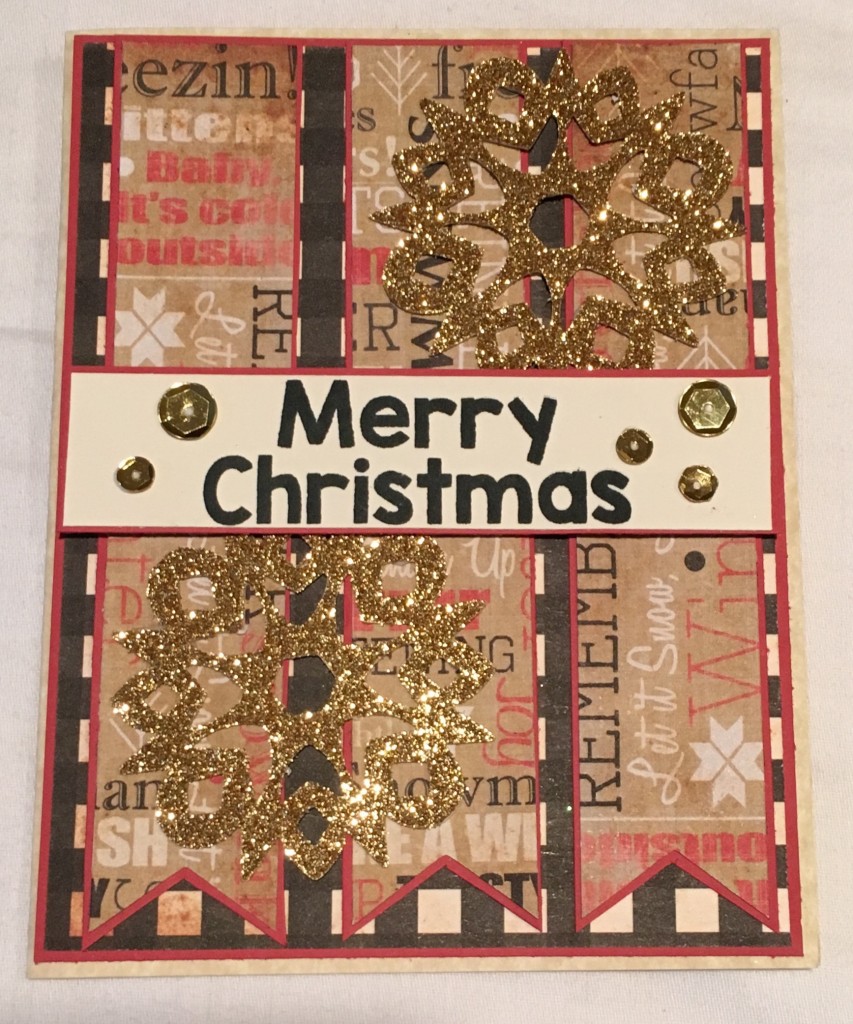
Sparkling Christmas - Pink and Main

Happy Sunday!
As we get closer to Christmas I needed a few more quick cards. This is the design I came up with and no coloring!
IMG_0362
Design steps:
  1. Use a cream color card base A2 size
  2. Cut a slightly smaller piece of red card stock and glue to front.  Then cut the black checked paper slightly smaller then the red card stock and glue it to the red card stock. Designer paper (Bazzill Nordic Pine) Plain card stock (Recollections)
  3. Cut 3 1/2 inch banners with dove tails and mat to red card stock. Add gold snowflakes as shown (Recollections)
  4. Stamp Merry Christmas (Pink and Main Hollydays Set) on cream card stock with black ink (Memento Black) then mat on red card stock
  5. Add gold sequins
Thanks so much for stopping by!
Merry Christmas
Pam

Saturday, December 12, 2015

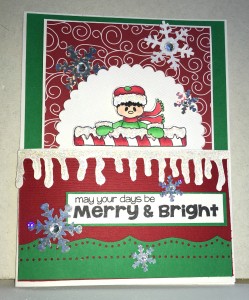
Frosty Fun - Pink and Main

Good Morning!
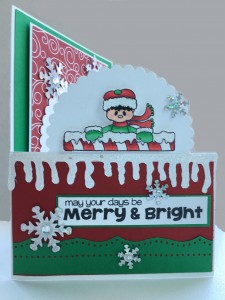
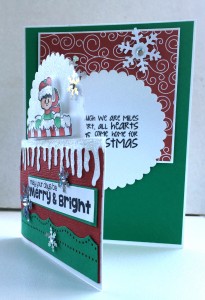
The card I am sharing with you today has a little twist.
Design steps:
  1. Use a standard A2 card and cut the front flap in half.
  2. Cut a 3 1/2 x 3 1/2 square of red swirl designer paper (Recollections) and mat on white.  Glue it to the inside of the card as shown
  3. Cut 2 3 inch scallop circles position one on the inside of the card and stamp the sentiment. The other circle should be placed directly on top of it attaching it to the front inside of the card front
  4. Glue a slightly smaller piece of red card stock (Recollections) to the front of the card add the border and the icicles
  5. Stamp the sentiment cut and mat and then stamp little boy and color with copics and use the matching die to cut out (Pink and Main stamps sets: Cocoa Cafe & Hollydays)
  6. Add snowflakes (Recollections)
Many Blessings and thanks for stopping by!
Pam
view 2view 3
view 4

Saturday, December 5, 2015

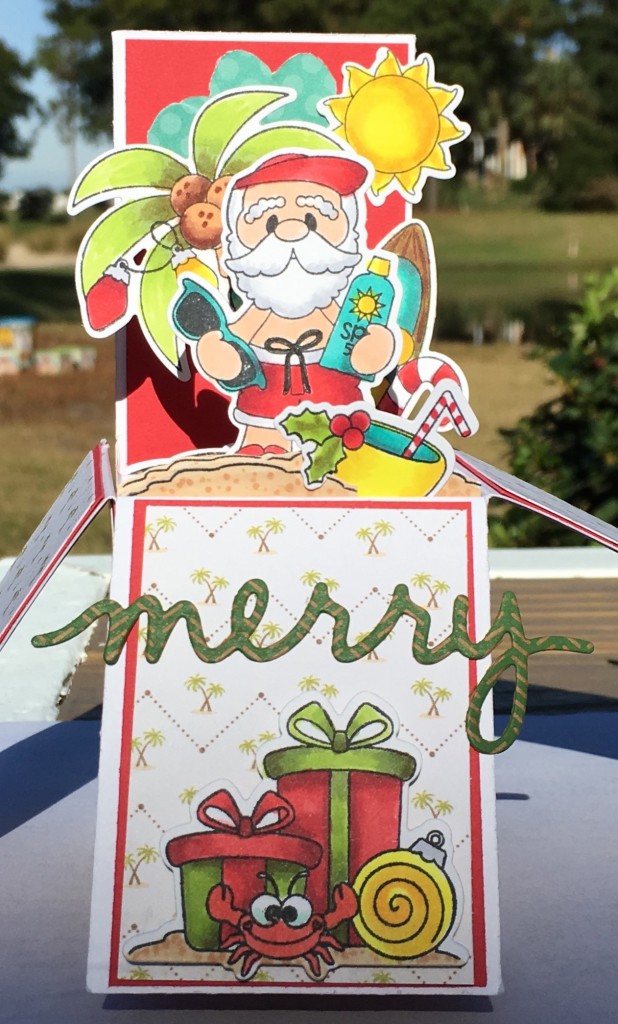
Santa in a Box - Pink and Main

Happy Sunday!
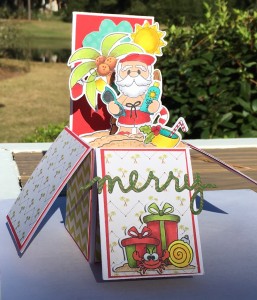
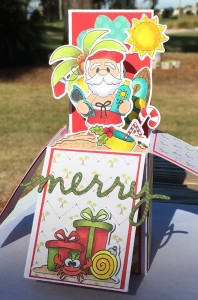
I live in sunny South Carolina so I thought this card would be a fun one to send to someone very special. And I do mean special because it does take some time to make.  If you look on YouTube you will find a bunch of tutorials on how to make this type of card.  Just type card in a box in the search and several will pop up.  I will give you a couple of angles to look at because there are lots of fun elements to the card. 
IMG_0331IMG_0333IMG_0334
Front and side views!
I hope you try one of these cards in a box!  They are so much fun!

Have a Blessed Day!
Pam 


Saturday, November 28, 2015

Birthday Girl - Pink and Main

Good Morning!
Today I am using the sweet set called Birthday Girl!  It is perfect for those fun loving little girls in our lives!


Here are my design steps and supplies:
  1. Use an A2 white card base.
  2. Cut a slightly smaller piece of dotted embossed purple card stock (Recollections) and glue to the front of the white card.
  3. After cutting the purple cut a slightly smaller piece of designer paper (Recollections) and glue it to the purple card stock
  4. Cut a 1 1/2 x 4 inch strip of the purple card stock and use a (MS) border punch and glue it to the front of the card just a little lower then center as shown
  5. Use your Cricut or dies to cut a 3 inch white scalloped circle (Bazzil)
  6. Stamp and the image and sentiment (Pink and Main and Memento Black Tuxedo)
  7. Color the image with copics: V01, 04, 06, 09 - RV10, 32, 34 - R20, 29, 59 - E00, 02, 04, 43, 47, 49 - C02 - YG03, 63, 67 - G99 - Y17, 21 - BG 11, 15, 75, 78. Cut her out using coordinating dies and pop dot her to the front of the card
  8. Cut out the little banner and pop dot to the top of the card as shown
  9. Layer the sentiment on purple card stock and pop dot to the top of the banner
  10. Add the rhinestones
Thanks for stopping by and have a blessed day!
DT Member Pam M.

Saturday, November 21, 2015

Christmas Bird - Pink and Main

Good Morning!
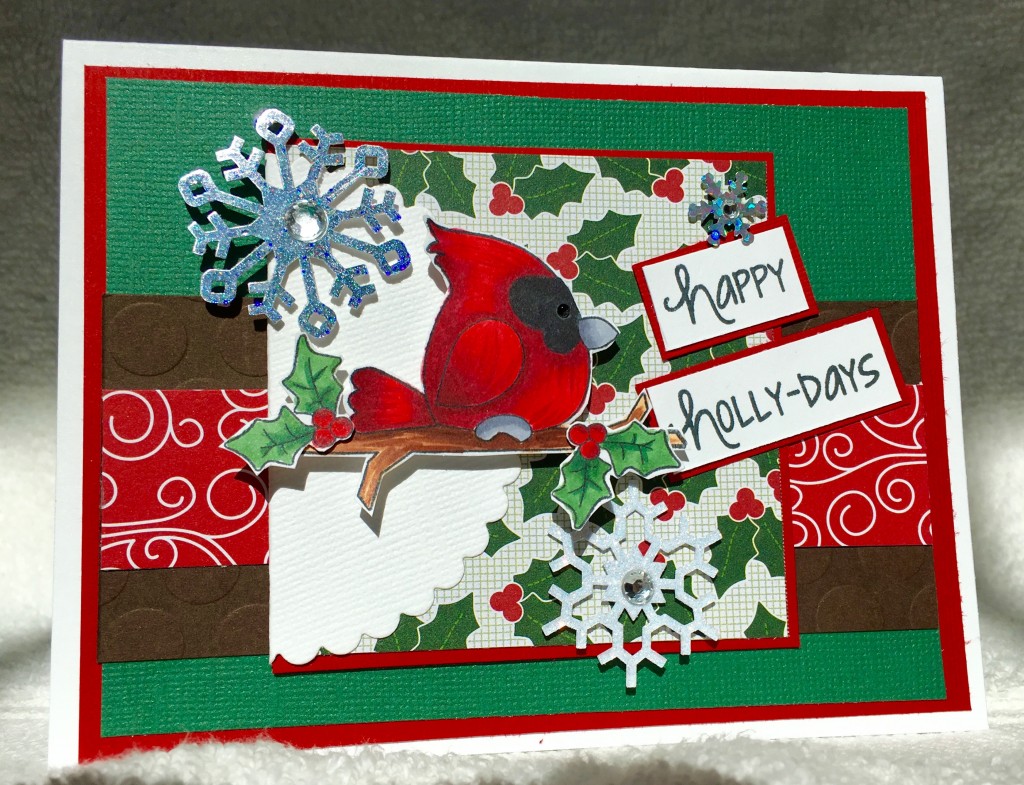
Today I am using the Holly Days stamp set.  I just love the little bird that comes in this set.  And all the sentiments are just perfect for Christmas!
IMG_0288
Here are my design steps:
  1. Use an A2 white card base
  2. Cut the red card stock slightly smaller then the front of the white card base (Bazzill Paper)
  3. Cut the green card stock slighly smaller then the red card stock and glue on top of the red and attach to the front of the white card (Bazzill Paper)
  4. Cut a 2 1/2 x 4 inch piece of embossed brown card stock and glue to the green card stock on the front of the card as shown (Recollections Paper)
  5. Then cut a designer piece of red  swirl paper 1 x 4 inches and glue it to the middle of the embossed brown card stock (Designer paper Welcome Christmas by Pebbles)
  6. Cut a 3 x 3 piece of designer holly paper and layer it onto red card stock. (Designer paper Welcome Christmas by Pebbles)
  7. Cut a 3 inch scalloped circle (I used my Cricut) and fold in half and attach it to the holly paper square as shown and glue to the front of the card in the center
  8. Stamp the bird and holly leaves (Memento Black Ink) color. Copics used: G29, 46 - E21, 25, 29 - R35, 37, 39, 59 - C03, 05
  9. Cut out the bird and holly leaves using coordinating dies and pop to the front of the card
  10. Stamp the sentiment and layer on red card stock
  11. Add the snowflakes (Jolee) and black rhinestone for the eye (Recollections)
Thanks for stopping by and have a Happy Thanksgiving!
Blessings
Pam

Saturday, November 14, 2015

Big Hugs - Pink and Main

Happy Sunday Morning to All!
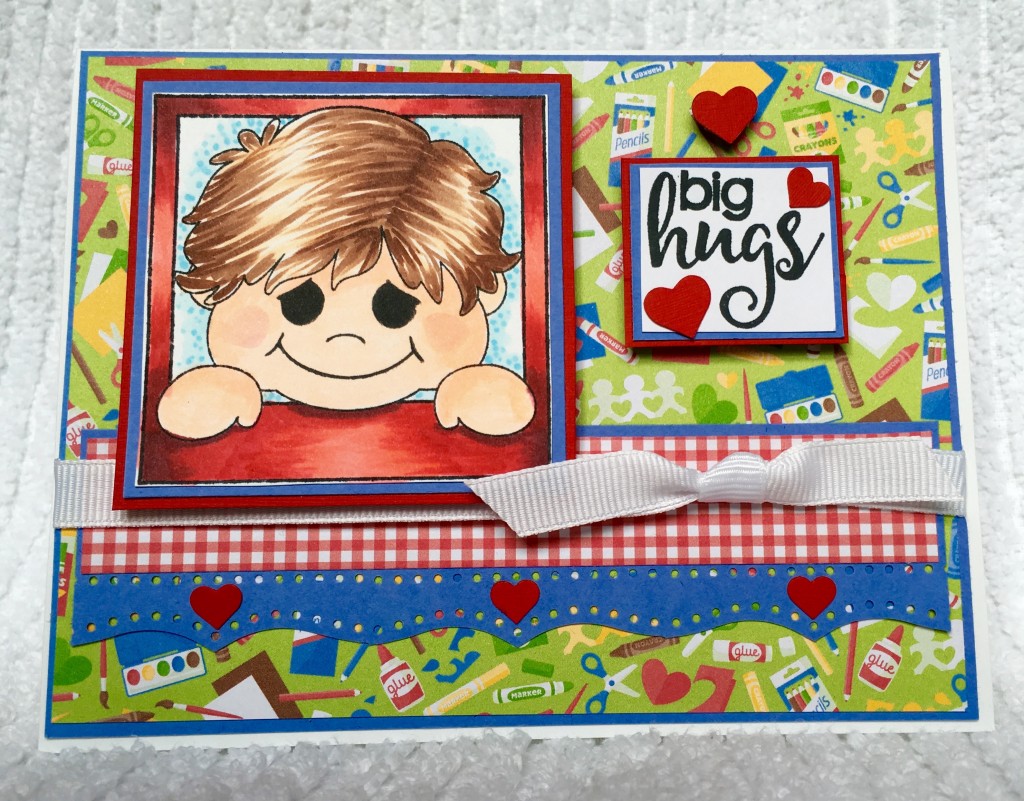
I have made a Happy card to go along with this beautiful morning! The two sets I am featuring today are Add a Smile and Sweet Faces Set 2.
IMG_0269
Here are my design steps:
  1. Use an A2 white card stock base
  2. Cut a slightly smaller piece of blue card stock and then a piece of designer paper slightly smaller then the blue paper. (Recollections and Family Fun American Crafts) Glue the pattern paper to the blue card stock
  3. Cut a 2 x 4 inch strip of blue card stock and punch the bottom (MS punch).  Then cut a 1 x 3 3/4 inch piece of checked designer paper (Family Fun American Crafts) and adhere to the blue strip. Glue to the layered strip to the front of the pattern designer paper as shown about a 1/2 inch from the bottom
  4. Add the ribbon and glue the layered piece of blue, designer paper and border to the front of the white card
  5. Stamp the little boy and sentiment  (Memento Black ink)(Stamps: Pink and Main Add a Smile and Sweet Faces Set 2)
  6. Color the little boy using copics (E00, 02, 21, 25, 29 - B000, 00, 01, 02 - C5 - R20, 22, 29, 46, 59)
  7. Layer the little boy and sentiment using red and blue card stock pop dot to card front
  8. Punch out red hearts (MS punch) and glue to the card
Have a fabulous crafty day!
Blessings
DT Pam 

Saturday, November 7, 2015

Cookies - Pink and Main

Good Sunday Morning!
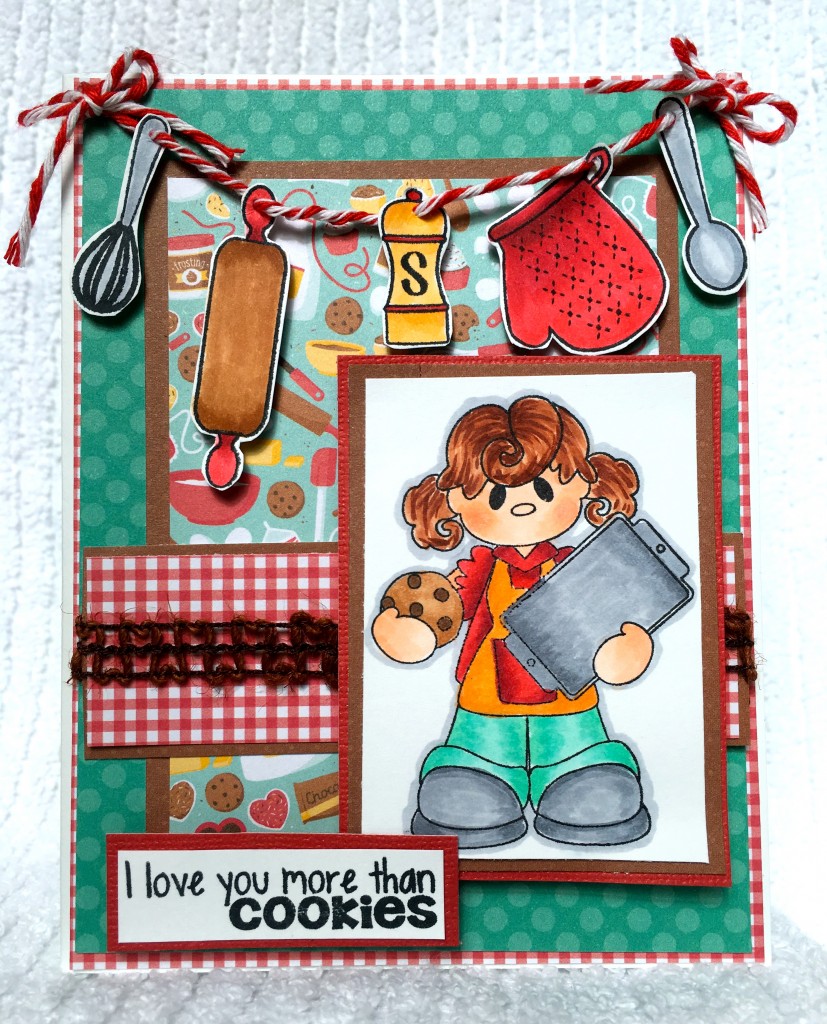
I have a very special sneak peek at two of the new November stamp release sets!  And boy are they stinkin cute! The two sets I am featuring are Cookies and Baker.
IMG_0258
Here are my design steps:
  1.  Use a white A2 card as the base (Recollections)
  2. Cut a slightly smaller red checked piece of designer paper (Family Fun American Crafts)
  3. Cut an even slightly smaller piece of teal dotted paper and glue to the checked paper. (Family Fun American Crafts)
  4. Cut a 3 x 4 inch piece of bakers pattern design paper and layer it on chocolate brown card stock.  Glue to the center of the teal dotted paper (Family Fun American Crafts and Recollections)
  5. Cute and 1 inch x 4 inch piece of red checked paper and layer it on chocolate brown card stock.  Add the brown twine trim (Recollections) and glue it about 2 inches up from the bottom.  Then glue all the layered pieces to the front of the white card
  6. Stamp the large image using Memento black ink (Pink and Main Cookies Set)
  7. Stamp all the utensils using Memento black ink (Pink and Main Baker Set)
  8. Color with copics: E00,02, 11, 13, 15, 18, 33, 34, 37, 47 - YR12, 14, 21 - C02, 3, 4, 6 - R20, 35, 37, 59
  9. Cut the large image out and layer it on chocolate brown and red card stock.  Pop dot to the card as shown
  10. Cut all the utensils out and use a piercing tool to thread them through the red bakers twine.  Attach to the top of the card as shown.  Add the twine (Recollections) bows using glue dots
  11. Stamp the sentiment (Pink and Main Cookies Set) in Memento black in cut then layer it on red card stock.  Pop dot to the bottom of the card
Thanks for stopping by!
Have a Blessed Day!
Pam

Saturday, October 31, 2015

Cute Package - Pink and Main

Happy Sunday Pink & Main fans!
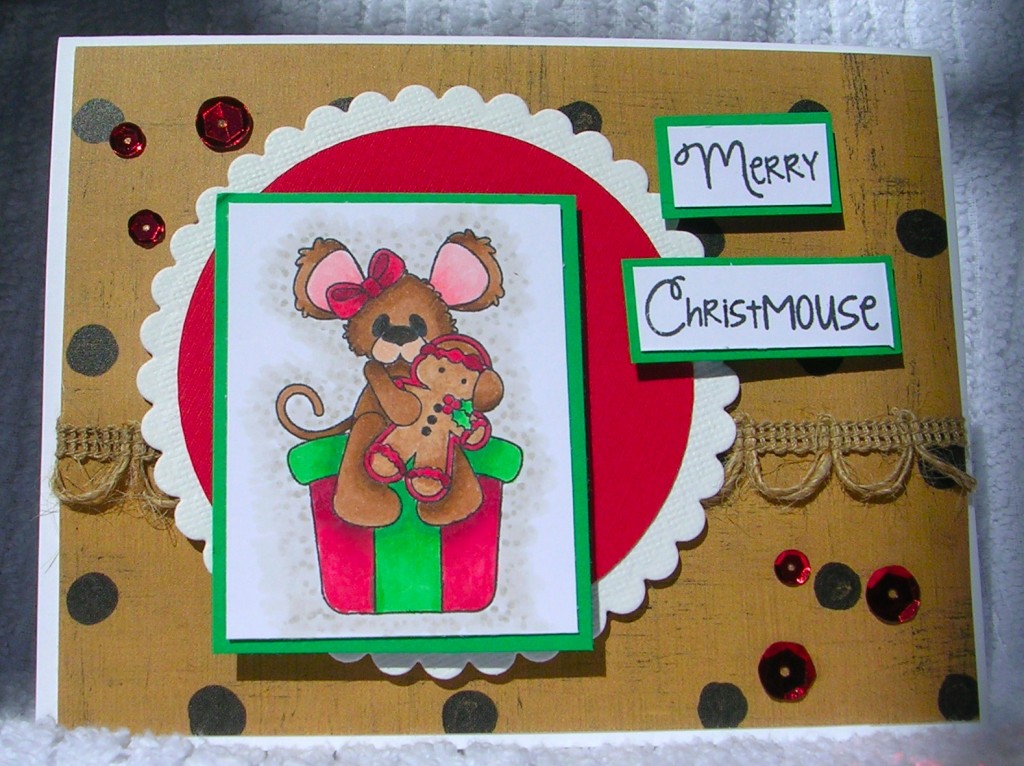
I hope you will have a great week starting with this fantastic Sunday! I am here to share with you a card that uses the cute little mouse from the freebie (with a $30 purchase) stamp set called Christmouse.
DSCN5461

Here are my design steps:
  1. Start with an A2 size white card base
  2. Cut the polka dot paper slightly smaller than the card front (Lasting Impressions Paper)
  3. Wrap the decorative twine around the polka dot paper then attach it to the card front (Twine Recollections)
  4. Cut the red circle and scalloped white circle using your cricut or a die cut adhere to the card front
  5. Stamp and color the little mouse with copics: W1, 2, 3, 4 - E11, 21, 23, 57, 59 - G5, 9, 17 - R20, 22, 46, 59 (Pink and Main Christmouse)
  6. Cut out image and layer on green cardstock pop to the front of the card as shown
  7. Stamp sentiment and layer on green yardstick.  Pop to the front of the card (Pink and Main Christmouse)
  8. Add red sequin
Thanks for taking a peek!
Blessings
Pam M.

Friday, October 23, 2015

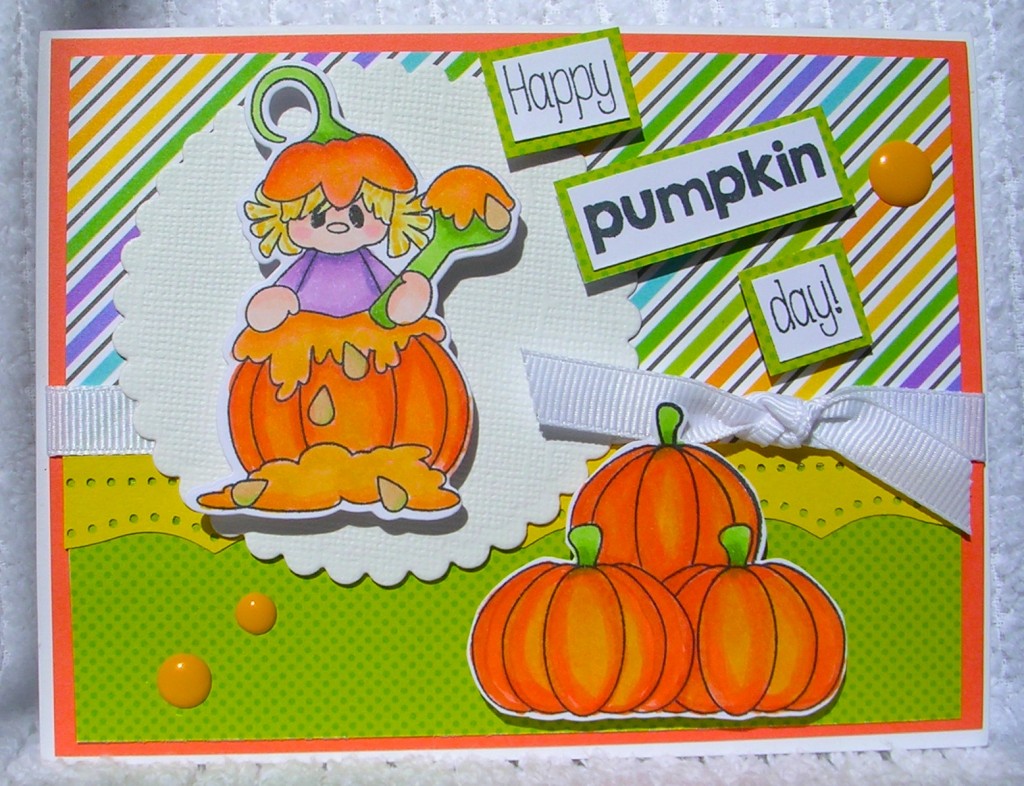
Hey Pumpkin - Pink and Main

Happy Sunday Pink & Main Fans!
I hope you had an awesome week and are ready to start a brand new one!  I needed one more Halloween card for a niece so I decided to use this adorable set.  It is called Hey Pumpkin!
DSCN5456
My Design steps:
  1. Use an A2 white card base
  2. Cut a slightly smaller piece of orange cardstock for the front
  3. Then cut a striped piece of designer paper 3 x 5  glue to the top of the orange cardstock (Doodlebug paper)
  4. Also cut a green polka dot piece of designer paper 2 x 5  and glue to the bottom of the orange cardstock (Doodlebug paper)
  5. Then add the border piece of yellow cardstock cut with a punch (MS punch)
  6. Add the ribbon to the orange cardstock and attach to the white card base.
  7. Add the scalloped circle (cut with a cricut)
  8. Stamp pumpkins using masking to create the pumpkin stack (Hey Pumpkin Set, Memento Tuxedo Black Ink)
  9. Stamp little girl and color the images with copics ( Y11, 17 - YR02, 04, 18, 21, 65, 68 - YG13, 17 - V12, 15, 17)
  10. Use matching dies for cutting little girl, hand cut the pumpkin stack
  11. Stamp sentiment and mat on green polka dot designer paper
  12. Use pop dots for mounting girl, pumpkin stamp and sentiment
  13. Add enamel dots (Doodlebug)
Thanks for stopping by and many Blessings!
Pam

Saturday, October 17, 2015

Gingerbread - Pink and Main

Hi Pink and Main Fans!
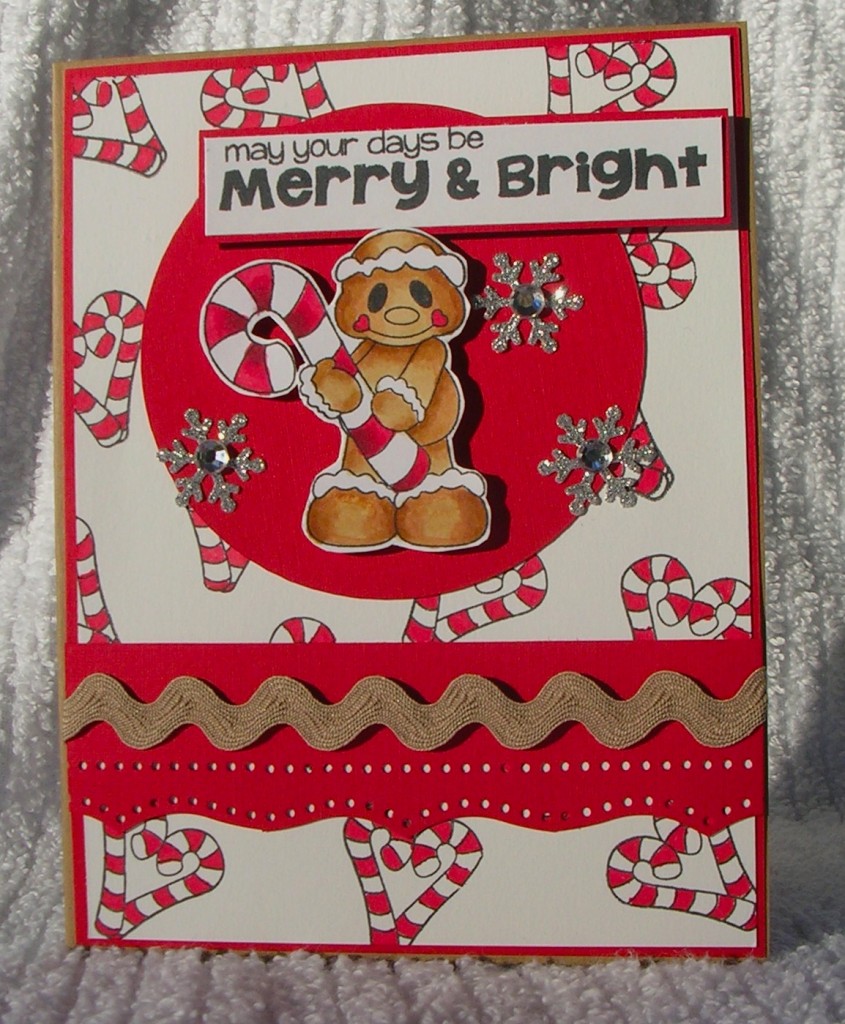
It is a beautiful Sunday morning!  I am sharing with you a card made with a two new release sets called: Gingerbread and Hollydays!
DSCN5449
My design steps:
  1.  Made an A2 size card using Craft colored cardstock
  2. Layered a slightly smaller piece of red to the front
  3. Cut a slightly smaller piece of white for my candy cane heart layer
  4. Stamp the background with the heart candy cane stamp (Gingerbread Stamp Set) colored with copics.  (Cool way to create your own background paper and it saves money on designer paper!)
  5. Cut border strip (MS punch)
  6. Added rik rak for a little texture. (Recollection rik rak)
  7. Cut a background circle (I used my Cricut)
  8. Stamped Gingerbread man using Memento Tuxedo Black Ink (Gingerbread Stamp Set)
  9. Colored with copics: E32, 33, 35, 37, R39, 46, 59
  10. Use coordinating die cuts to cut out gingerbread man
  11. Add snowflakes (Jolee)
  12. Stamped sentiment using Memento Tuxedo Black Ink (Hollydays Stamp Set)
  13. Layered the sentiment with Red Card stock
Thanks for stopping by!
Have a Blessed and Crafty Day!
Pam M.

Saturday, October 10, 2015

Pink and Main - Baby It's Cold Outside

Hi Everyone!
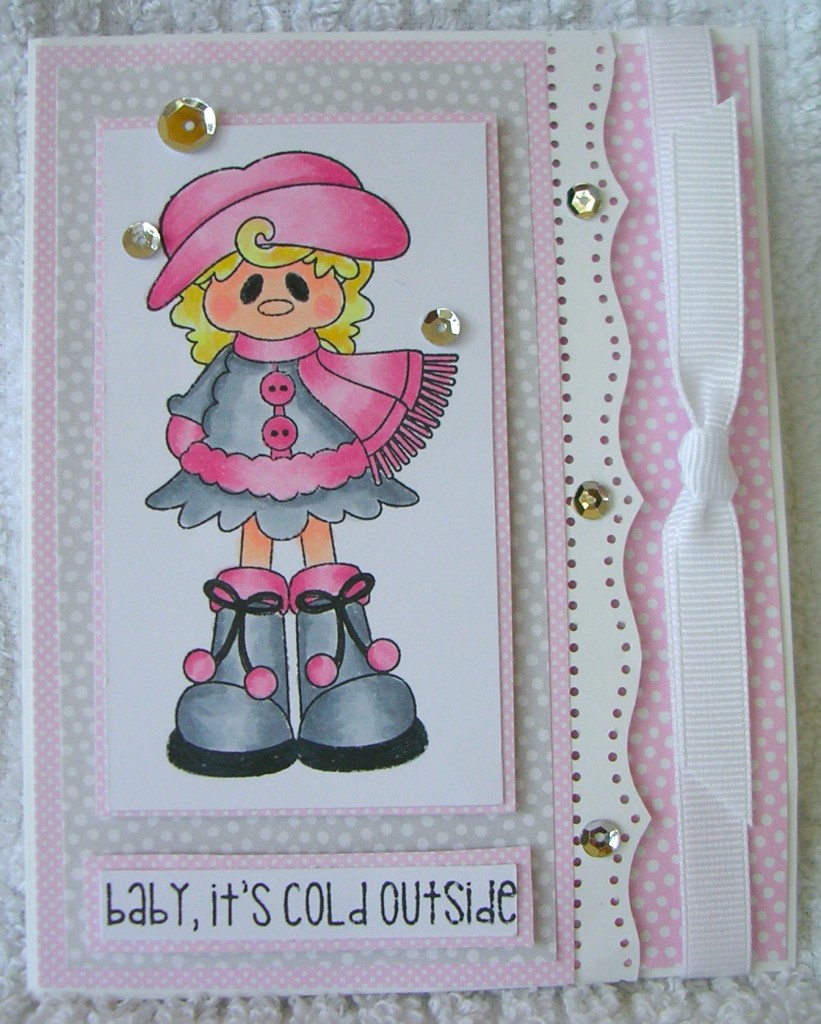
It's time for the new release and boy are you in for some sweet and darling stamp sets!  I am using Scarlett.  And isn't she the cutest thing every! 
DSCN5441
My supples are: Pink and Main stamp set Scarlett, copic markers, MS border punch, Recollection paper, ribbon, and sequin.
Thanks for looking
Pam

Saturday, October 3, 2015

She Believes! - Pink and Main

Happy Sunday Everyone!
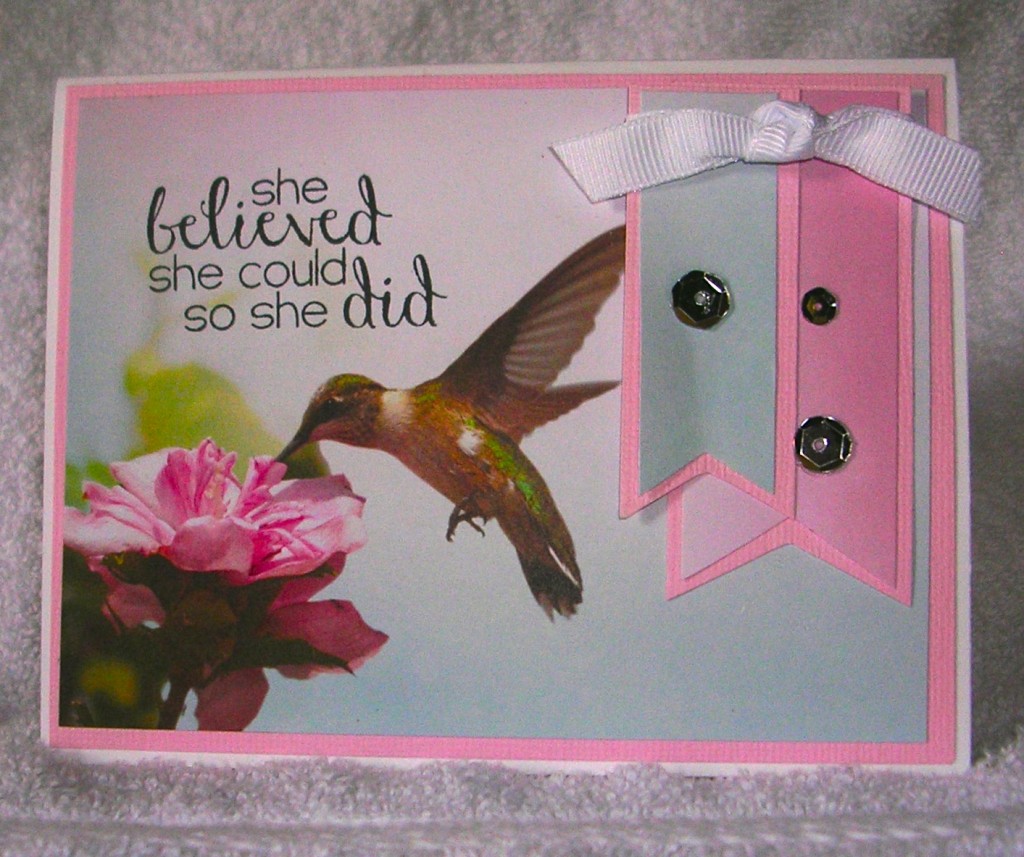
I am doing a very quick card today because I am staying at a Holiday Inn with very limited supplies until my house finally closes next week. I am so ready to stop living out of suite cases but very grateful that the Lord provided a wonderful home for us! It has really been a lesson in patiences!
Here is the fast and easy card!
DSCN5439
The supplies I used are: The Pink and Main Stamp set: Believe Script, Paper House: Blossom Paper Pix, Memento: Tuxedo Black ink, Silver sequins, white ribbon and adhesive.
I hope you have a great day!
Pam

Saturday, September 26, 2015

Best Witches - Pink and Main

Happy Sunday!
This little witch sure would not scare anyone! She is just adorable! The stamp set is called Best Witches and it has coordinating dies! Make sure to check out the new release sets at the Pink and Main Store
The coloring is with Copic Markers, the paper is Doodlebug, and I added polka dot ribbon!
DSCN5382
Blessings and make sure to craft today!
Pam

Saturday, September 19, 2015

Hey Pumpkin - Pink and Main

Happy Sunday!!
I am using a new release set called Hey Pumpkin with the coordinating dies! These stamps are so stinkin cute! The sentiments are fun too! I colored with copic markers, used Doodlebug Paper and seam binding for the little knot. Please make sure you check out the new release stamps! You will be so glad you did! Just go to the Pink and Main store.
DSCN5378
Blessings and Happy Crafting
Pam

Saturday, September 12, 2015

Pink and Main - Fall Fun!

Happy Sunday!
I am just loving all the September release stamps from Pink and Main!  Every single set is just adorable!
Fall is my favorite season, the beginning of school, cool air, colors and of course football!  The set I used is so perfect for fall and really cute too! It is called Scarecrows. 
I used the new curved stitched die cut for the grass. (love it) I colored the image with copic markers and used Doodlebug papers.  The ribbon is seam binding and the embellishments are enamal dots.  I hope you enjoy this card.  I sure had fun making it!
Blessings and Happy Crafting!
Pam

Saturday, August 29, 2015

You Mean the World to Me!

Good Sunday Morning!  I just love the Pink and Main August release Owl set called Owl Nerds!  It is perfect to pair up with some back to school paper.  I used My Mind's Eye Collectable Remarkable paper for the background. I am stuck on using sequin.  I just love the little pop of bling they add.  I colored the owl with my copics and used a die cut.

Have a Blessed and Crafty Day!
Pam

Saturday, August 22, 2015

Journey!

Hello I hope your are enjoying your wonderful Sunday!  I have used two Pink and Main sets of stamps for this card.  The sets are Destination Fun and Hot Air Balloons.  I used washable markers to color the red part of the hot air balloon and I stamped it over printed paper.  Then I took my copics and colored in the tan area to give it a weathered look.  The background paper is from Mind's Eye Sky's the Limit.  Hope you enjoy the card!

Have a Blessed and Crafty Day!
Pam

Saturday, August 15, 2015

Stay Beautiful!

Happy Sunday!
Today I am using one of the Pink and Main August Release sets called Florals!  It is so versatile!  I used it as a pretty background panel and scored on the top and bottom of the panel.  I colored the stamps with just washable markers and stamped. (I picked up the markers really cheap at Big Lots!) I really love the sentiment style too! Hope you enjoy the card!

Have a Blessed and Crafty Day!

Pam

Saturday, August 8, 2015

Talk Nerdy!

Good Morning!

I hope you are having a wonderful Sunday!!  This card is made with two of the newly released sets.  I used the sentiment from the freebie and the little owl from the Owl Nerds set.  I used copics to color the owl and then cut him out.  The paper is from Paddywack Paper Pad by Recollections.  Make sure your check out the Pink and Main store and find out how you get the freebie! 

Have a Blessed and Crafty Day!
Pam

Saturday, August 1, 2015

Paper Sweeties' 3rd Birthday Blog Hop and Giveaway

Good Morning!

Some of the Pink and Main Design Team are having fun celebrating with Paper Sweeties' on their 3rd birthday party!  Help us celebrate with them by hopping along just click here and jump right into the fun!


I have created this card using:
Pink and Main stamp set Birthday Wishes 
The paper is Jillibean Soup Birthday Bisque
Red and white baker's twine
Sequin
Red ribbon
EK punch

I sure hope you come by and join in on all of the fun!

Blessings
Pam


Tuesday, July 14, 2015

Sun Kissed Greetings - Pink and Main

Happy Tuesday

Today I thought I would share a new release stamp set from Pink and Main.  The set is called Sunkissed Greetings and is so perfect for those Lazy Crazy Days of Summer!!
I had so much fun coloring this sweet image with my copics.  I also fussy cut out the castle for a little added interest.  I hope you get a chance to visit our store.

Many Blessings
Pam

Sunday, June 28, 2015

Pink and Main - Mermaid

Happy Sunday Afternoon!

I just wanted to share a sneak peek at the new release sets for July!
Isn't she just adorable!  Make sure and pop over to the Pink and Main Blog and check out all of the darling stamps!

Blessings
Pam

Thursday, June 25, 2015

MFP Stamp Shop Blog Hop - Final Day

Welcome to the MFP Stamp Shop
June Blog Hop


Let's get started!!!!
This month's new Stamp Set Releases are:

Featured June 23
Paper Doll Chuck

Featured June 24
 Paper Doll Chuck Formal and Hunting

Featured June 25
 Background Diamonds and Flowers

Featured June 26
Pots and Vases 2
Love these little pots and vases they are so versatile!
Here is my card

Please Hop along with us!! You have a chance to win one of these new stamp sets! Just comment on the following blogs ( don't forget this one ) each day for more chances to win! ( You do NOT need to comment on on all the blogs each day! The names are drawn randomly.) The winners will be announced on June 26, 2015 right here on the MFP Stamp Shop Blog. You can go back and comment if you missed a day. ( HINT: The more you comment the more chances you have to win. And comments on the MFP blog count twice. ) The deadline for commenting is Friday June 27, 2015 at 10:00 PM EST.

Let's get started !!
Here's the Design Team
Enjoy the Hop. Come on back tomorrow for more creative fun!!

Wednesday, June 24, 2015

MFP Stamp Shop Blog Hop - Day 3

Welcome to the MFP Stamp Shop
June Blog Hop


Let's get started!!!!
This month's new Stamp Set Releases are:

Featured June 23
Paper Doll Chuck

Featured June 24
 Paper Doll Chuck Formal and Hunting

Featured June 25
 Background Diamonds and Flowers

Featured June 26
Pots and Vases 2

Please Hop along with us!! You have a chance to win one of these new stamp sets! Just comment on the following blogs ( don't forget this one ) each day for more chances to win! ( You do NOT need to comment on on all the blogs each day! The names are drawn randomly.) The winners will be announced on June 26, 2015 right here on the MFP Stamp Shop Blog. You can go back and comment if you missed a day. ( HINT: The more you comment the more chances you have to win. And comments on the MFP blog count twice. ) The deadline for commenting is Friday June 27, 2015 at 10:00 PM EST.

Here is my card for the Diamond Background

Let's get started !!
Here's the Design Team
Enjoy the Hop. Come on back tomorrow for more creative fun!!

Tuesday, June 23, 2015

MFP Stamp Shop Blog Hop - Day 2

Welcome to the MFP Stamp Shop
June Blog Hop


Let's get started!!!!
This month's new Stamp Set Releases are:

Featured June 23
Paper Doll Chuck

Featured June 24
 Paper Doll Chuck Formal and Hunting

Featured June 25
 Background Diamonds and Flowers

Featured June 26
Pots and Vases 2

Please Hop along with us!! You have a chance to win one of these new stamp sets! Just comment on the following blogs ( don't forget this one ) each day for more chances to win! ( You do NOT need to comment on on all the blogs each day! The names are drawn randomly.) The winners will be announced on June 26, 2015 right here on the MFP Stamp Shop Blog. You can go back and comment if you missed a day. ( HINT: The more you comment the more chances you have to win. And comments on the MFP blog count twice. ) The deadline for commenting is Friday June 27, 2015 at 10:00 PM EST.

Here is my card with Chuck getting ready to for a hunting trip!


Let's get started !!
Here's the Design Team
Enjoy the Hop. Come on back tomorrow for more creative fun!!

Monday, June 22, 2015

MFP Stamp Shop - Blog Hop - Day 1

Welcome to the MFP Stamp Shop
June Blog Hop
Let's get started!!!!
This month's new Stamp Set Releases are:

Featured June 23
Paper Doll Chuck

Featured June 24
 Paper Doll Chuck Formal and Hunting

Featured June 25
 Background Diamonds and Flowers

Featured June 26
Pots and Vases 2
Here is my card with Chuck just about ready to hit the slopes!


Please Hop along with us!! You have a chance to win one of these new stamp sets! Just comment on the following blogs ( don't forget this one ) each day for more chances to win! ( You do NOT need to comment on on all the blogs each day! The names are drawn randomly.) The winners will be announced on June 26, 2015 right here on the MFP Stamp Shop Blog. You can go back and comment if you missed a day. ( HINT: The more you comment the more chances you have to win. And comments on the MFP blog count twice. ) The deadline for commenting is Friday June 27, 2015 at 10:00 PM EST.

Let's get started !!
Here's the Design Team
Enjoy the Hop. Come on back tomorrow for more creative fun!!

Thursday, June 18, 2015

Pink and Main

Happy Friday

I am just loving these sweet stamps sets from the Pink and Main June release!  Here is a stamp set that just shouts summer!

I used my copics to color her!  Make sure and stop by the store and check out all the new June release stamps sets!  You are going to love them!

Blessings and Happy Stamping!
Pam

Monday, June 15, 2015

Pink and Main

Happy Tuesday

Look at this darling stamp from Pink and Main!  My niece just loves gnomes so I made this card for her just because!
Make sure and check out all the new release sets for June I am sure you are going to love them!

Blessings and Happy Stamping!
Pam