Hello Friends
Saturday, September 30, 2023
Fall Release
Saturday, September 23, 2023
Christmas Sleigh Ride
Hello Friends
It is time to show off our new RELEASE! It is called Christmas 2023 just in time for you to get started on making all those wonderful holiday cards and scrapbooks!
The new dies are in the online store. There are 40 designs many with a very vintage look. You can order the entire release at 50% off. Or you can get the individual dies at 30% off. This special offer is for a limited time only.
To display some of these beautiful new dies I designed a side step card (shown below). The card features 4 of the new release dies: Clock Tower, Pine Tree Slim, Pine Tree Full, and Vintage Horse and Sleigh.
3. Score the 3 inch wide section at 1 inch, 2 inches, 3 1/4 inches, 4 1/2 inches and 6 1/2 inches
4. Fold the score line on the 2 1.2 side at the 4 1/4 mountain style
5. On the other side fold the first score line mountain, then valley, mountain, valley, mountain. It will look like the picture above6. To decorate the side step card cut 3 strips of white 5 1/2 x 1 1/4, 3 x 1 1/2 and 3 x 2 1/4. Die cut all of the top of the pieces using the Hills Slimline die. Cut a piece of DP 2 1/2 x 4 1/47. Glue the pieces to the side step card as shown above8. Using the Clock Tower, Pine Tree Slim, Pine Tree Full and the Vintage Horse and Sleigh cut out the following colors of card stock: red, dark brown, brown, light brown, black, silver, white, yellow, and green. Assemble the pieces with a fine tip glue. As shown below
9. Places the finished pieces on the card as shown below and add your sentiment
Tuesday, September 19, 2023
Halloween Butterfly
Hello Friends
Today's post is for the House-Mouse Monday Challenge! The challenge is Anything Goes. To Check out this challenge clip HERE!
This is such a perfect challenge for using those wonderful House-Mouse Stamps! Come and join the fun!
Sunday, September 17, 2023
Happy Fall Y'all
Hello Friends,
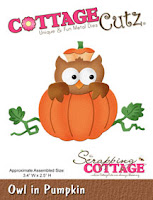
I have another fall card for you. It can be used to welcome in autumn or for a Thanksgiving card. I am using the Owl in a Pumpkin die. It is an oldie but a goodie and still available in our store today!
Design steps:
1. Using the Owl in a Pumpkin die cut out the following pieces of card stock: brown, green, yellow, white, black and a DP orange2. Using coordinating ink colors shade the pieces and then glue together
3. For the base use an A2 blue card, cut a piece of brown 4 1/8 x 5 3/8, and a piece of leaf DP cut 4 x 5 1/4. Using the largest Pierced Wide Circle Frame die cut out 2 circles in brown and glue together. Using the second from the largest Pierced Circle die cut out blue and then run through an embossing folder of your choice. I used a leaf embossing folder
4. Glue the brown to the blue card base and then add the leaf DP. Glue down the blue circle slight above center as shown above. Place dimension dots on the back of the circle frame and pop of the blue circle
5. Place dimension dots on the back of the Owl in the Pumpkin and pop it to the blue circle as shown. Add your green leaves. I cut a few extra leaves as you can see below
6. Finish your card by adding the sentiment
Saturday, September 9, 2023
Fall Truck
Hello Friends
Today, I have a fall card to share. I am featuring the Flatbed Truck w/Accessories. I added some pumpkins to fill up the truck.
Design Steps:
1. Using the Flatbead Truck die cut out the following colors of card stock: blue, black, white, brown, silver and vellum. Using the Scarecrow die cut out the pumpkins in orange and green2. Ink the truck and pumpkins with coordinating ink colors and then assemble
3. Use a white card base (4 1/2 x 6 1/4) cut a piece of rust DP 4 1/8 x 6 1/8, cut a piece of white DP 5 1/4 x 3 1/2, cut a piece of corrugated kraft card stock 1 x 5 1/4
4. Glue the white DP to the rust DP and then glue down the strip of corrugated kraft to the bottom of the white DP. Add a double piece of twine and a bow to the corrugated kraft card stock (as shown above)
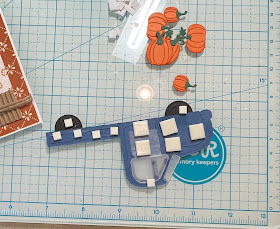
5. Add dimension dots to the back of the truck (do not put dimension dots on the back of the truck rail so you can slide in the pumpkins) and pop it to the card front (as shown below). Put dimension dots on the back of the pumpkins and slide them behind the truck rail. I then added a little glue to the truck rails and glue it to the pumpkins
6. Add the sentiment and your card is complete
Thursday, September 7, 2023
Birthday Celebration
Hello Friends
Today's post is for the House-Mouse Monday Challenge! The challenge is Anything Goes or Birthday. You can find this challenge HERE! I decided to go with Birthday.
This is such a perfect challenge for using those wonderful House-Mouse Stamps! Come and join the fun!
Saturday, September 2, 2023
Spook-tacular Halloween
Hello Friends
Before we get started I wanted you to know we have a SALE in the online store. So be sure to check it out HERE.
The card I am sharing today is another one for Halloween. I usually send out about 20 Halloween/Fall cards so I have a few more to make. Today's card features the Halloween Chair plus a couple of others dies for some added fun.
Design Steps:
1. You will need a black horizontal A2 card base, purple DP 4 1/8 x 5 3/8, black checked DP 4 x 5 1/4 and an orange frame cut with the largest of the Pierced Frame Rectangle dies2. Glue the purple to the black card base then glue the black check to the purple and last add the orange frame to the middle. Set aside
3. Using the Halloween Chair cut out the following colors of card stock: orange, green, black, yellow and brown. For the cat I used the Spooky Tree Gnome and cut it out of black4. Assemble the pieces using a fine tip, fast drying glue
5. Using the largest Wacky Stitched Rectangle cut out a piece of the purple striped DP. Build your scene on the rectangle
6. I needed a little something in the upper right corner so I cut out a web using the Spooky Halloween Castle and spiders from the Spooky Tree Gnome. Add your sentiment to the left of the chair


